Uploading a dataset
Snorkel Flow organizes data into data sources and datasets:
- Data sources are individual partitions of data points, such as the rows of an individual parquet file or resulting rows from an individual SQL query. Each data source is assigned to exactly one split (train, valid, or test).
- Datasets are collections of data sources, with each data source assigned to a specific split (train, valid, or test) within the dataset.
You can upload datasets to Snorkel Flow, starting with a single data source. Data sources can be added to datasets at any time.
Prerequisite
Before uploading your dataset to Snorkel Flow, prepare your data to minimize any unexpected data processing issues when managing your applications.
To upload a dataset
- Select the Datasets option in the left-side menu, and then click + New dataset in the top right corner of your screen.
Alternatively, you can also create a new dataset during application creation.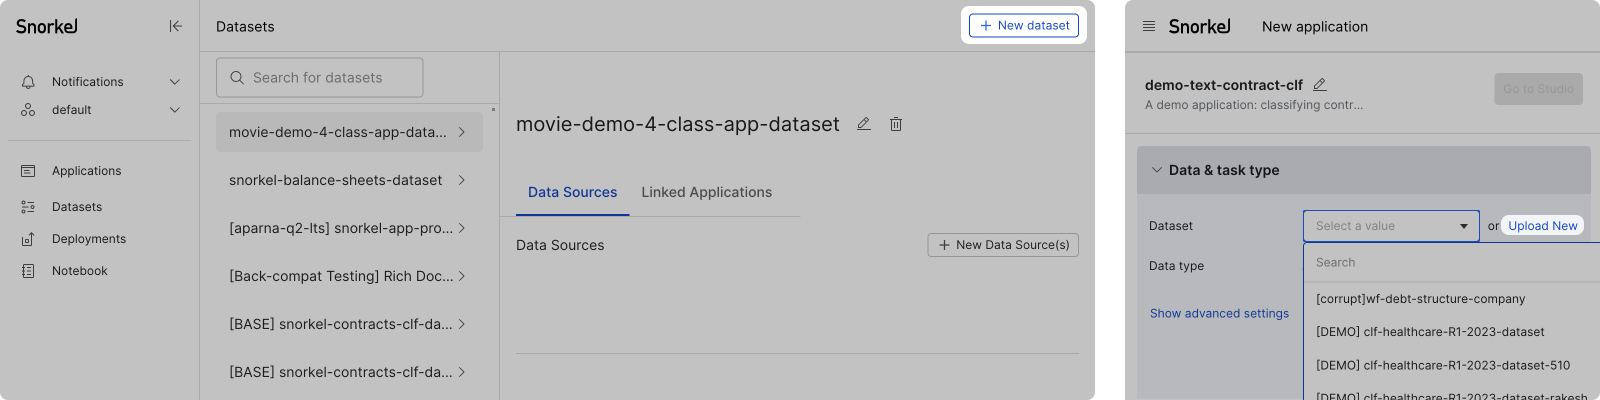
- For the New dataset, enter a dataset name and select your data source.
Learn more about supported data source types.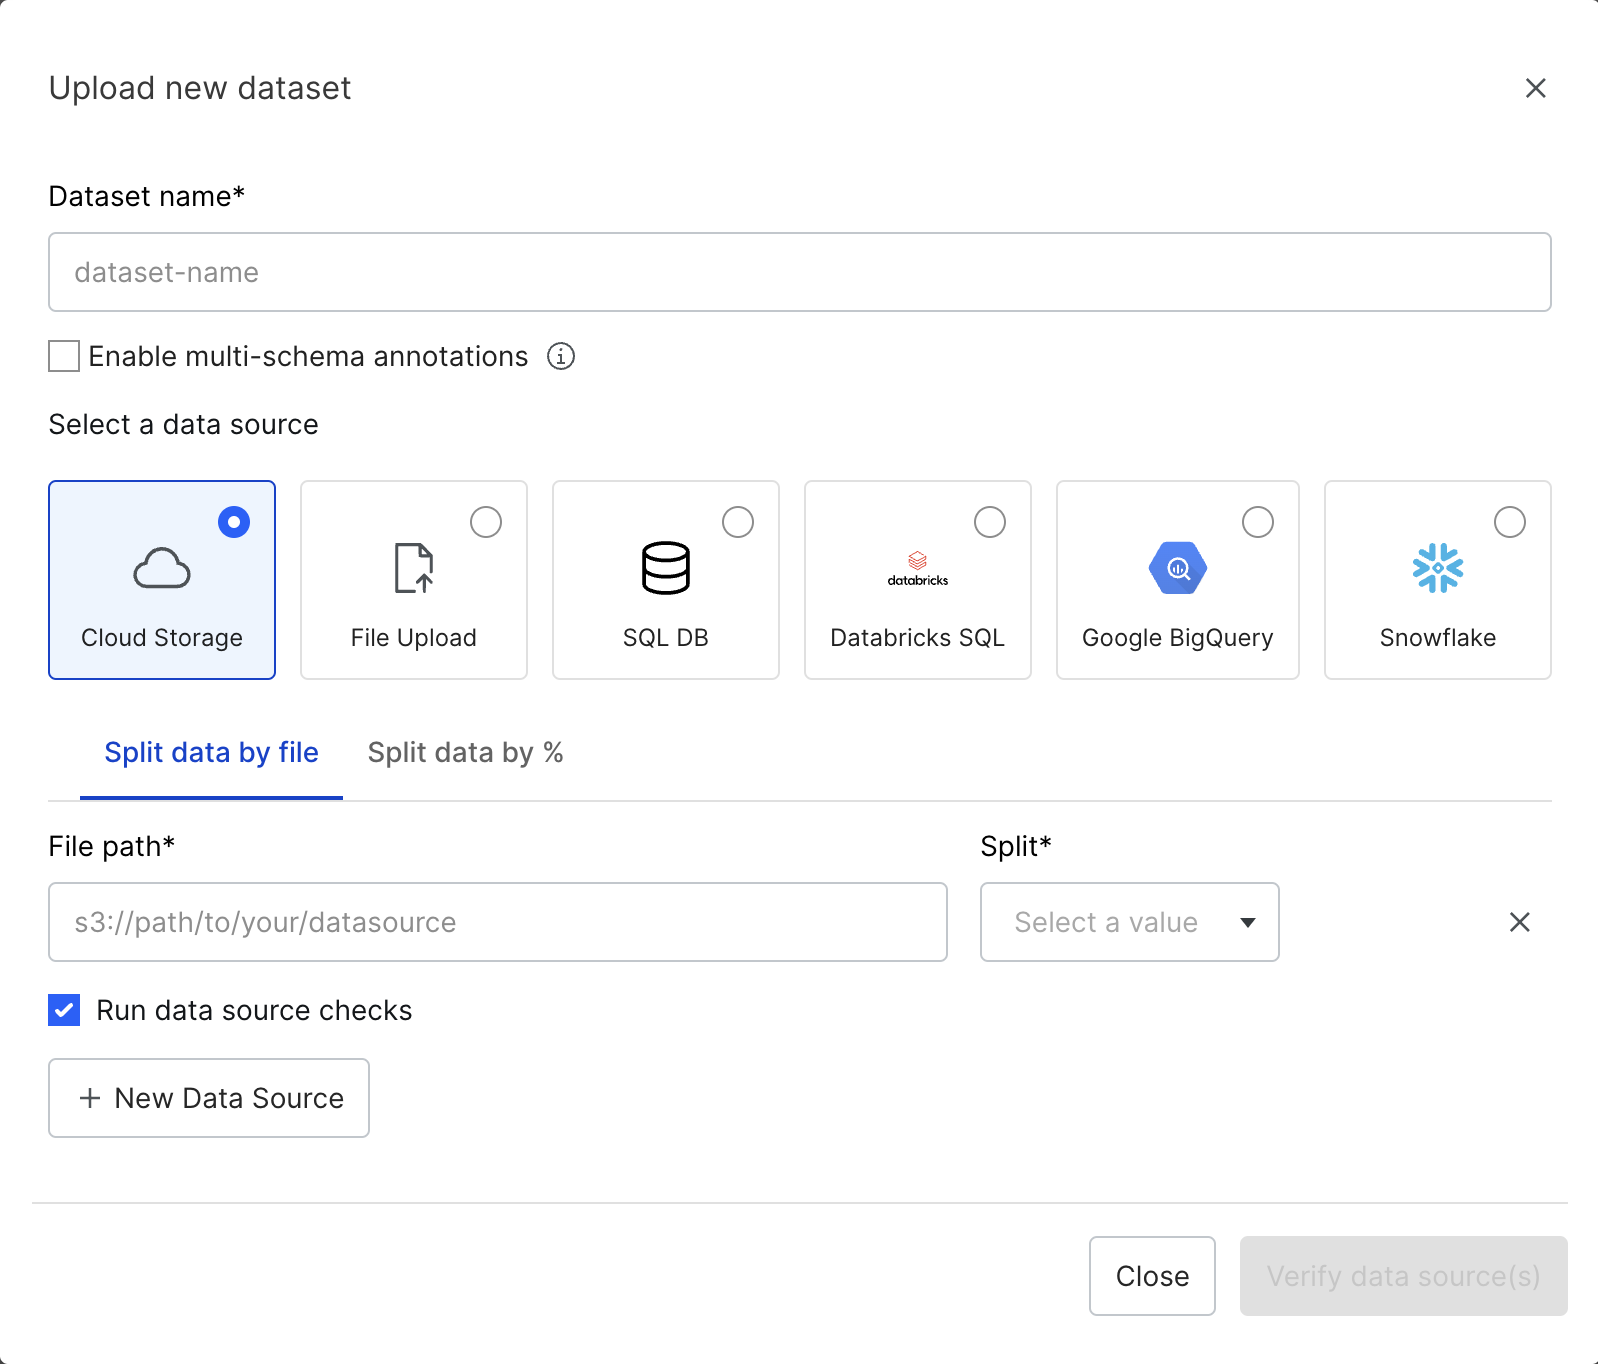
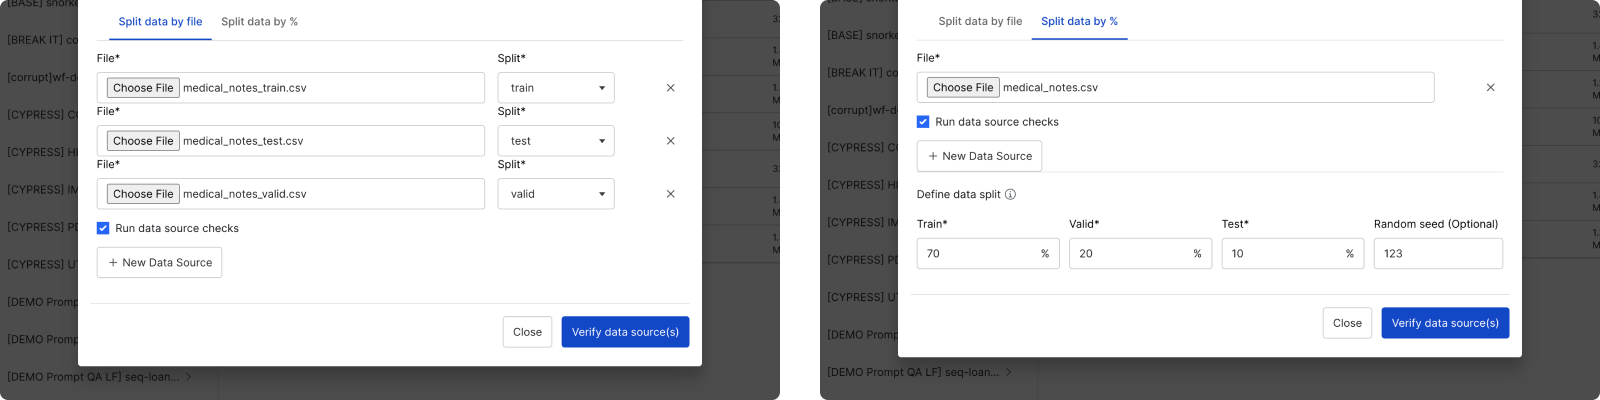
- Assign splits to data sources. There are two ways to assign splits to data sources:
- Manually with the Split data by file option.
- Automatically with the Split data by % option. If you select this option, then you will also need to define your ground truth (GT) column.
 **Tip
**Tip
**If you have a large amount of unlabeled data, split your training data into smaller data sources. You can enable a subset of data sources for faster initial development before scaling up to all of your data.
- After uploading your data sources, select verify data source(s).
Run data source checks is selected by default to automatically run basic checks such as detecting NaN values.- If the verification succeeds, there is a green checkmark next to each data source.
- If the verification fails, there are warnings and/or errors next to each data source.
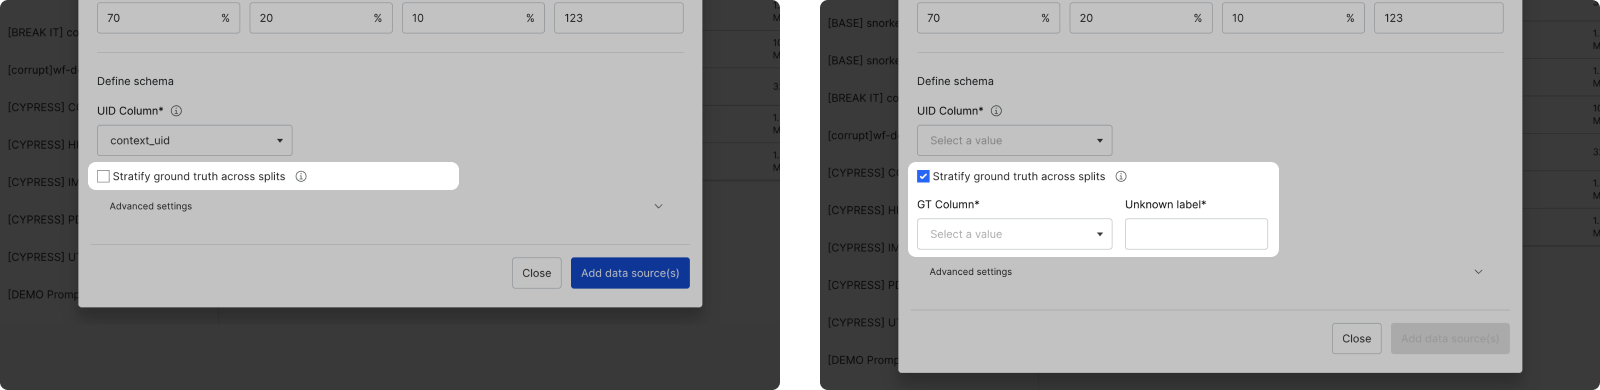
- Once all of your data sources are verified, choose a UID column that is unique for each row across the dataset. This UID column can be text or an integer.If your dataset does not have that type of field, then choose Snorkel Flow Generated to have Snorkel Flow generate a UID column.
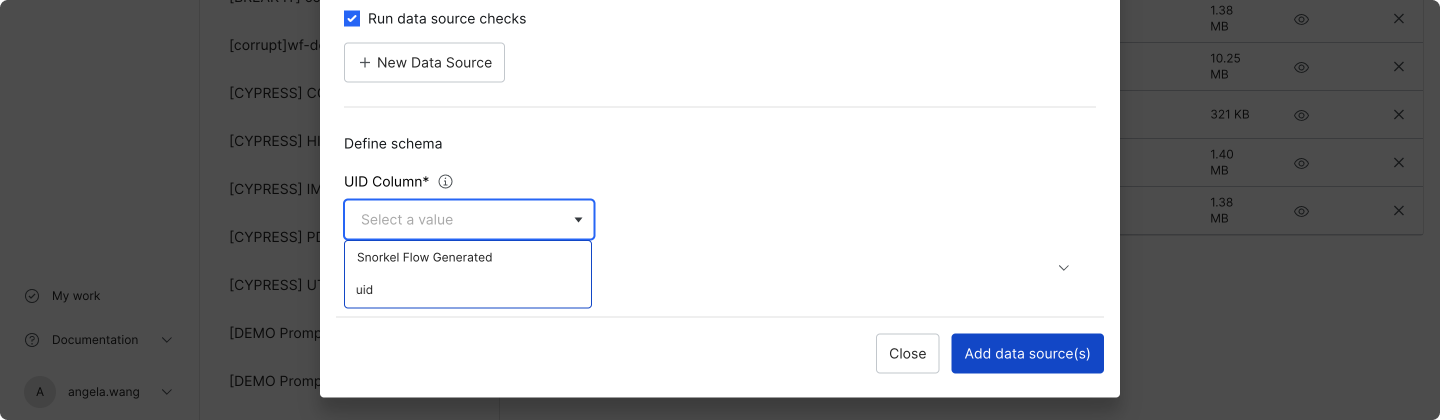
Once the dataset is created, a newcontext_uidcolumn is added to your data. This column is populated with the selected UID column or the Snorkel Flow Generated UID. - If you chose to automatically split your data with the Split data by % option, you can Stratify ground truth across splits. This option ensures that the ground truth labels are evenly distributed across the splits.
- If you opt-in to stratify ground truth, provide the GT column and the value corresponding to UNKNOWN ground truth.
- If you opt-out, the data is split randomly.
- [Optional] When you are creating a dataset for a CV or PDF use case, you can reference uploaded files that are associated with each row's UIDs in the dataset.
- Select the Add a new file column to dataset checkbox. This options shows the inputs to specify where your files are located and how to associate them with your dataset.
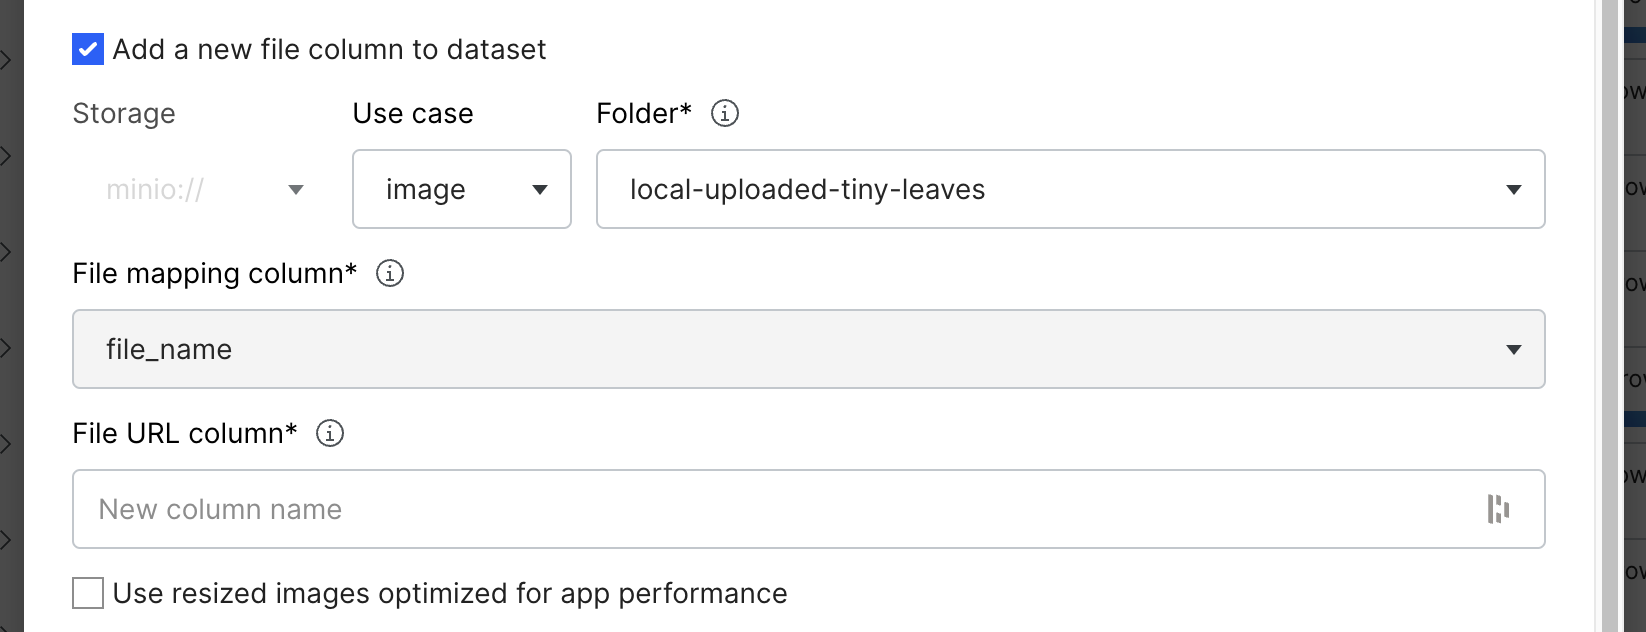
- Storage: This dropdown specifies where the relevant files currently reside.
If you have uploaded your files directly through Snorkel Flow, they will reside inminio://<workspace-id>/.-
**minio://:
**If you specifyminio://as your Storage option, enter the Folder input. Select this dropdown from the list of folders you have previously uploaded files to directly through Snorkel Flow. -
Remote Storage Path: If you specify a remote storage service such as Amazon S3, enter the details:
 Supply a fully qualified storage URL or the path portion of it. Both of these input values are acceptable for S3:
s3://my-bucket/path/to/filesmy-bucket/path/to/files
-
File mapping column: Select the column header from the uploaded data source that stores the filenames without extensions of the files that are associated with each row in the data source. For example, if you uploaded an image that is named
starfish_123.jpg, then the row associated with that file should have a value ofstarfish_123in the column to select. -
File URL column: Specify a name for the new column to be automatically inserted into the dataset. The new column is populated with URLs for the uploaded files.
-
Optional: Use resized images optimized for app performance: This option is valid for only image file types uploaded through Snorkel Flow. When files are uploaded through Snorkel Flow, smaller optimized versions are created automatically. If you would like to optimize application performance, check this box to reference the optimized versions instead of the full resolution images.
-
- Use case: The dataset use case, such as image or PDF.
- Select the Add a new file column to dataset checkbox. This options shows the inputs to specify where your files are located and how to associate them with your dataset.
- Select Add data source(s) to complete the dataset upload.
You can use this dataset in any application.