Managing file collections
Snorkel Flow provides options for managing the files in your datasets. After uploading a dataset, select the Files tab to manage and view the associated files. Actions include:
- Organizing files into collections
- Checking file metadata
- Uploading additional files to specific folders.
File management ensures that the correct files are linked to the relevant dataset for model training or data processing.
Once you have uploaded files into file collections, you can view and manage them on the Datasets page.
When you upload files, a manifest CSV is automatically created with a listing of the storage locations of all of the uploaded files. This file serves as an index of all the files you've uploaded, allowing you to easily reference their storage paths. The file can be downloaded and used in the creation of datasets. For more information see Data upload.
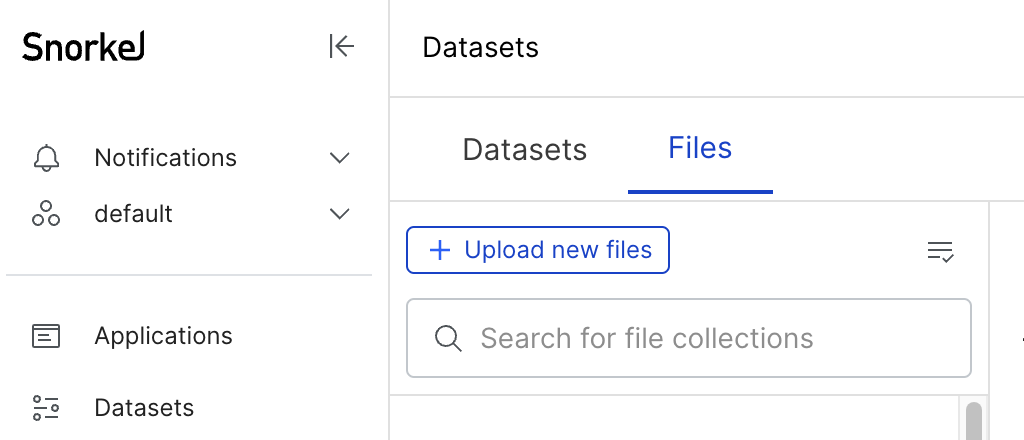
To view file collections
-
Select Datasets in the left-side menu to navigate to the Datasets page.
-
Select the Files tab. On the left side of your screen, you'll see your list of file collections. You can scroll the list or search for file collection by name.
-
Select the name of a file collection to show all the contained files and their metadata.
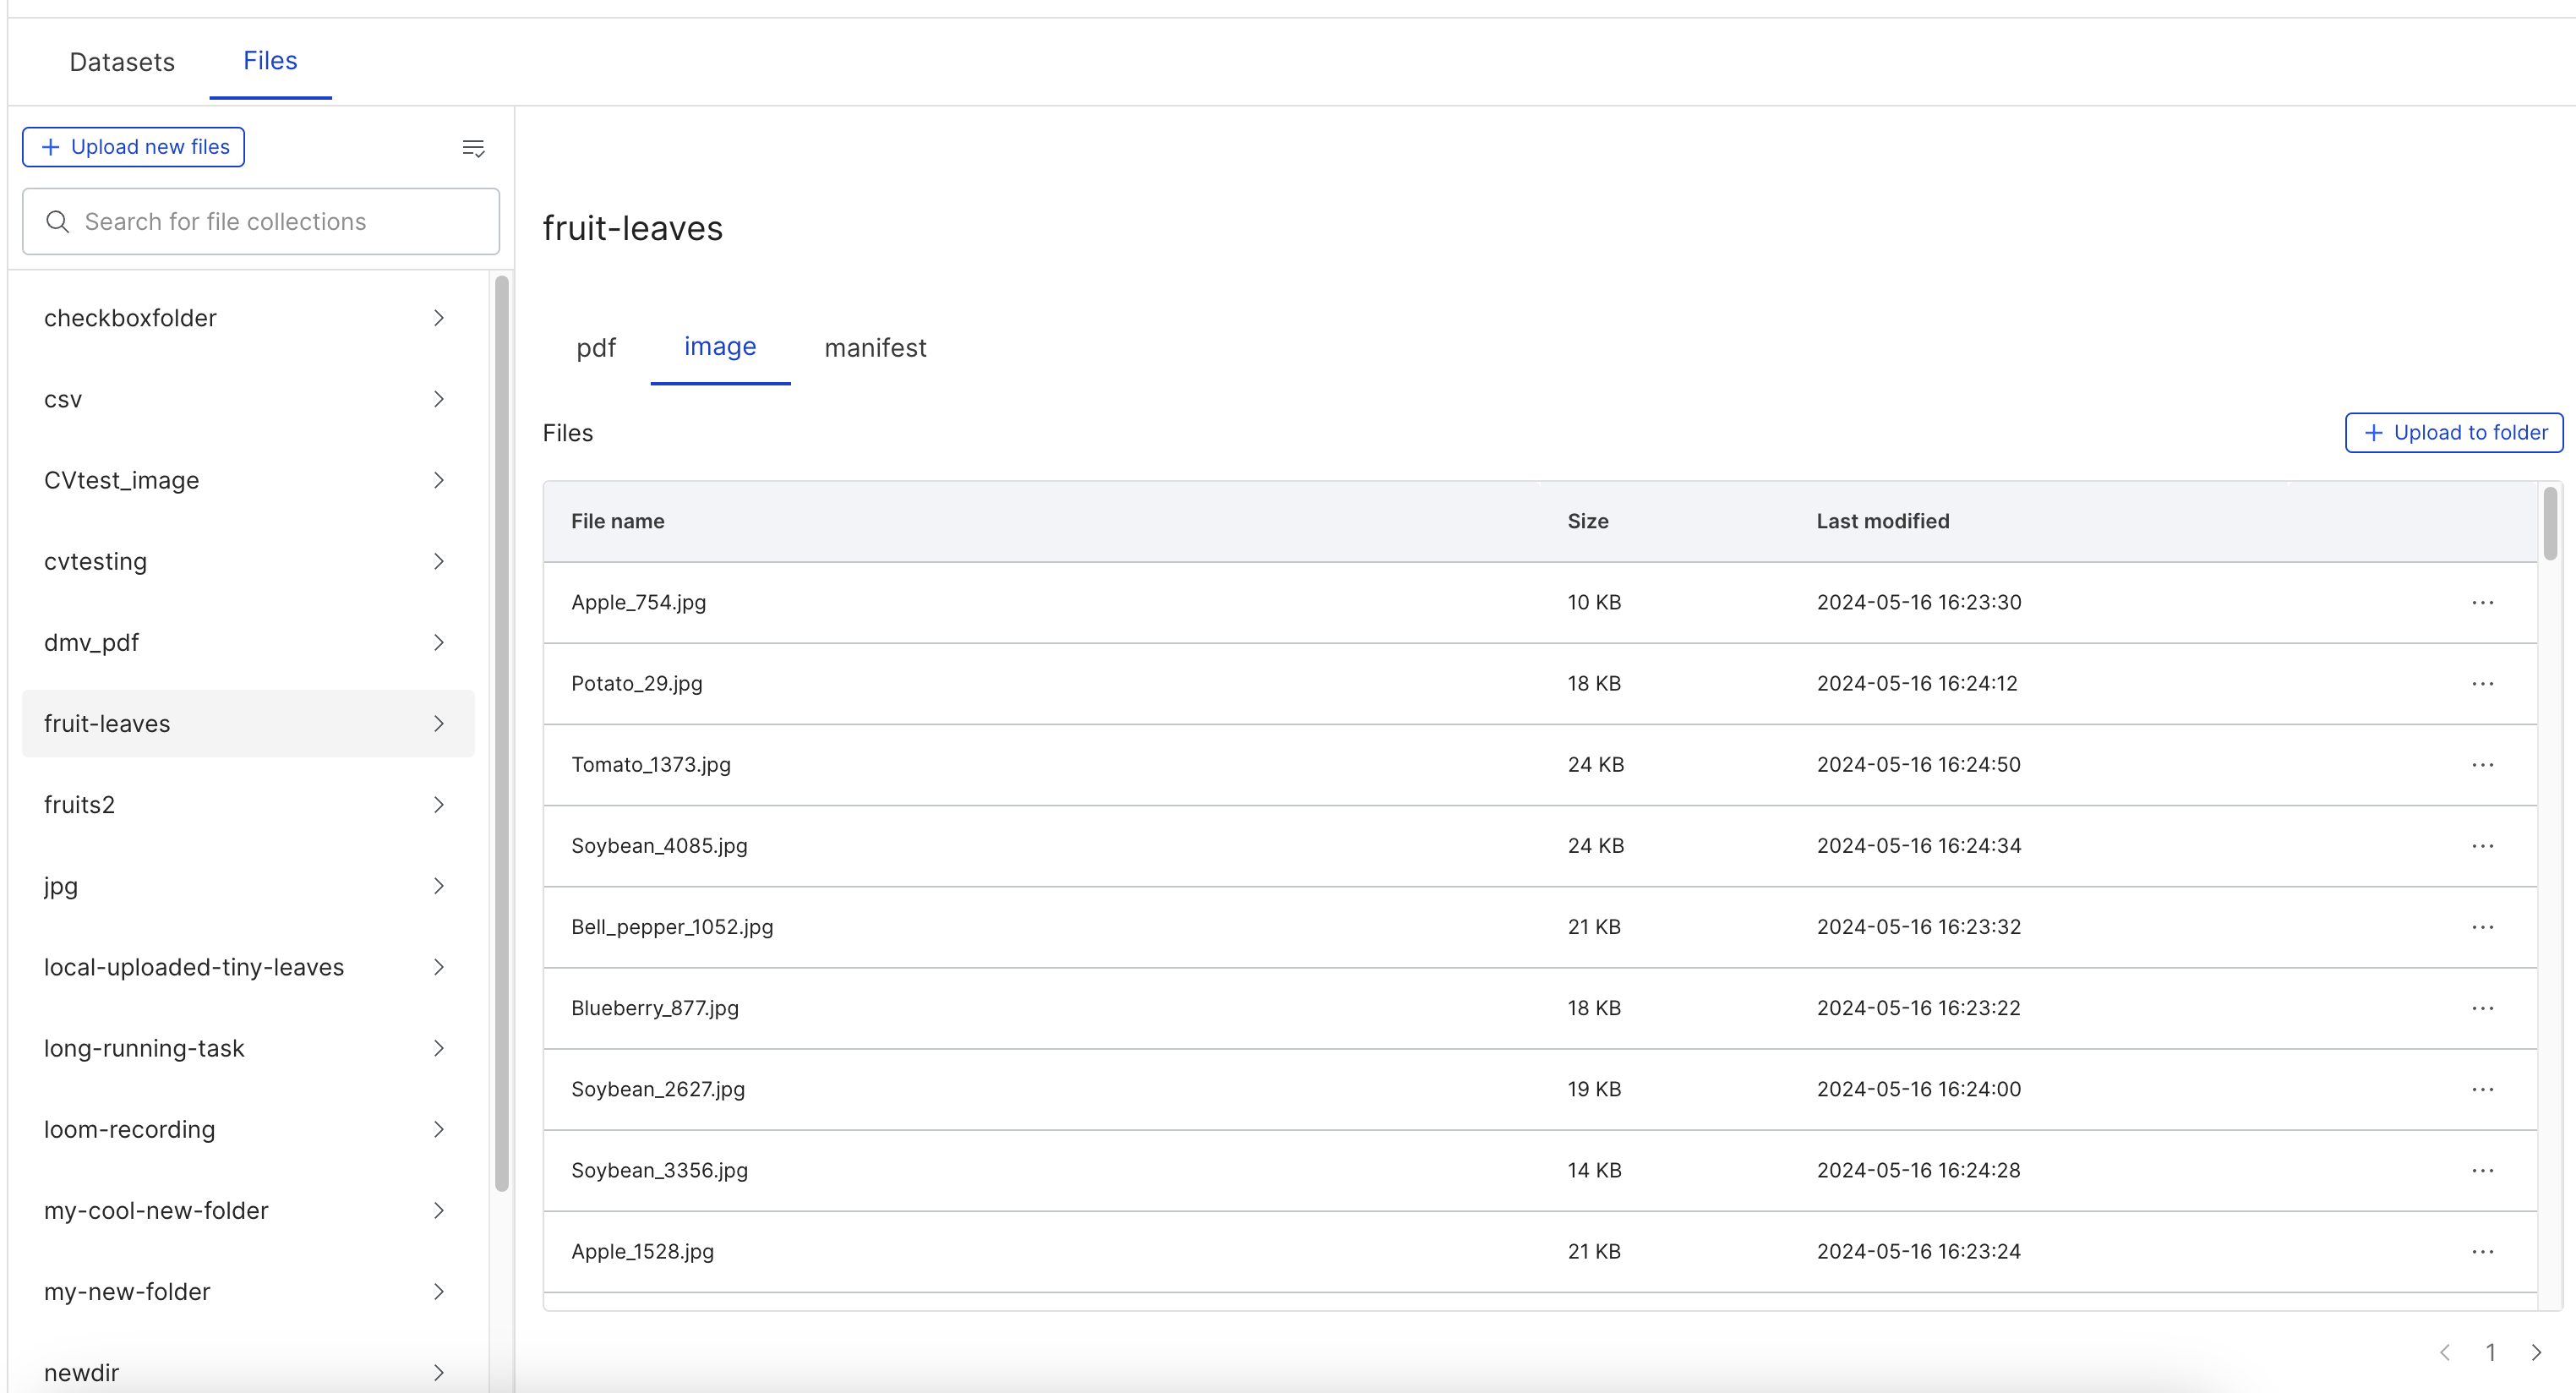
Typically collections contain only one type of file, such as images or PDFs. If multiple types exist, the files are automatically sorted into subfolders by file type, which you can switch between by selecting the different file type tabs.
To upload additional files to a collection
-
In the left-hand sidebar, select the file collection to which you want to upload.
-
Select + Upload to folder, which will open the upload dialog.
-
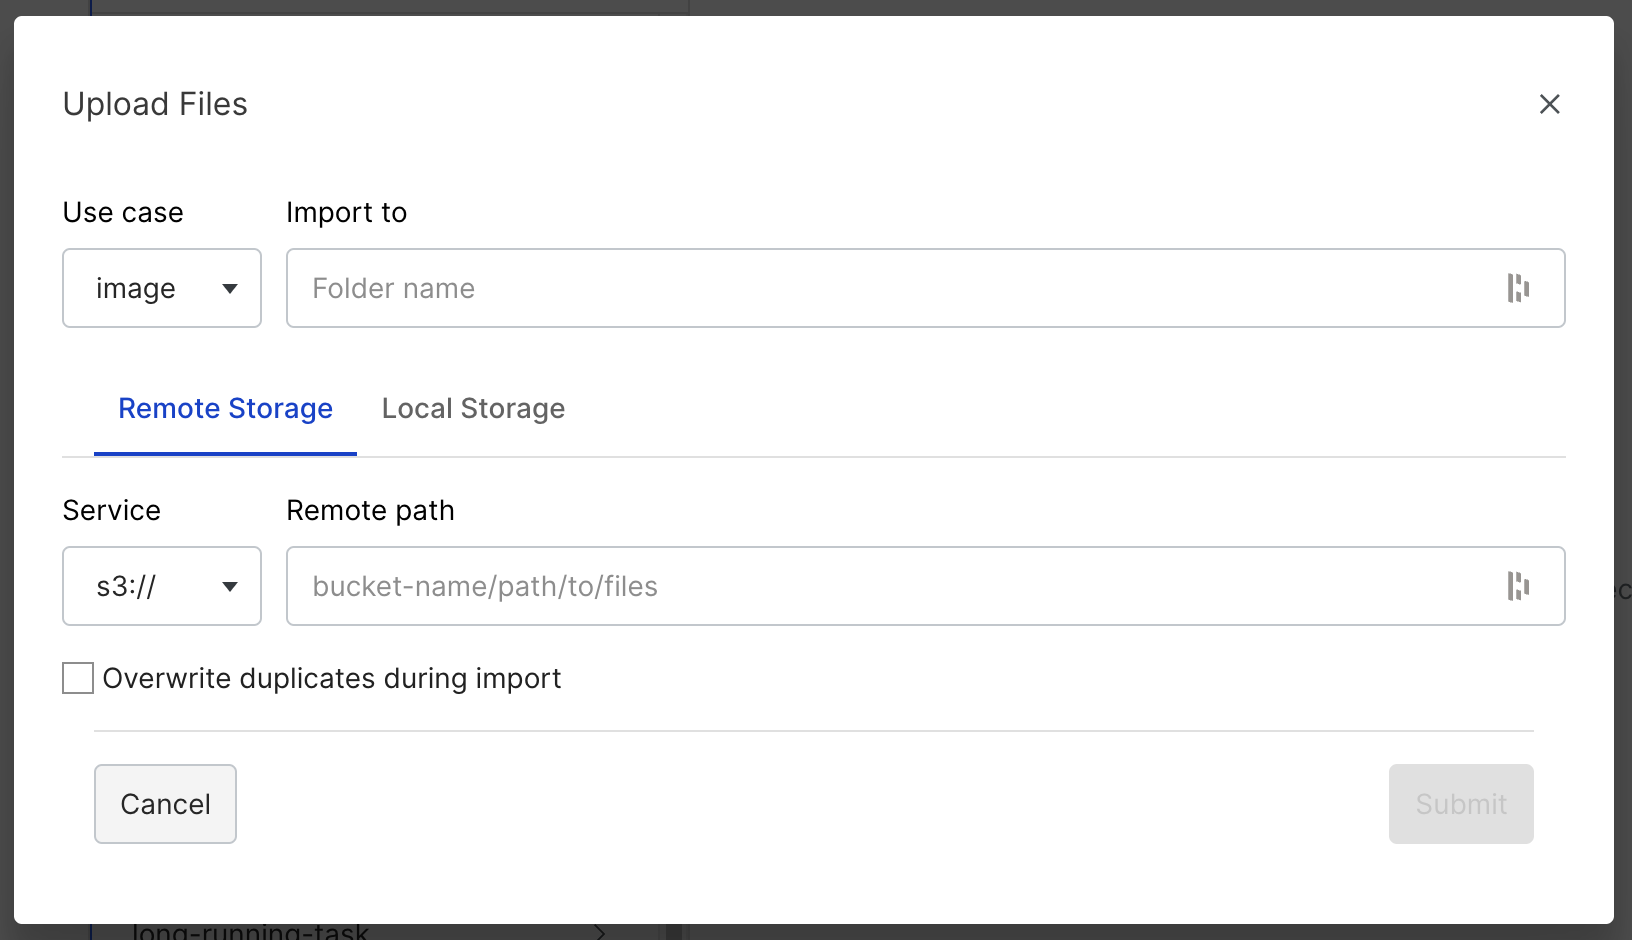
In the upload file modal, complete the fields to transfer remote files or upload local files:
-
Use case: Select the file type you want to upload from the dropdown. This restricts the file type that can be uploaded or transferred.
- For
imageapplications,.jpg,.jpeg, and.pngare allowed. - For
pdfapplications, only.pdffiles are allowed.
- For
-
Import to: Name the folder to which you want to upload files.
- If you enter an unused name, a new folder is created where the files are uploaded.
- If you enter the name of an existing folder, files are added to the existing folder.
-
Select the Remote storage and Local storage tabs:
-
Remote Storage

- Service: Select the cloud storage provider that hosts your files: Amazon S3 or Google Cloud Storage.
- Remote path: Enter the URL or path to the folder containing your remotely hosted files. For S3, you can include or exclude a protocol prefix with these acceptable inputs:
s3://my-bucket/path/to/filesmy-bucket/path/to/files
-
Local Storage

- Choose Files: Select this input to open your operating system's file browser. Select individual or multiple files to upload.
- For direct uploads from your computer, you can upload up to 1,000 files and/or a total of 1 GB in a single upload. This limit only applies to each individual upload, not to the folder you're uploading to. You can add more files to the same folder later by using the + Upload to folder option in the file collections list.
- You can't upload entire directories at once, but you can use shortcuts to select all files in a directory. For example, on MacOS, enter
CMD + Ato select all files inside a given directory.
- Choose Files: Select this input to open your operating system's file browser. Select individual or multiple files to upload.
-
-
Overwrite duplicates during import
- Checked: Any files you upload in the collection will replace existing files with the same name.
- Unchecked: Any files you upload with the same name as existing files in the collection are not uploaded.
-
-
Select Submit.
-
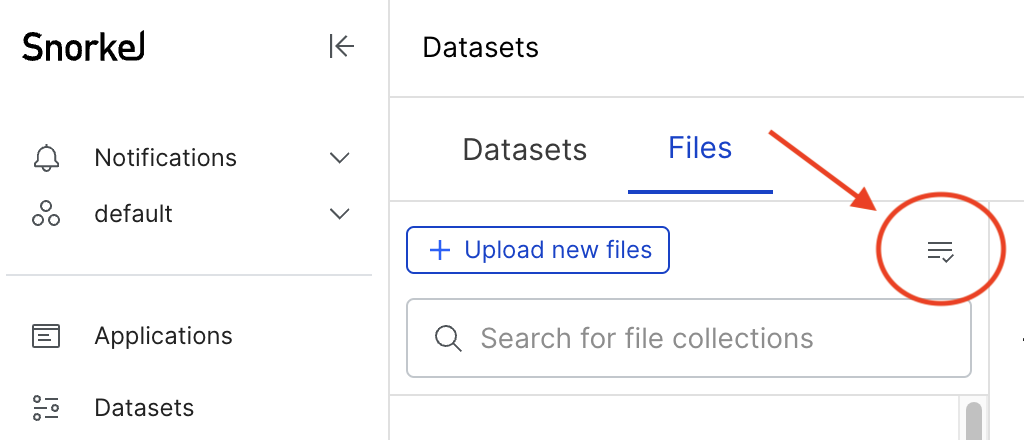
If you selected the Remote storage option, your files are transferred in the background. You can check the status of this transfer using the Jobs icon:
-
If you selected the Local Storage option, your files are uploaded. A loading spinner appears, and the user interface is disabled.
warningDo not close the tab. Wait for an alert to confirm the upload finished successfully. It may take several minutes to finish uploading.

-
-
Once you have uploaded or transferred files to your Snorkel Flow instance, you can associate them with your data sources when creating new datasets.
To download files from a collection
- In the left-hand sidebar, select the file collection from which you want to download.
- Select the
...icon next to an individual file to open the file options menu. - Select Download.

The file downloads to your browser's default download location.