Create application: A guided flow
This page walks process of creating a Snorkel Flow application. The guided experience currently supports the following data and task types:
- Raw text classification
- Raw text extraction (candidate-based or sequence tagging)
- PDF classification
- PDF extraction (candidate-based)
This guided experience is best suited for single-task applications. To create an application that involves multiple model nodes, custom preprocessing modules, and/or a hierarchical structure, choose the legacy Create from template option in the dropdown.
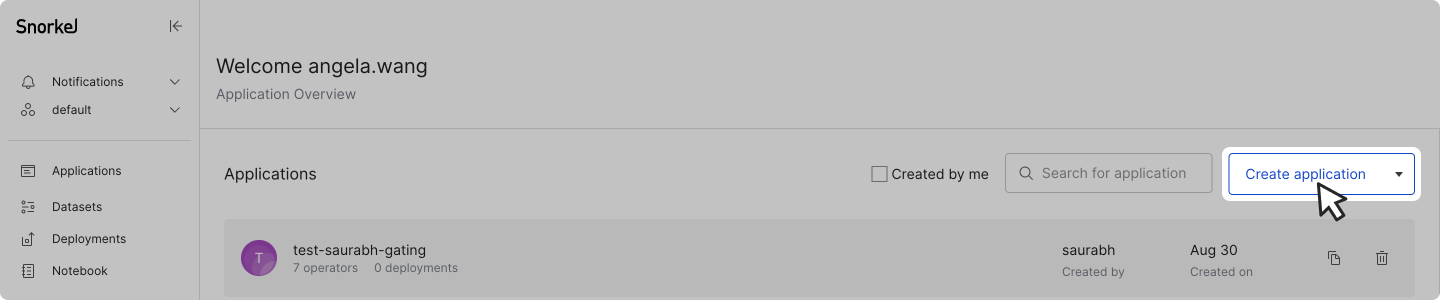
Entry point
In the left-side menu, click Applications, then click the Create application button.
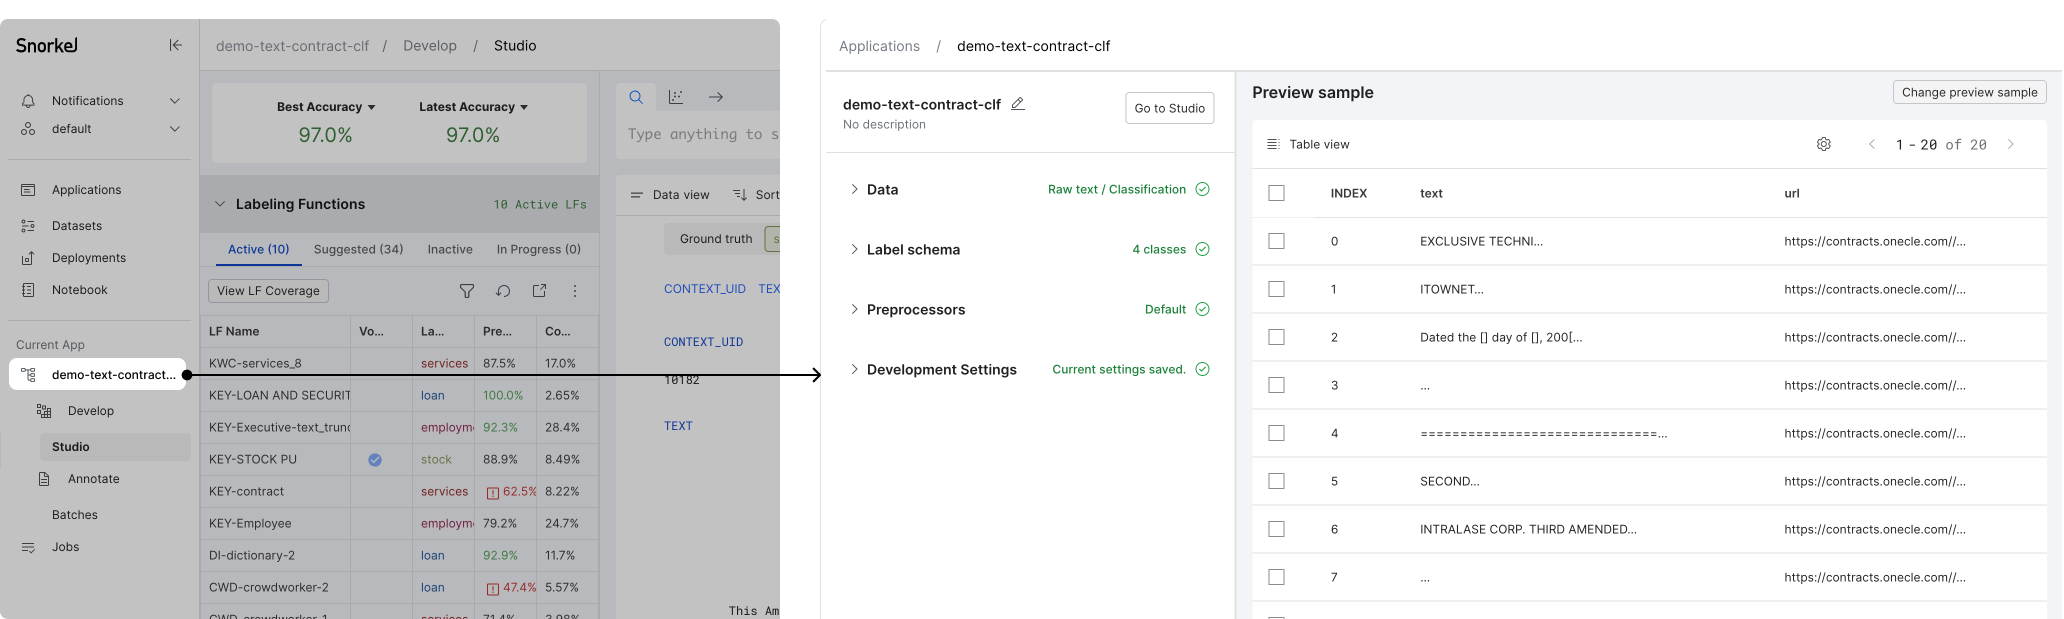
Page overview
The application creation page includes three main sections:
- Header: add an application name (required) and description (optional)
- Application creation steps: expand the accordions to provide the required inputs
- Data
- Label schema
- Preprocessors
- Development Settings
- Dataviewer: preview sample: view a small sample (20 data points) of the dataset and if applicable, see data changes per preprocessor settings
4mP7lTp0my-e8a044b1f6ad58f4b2998eb242f26a42.webp)
Step 1: Add application name and description
On the top-left of the page (the Header section), enter an Application Name and optionally a short Description of the purpose of the application. Click Save to move on to Step 2: Define Data. Click the pencil icon next to the application name to edit the name or description at any time.

Step 2: Define data
In the Data accordion, select the dataset that you wish to use for this application. You can choose from existing datasets in your workspace in the dropdown, or click upload new to upload a new dataset (see Data upload for more information).
-IrfwJyjM--576140bf4e3ef36fd72b53e8223fd685.webp)
Once a dataset is selected, 20 data samples from your dataset will be loaded in the Preview sample pane. If you click Table view, you then have the option to view the sample data in Snippet view or Record view. For more information about the data views that are available, see Dataviewer: Display control pane.
lJd_Dk5AKy-fc8bfc1b0626da1c486636037f10935b.webp)
In addition, Show advanced settings includes rare operations such as altering data sources (the default is to enable all data source in the selected dataset).
OzQCQgc33q-4f9f059ab4bfa50cf544192c0356f977.webp)
Confirm that your selections are correct as they cannot be changed later. Then click Next to confirm the selections and move on to Step 3: Define label schema. This action also creates and saves the application.
Step 3: Define label schema
In the Label schema accordion, first complete the data and task type inputs. Additional options may be required based on your data and task type selection.
| Option | Data and/or task type | Description |
|---|---|---|
| Primary text field | raw text | The primary text field for labeling. |
| IE type | raw text extraction | The desired format for information extraction. |
- Candidate-based: generating candidate spans using a heuristic (e.g. regex matcher), and then classify each candidate as a target class or "other" (i.e. false positive).
- Sequence-tagging: token-level tagging over spans.
| | Filter out docs > 10MB | raw text extraction - sequence tagging | Select to skip documents larger than 10MB in the dataset to optimize performance. | | PDF type | PDF | The nature of PDF data. This selection sets the default preprocessors to run in the Preprocessor step. Native PDFs are created digitally and Scanned PDFs are typically created from scans of printed documents. | | PDF URL field | PDF | The field with a URL link to the PDF file. | | hOCR field | PDF - scanned PDF, no need to run OCR | The field with hOCR value. This assumes that you have already ran preprocessed your data with an optical character recognition (OCR) library. | | Image URL Field | Image | The field with a URL link to the image file. |
If your data type is PDF or Image, you can click Generate Preview to view the rendered PDF/image in the Preview sample.
dGYLaQFAxa-d62a6bbfe8a61f29f026bd8b1c9c9379.webp)
Based on your selections above, you can now complete the following actions:
- Specify label type
- Add new labels
- (Optional) edit or delete labels
- (Optional) import ground truth (GT) from file
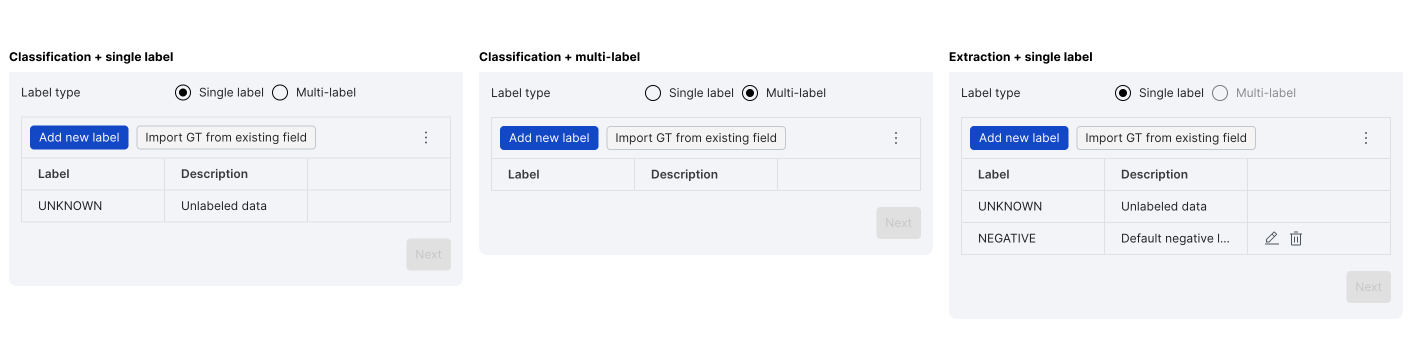
Specify label type
Choose either Single label (i.e., the target is a single choice) or Multi-label (i.e., the target is zero or more choices) label type. Upon selection, default labels will be loaded per task and label type setting.
Add new labels
Depending on the task and label type, one or more custom labels are required to complete the initial schema setup (you can edit this later). There are two ways to add labels:
- Add new label allows you to add one custom label at a time.
- Import GT from existing field allows you to import the unique strings from a field in the dataset.

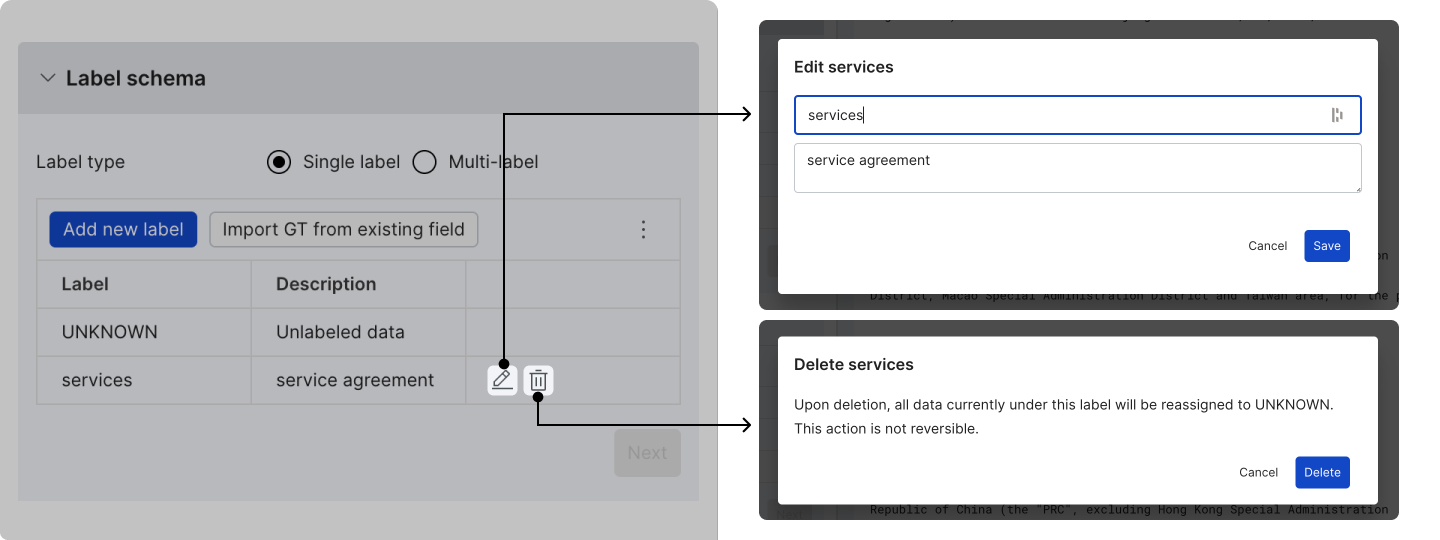
(Optional) Edit or delete labels
To edit or delete labels:
- Click the pencil icon to edit the label name and description.
- Click the trashcan icon to delete a custom label. For all data under the deleted label, the Ground Truth value is reassigned to UNKNOWN.
(Optional) import GT from file
Once the label schema is specified, you can import the GT of the dataset to this application by uploading a file that connects the data UID and label names. Click the three dot overflow menu and select Import GT from file. In the modal, you can either add the file via cloud storage or from a local machine.
d8ygg7afr9-4dd91c06a04b58b2d3e3807c0d3c4243.webp)
Click Next to confirm the label schema setting. This will kick off preprocessing on the full dataset (previously preprocessing was done on the preview sample only), which may take a few minutes. Refer to the progress bar at the bottom of the accordion to see the status of the operation.
m9UIK2QQF6-1db04de5d4af45fad52c2d76b88b9300.webp)
Upon completion, click Next again to move on to next step: Step 4: Set up preprocessors (optional)
Step 4: Set up preprocessors (optional)
Snorkel Flow provides preset preprocessors based on the data type and task type that you selected. If additional user input is not required, then you will be automatically brought to Step 5: Development settings.
| Data & task types | Additional user input required? |
|---|---|
| Raw text classification | No |
| Raw text extraction (candidate-based) | Yes: select the extraction method |
| Raw text extraction (sequence tagging) | No |
| PDF classification | Yes: option to split docs to pages (highly recommended) |
| PDF extraction (candidate-based) | Yes: select the extraction method, and option to split docs to pages (highly recommended) |
Split docs into pages (PDF-only)
Splitting docs into pages is a highly recommended operation for PDF data types to reduce file size and proceeding iteration time. Upon turning on the option, the default page split method PageSplitter is selected. If you want to use a custom method, click Create custom and follow the documentation that opens in a new window to setup custom operator in the SDK. Any custom operator that is uploaded to the workspace will be available in the dropdown.
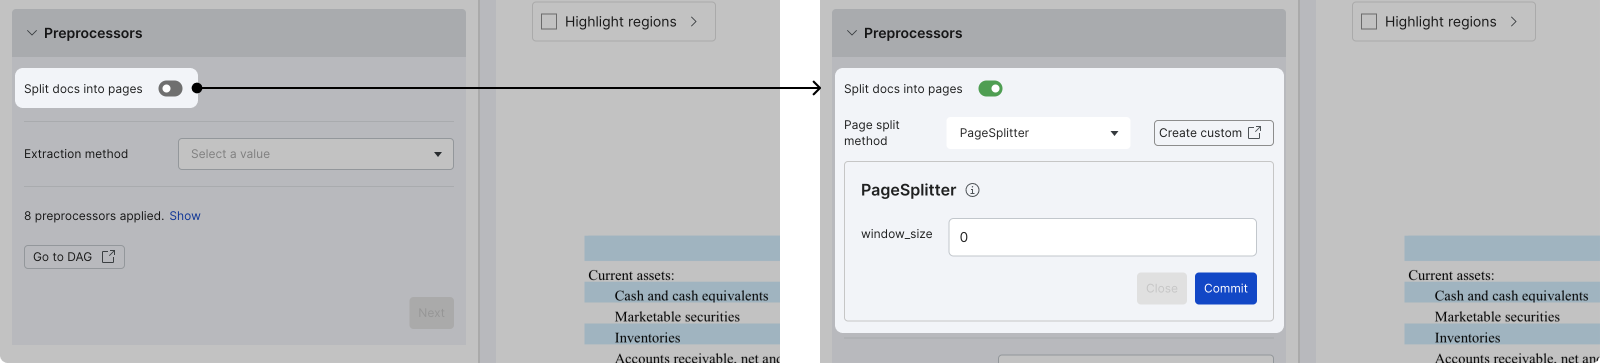
Click Commit to confirm the page splitting operation. Note that this step is currently non-reversible.
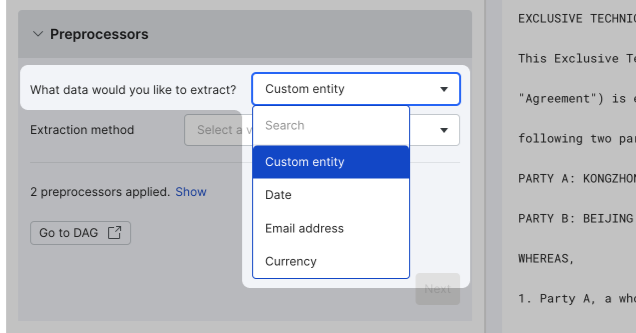
Select an extractor
For raw text extraction, in the What data would you like to extract? option, choose one of the common data types to auto-select a built-in extractor method, or choose Custom entity and then select from Snorkel's full library of extraction methods. Additionally, you can also use custom extractors.
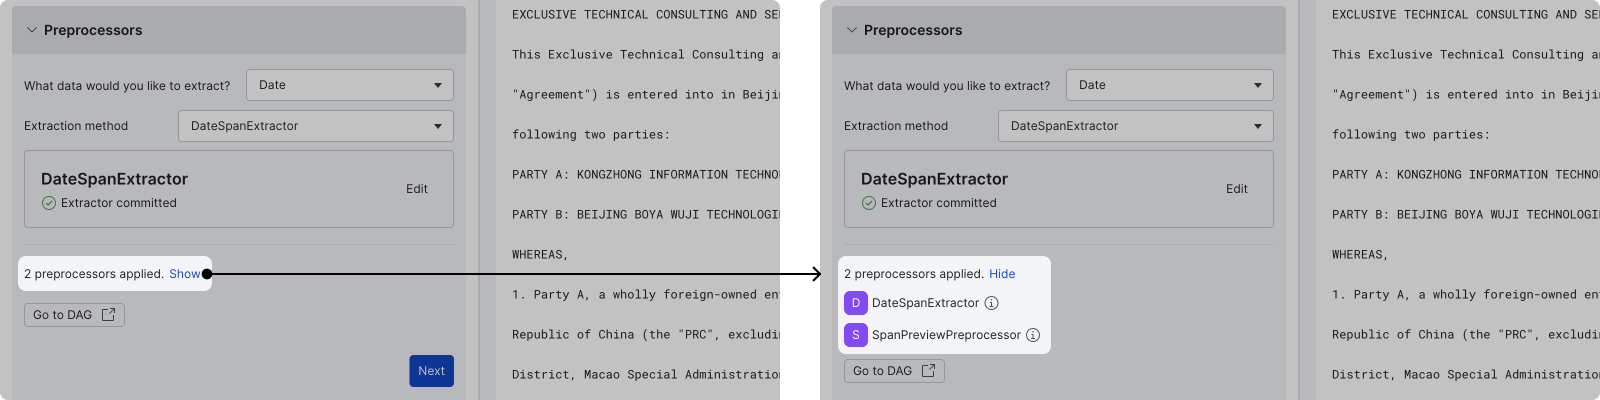
Once the extraction method is selected, fill out the required fields and then click Commit. You can change the extractor and its settings later.
After all required fields are completed, you can see the full list of preprocessors by clicking Show, which is next to # preprocessors applied.
Transition to DAG-first workflow
If you want to perform advanced edits (e.g., add custom preprocessors or add blocks), click Go to DAG to perform advanced actions directly in the DAG. Note that this action will transition this application to the legacy template-based setup and is not reversible (i.e. you cannot return to the guided interface).

Click Next to move on to Step 5: Development settings.
Step 5: Development settings
In the Development Settings accordion, confirm or edit the following default settings:
- Compute embeddings: The default setting is Yes, with the field selection being the primary text field. For more information about using embeddings across your end-to-end workflow, see Utilizing embeddings.
- Primary metric: The default metric varies depending on your data and task type selection.
YyG6wiRHrG-ce6f06d92e7245062820fe4769554151.webp)
Click Go to Studio to complete application setup and start developing your model!
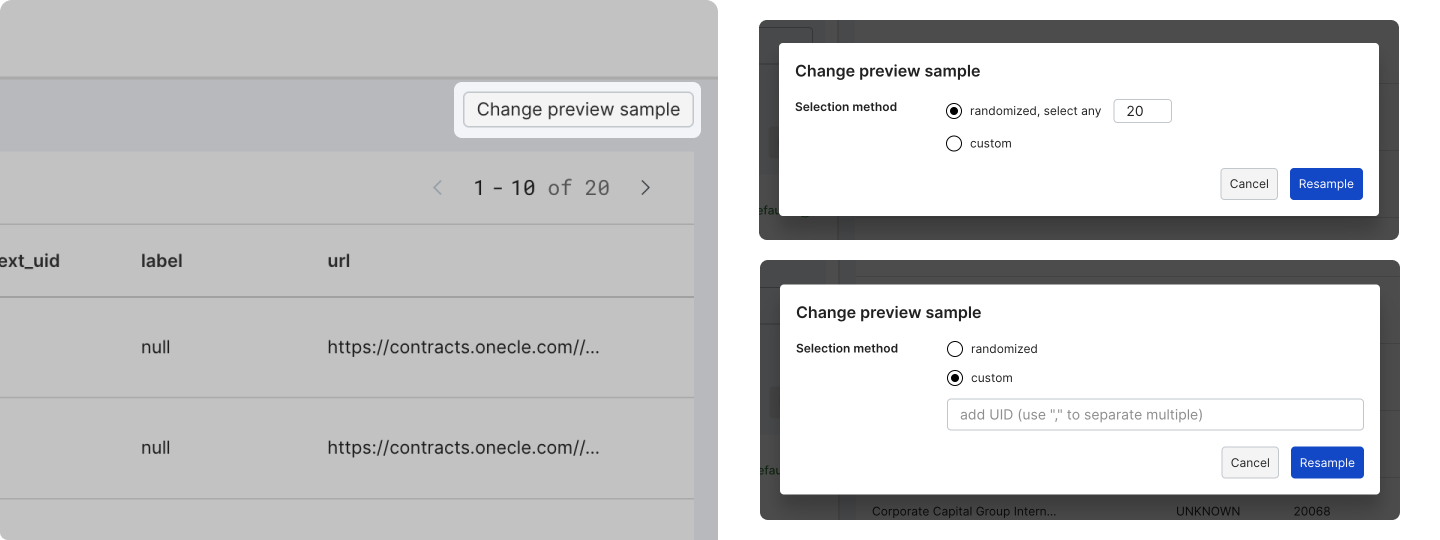
Resample the preview sample
If you want to resample the preview data during the setup process, click Change preview sample on the top-right corner of your screen, then select the desired resample method.
Return to the application setup page
Any initiated application (i.e., passing Step 2: Define data) can be found in the applications list on the Application page. You can get to the Application page at any time by clicking Applications in the left-side menu.
For applications with unfinished setup, clicking the application brings you to the application setup page.
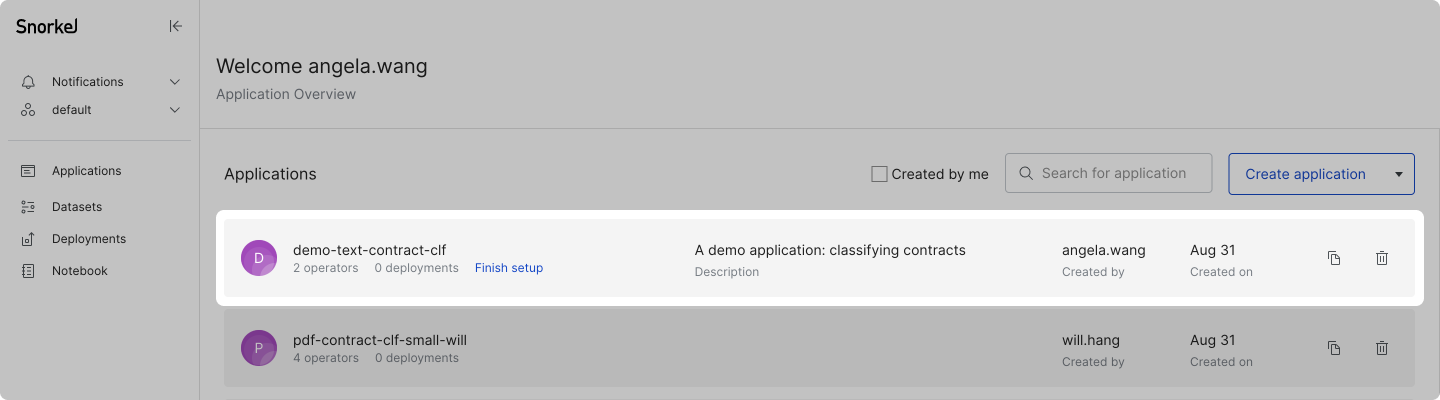
For applications with completed setup, click the application name in the left-side menu to return to the application setup page.