(Beta) Named Entity Recognition from PDFs: Extracting patent data
This is a beta feature available to customers using a Snorkel-hosted instance of Snorkel Flow. Beta features may have known gaps or bugs, but are functional workflows and eligible for Snorkel Support. To access beta features, contact Snorkel Support to enable the feature flag for your Snorkel-hosted instance.
In this tutorial, you will use Snorkel Flow to extract patent data such as title, patent number, date of patent, assignee, and filed date from PDFs. This example highlights the information to be extracted in different colors:
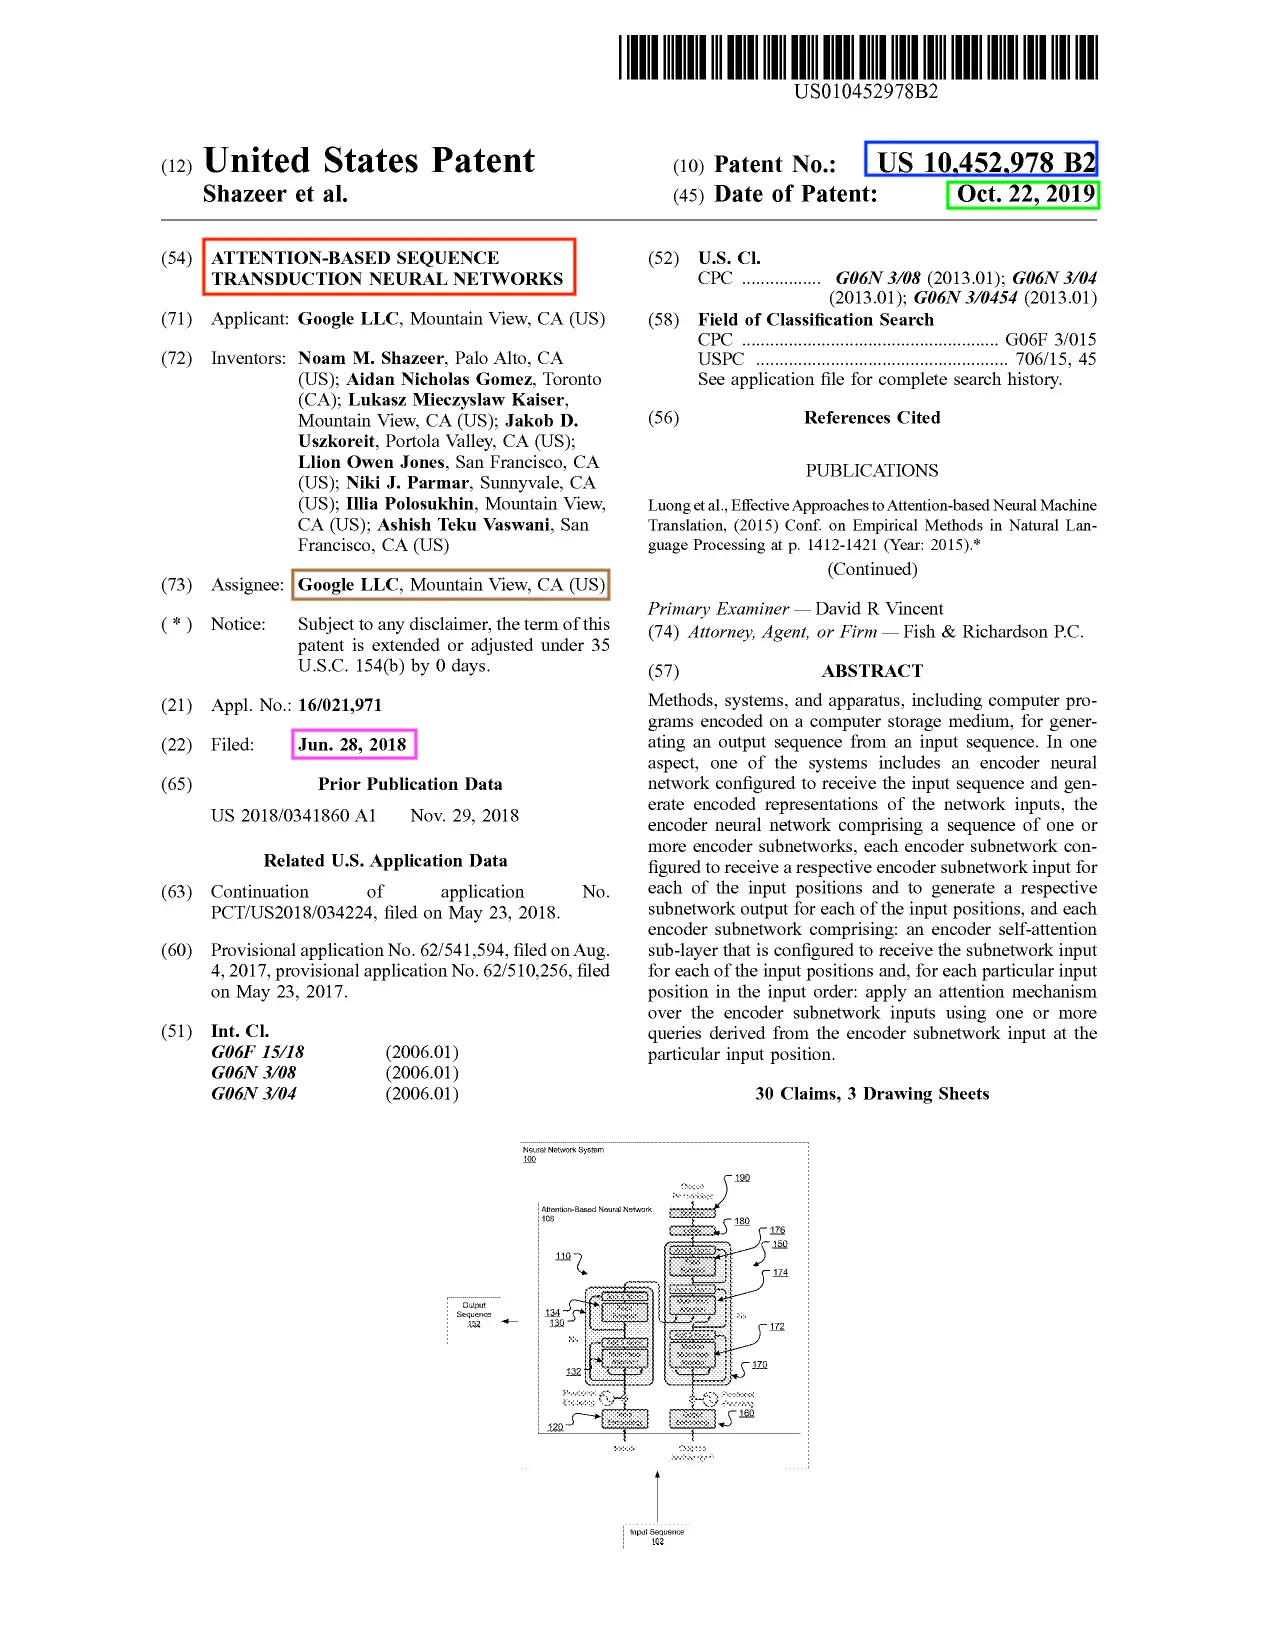
There are many challenges to extracting the information:
- Some information come in different formats. For example, "patent number" comes in "US x,xxx,xxx B2" for newer patents, but could come in "x,xxx,xxx" for older patents.
- Older patents come in scanned PDFs and the location of these information in x-y pixel coordinates varies among documents.
- Some information might be missing. For example, "patent number" and "assignee" are missing in the case of a pending patent.
- Patents issued in different countries come in completely different formats and layouts.
In Extraction from PDFs: Extracting balance sheet amounts tutorial, you first define a span extractor and work with extracted spans, which works well when the information to be extracted comes in the same format, such as numeric values.
For this tutorial, you have to extract title, assignee, patent number, etc., which all come in different formats. For this use case, the approach gives you better flexibility because you don't need to define a span extractor for a particular format.
In this tutorial, you will learn how to:
- Upload data into Snorkel Flow
- Annotate the data
- Create an application
- Define labeling functions
- Train a model
Upload data
Snorkel Flow can ingest data from a range of storage options, including cloud storage, databases, or local files. For PDF extraction applications, the input data must include the following fields:
| Field name | Data type | Description |
|---|---|---|
uid | integer | A unique ID mapped to each row. This is standard across all Snorkel Flow datasources. |
url | string | The file path of the original PDF. Used to access and process the PDF. |
For this tutorial, use the provided dataset from in AWS S3 Cloud Storage. Start by creating your new dataset.
-
Select Datasets from the left menu.
-
Select the Upload new dataset button on the top right corner of your screen.
-
In the Upload new dataset window, enter the following information:
-
Dataset name: Enter
patent-dataset. -
Enable multi-schema annotations: Select this option.
-
Select a data source: Select Cloud Storage as your data source.
-
File path and Split: Add these datasets:
File path Split s3://snorkel-public/patent1p/0-9.csvtrain s3://snorkel-public/patent1p/10-19.csvtrain s3://snorkel-public/patent1p/20-29.csvvalid
-
-
Select Verify data source(s) to run data quality checks to ensure data is cleaned and ready to upload.
-
After clicking Verify data source(s), select
uidfrom the UID column dropdown box. Theuidis the unique entry ID column in the data sources. -
Define data type as follows:
- Data type: PDF
- PDF type: Native PDF
- Primary URL field:
url
-
Select Add data source(s).
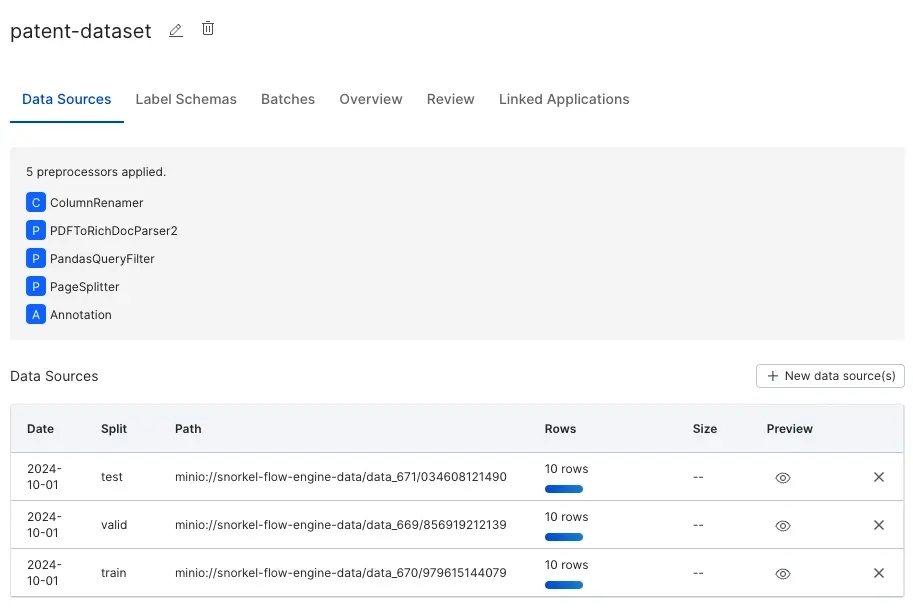
Once the data is ingested from all three data sources, you'll have a dataset like this:
Annotate the data
Next, let's annotate the data.
-
Select Datasets and search for your
patent-dataset. -
Select Label Schemas > Create new label schema.
-
Fill out the form as follows:
- Label schema name: Enter
my-label-schema. - Data type: Select
PDF. - Task type: Select
Extraction. - PDF type: Select
Native PDF. - PDF URL field: Select
rich_doc_pdf_url. - Labels: Add the following labels, using Enter for each new label:
- Keep
UNKNOWN - Keep
NEGATIVE - Add
app # - Add
filed date - Add
title - Add
assignee - Add
issued date - Add
patent #
- Label schema name: Enter
-
Select Add label schema.
-
Create a batch for each split.
- Select Batches.
- Select Create new batch.
- Enter the details for your batch:
- Batch name: Use your split.
- Label schema: Use
my-label-schema. - Split: Use one of the splits you created.
- Data points: Select
All. - Sample percentage: Use
100. - Assign to: Select yourself as the annotator for this tutorial.
- Select Batches.
-
Go into the batches and annotate the data.
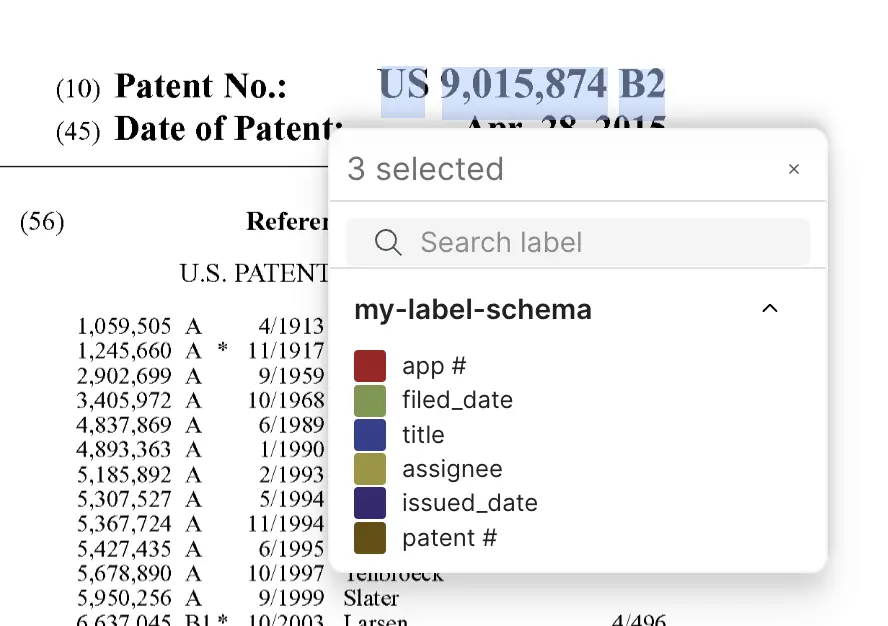
For example, these words next to "Patent No.:" can be annotated as "patent #".
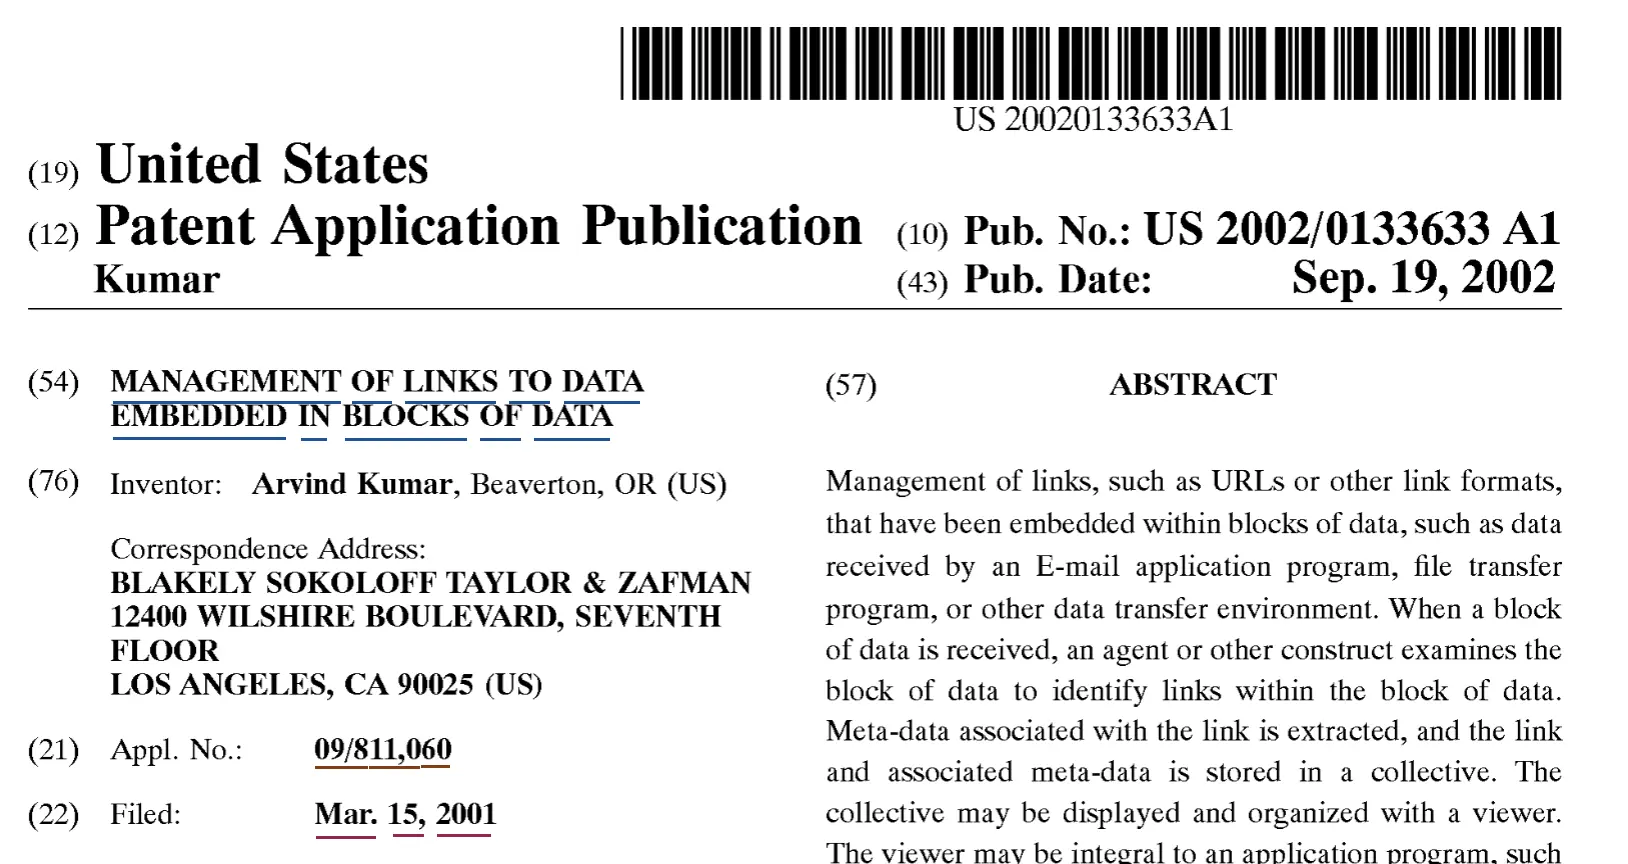
Some documents are missing some information. For example, this document is missing the patent number and the issued date because this is a pending patent.
-
Commit the annotations.
For more about annotating, see Walkthrough for annotators
Create an application
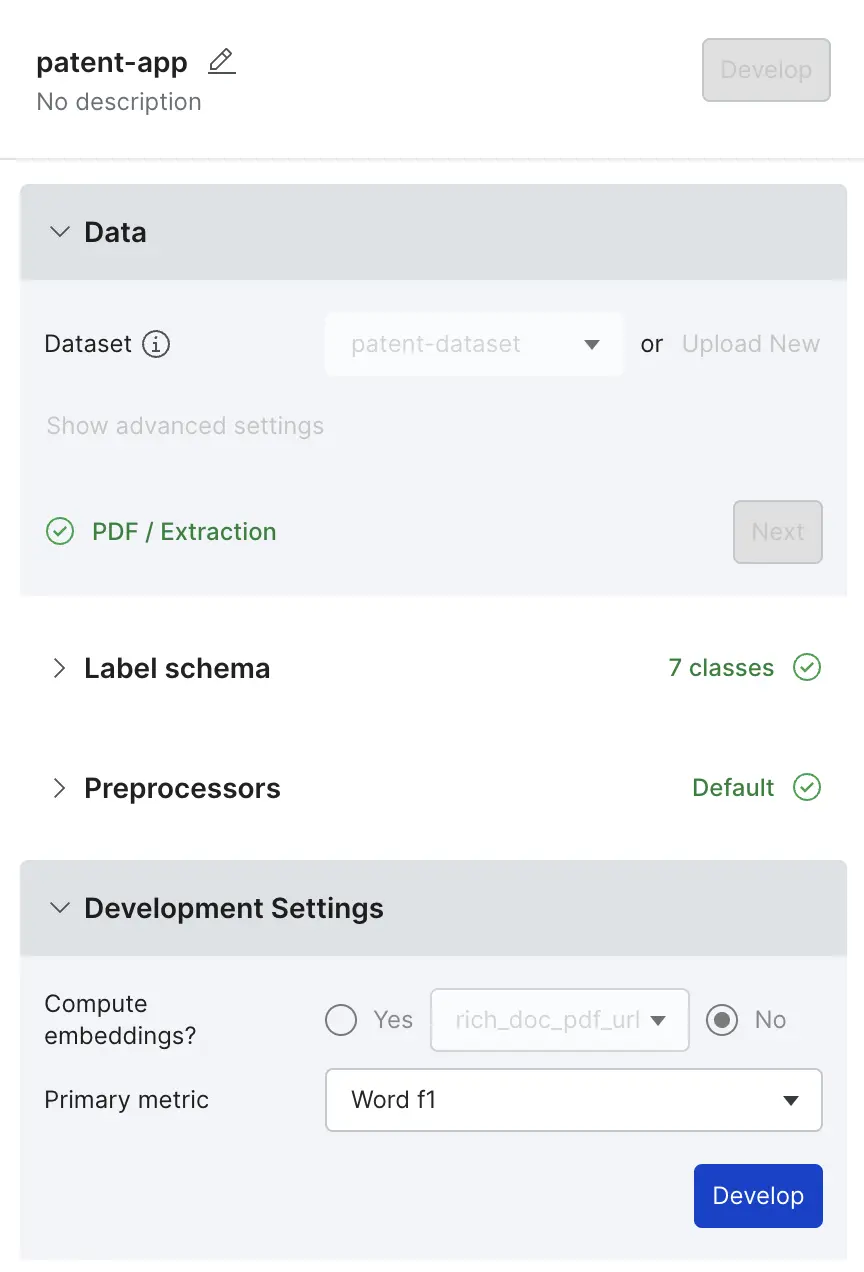
Next, create an application on top of the dataset with the ground truth labels that you committed in the previous step.
-
Select Linked Applications in your dataset viewer, and select Create application.
-
Enter or select the following values:
- Application name:
patent-app - Dataset:
patent-dataset - Label schema name:
my-label-schema
- Application name:
-
Select Next in the "Label schema" stage. You will see a progress message like
Processing data source 1 / 3: starting.Wait for this message to disappear before continuing. -
In Development Settings, keep
Noat the Compute embeddings, and then select Develop.
Review data in Studio
In Develop (Studio), you'll review the data and write labeling functions.
First, let's resample the dev to have more pages.
- Select the Dev split dropdown in the top toolbar.
- Select Resample data.
- Set the Sample size to 10 and Min per class to 0, and select Resample dev split.
Pages are randomly sampled across PDFs in the dev split.
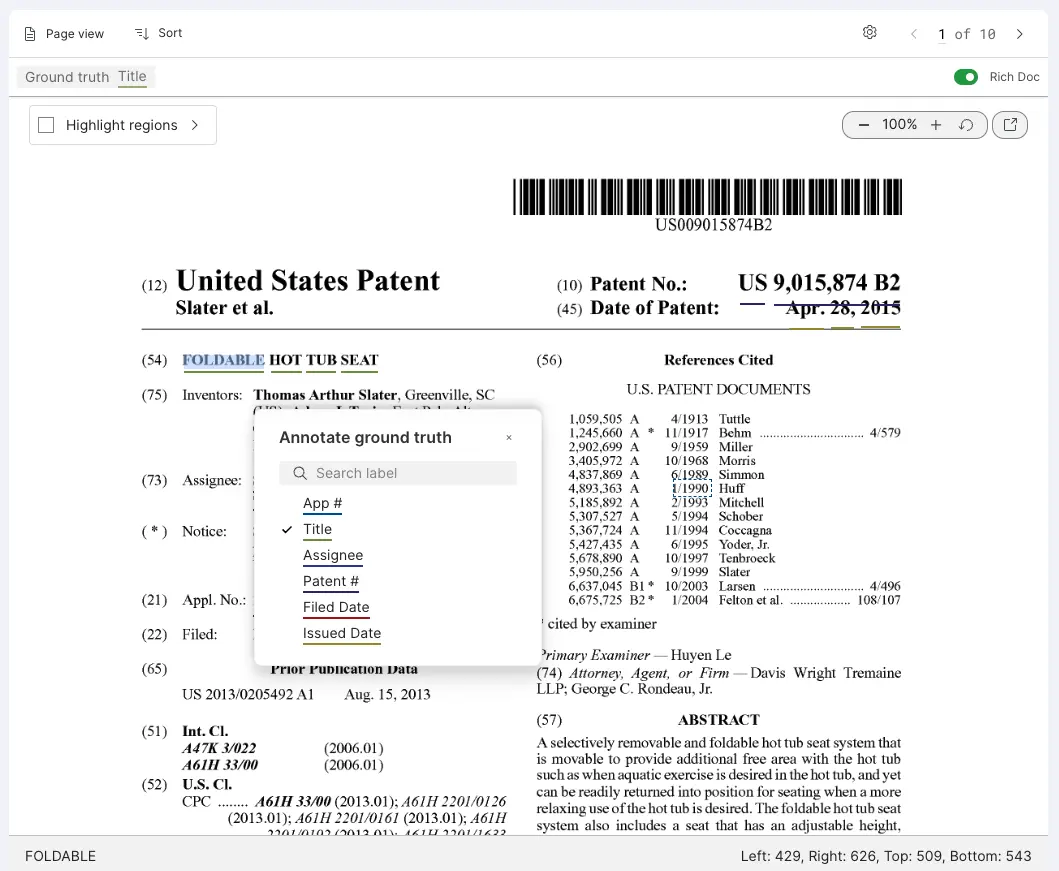
You should be able to see words that are highlighted with colored underlines if you've successfully committed annotations.
-
Select any word in the document. You can see the bounding box coordinates of the word as measured in pixels at the bottom of the screen.
-
Explore different view options in Studio:
- Toggle Rich Doc off to see the plain text extracted from the document.
- Select the arrow to expand Highlight regions. This allows you to highlight the bounding boxes of the different regions in the document: Area, Paragraph, Line, Word, and Row.
- Zoom in and out of the document using the button at the top right corner.
- Pop up a modal to see the document of all pages using the button next. This is useful to see pages before and after the page you are looking at in Studio.
Next, you'll define your labeling functions.
Define labeling functions
- Create new labeling functions.
- In Patterns, select your LF template by typing
/, followed by the pattern, such asWord-based ExpressionandWord-based Regex. - Enter the requirements for the labeling function.
- Select a label from the dropdown menu.
- Select Preview LF to see the precision and coverage of your LF.
- Select Create LF.
The new LF shows up in the Labeling Functions pane.
Using the steps above, add these LFs to your application:
| LF Template | Settings | Label | Explanation |
|---|---|---|---|
| Word-based Expression Builder | Label words satisfying expression: PATTERN.right < WORD.left and abs((WORD.top + WORD.bottom)/2 - (PATTERN.top + PATTERN.bottom)/2) < 50 with regex pattern patent (no\.|number) | patent # | This LF labels words that are on the right and on the same row as "patent (no.|number)" as patent #. |
| Word-based Expression Builder | Label words satisfying expression: PATTERN.right < WORD.left and abs((WORD.top + WORD.bottom)/2 - (PATTERN.top + PATTERN.bottom)/2) < 50 with regex pattern Date of patent: | issued date | This LF labels words that are to the right and on the same row as "Date of patent:" as issued date |
| Word-based Expression Builder | Label words satisfying expression: PATTERN.right < WORD.left and abs((WORD.top + WORD.bottom)/2 - (PATTERN.top + PATTERN.bottom)/2) < 50 and WORD.right < 1275 with regex pattern Filed: | filed date | This LF labels words that are to the right and on the same row as "Filed:" as filed date, as long as it is on the left half of the page boundary |
| Word-based Expression Builder | Label words satisfying expression: PATTERN.right < WORD.left and abs((WORD.top + WORD.bottom)/2 - (PATTERN.top + PATTERN.bottom)/2) < 50 and WORD.right < 1275 with regex pattern appl\. no\.: | app # | This LF labels words that are to the right and on the same row as "appl. no." as app #, as long as it is on the left half of the page boundary |
| Word-based Expression Builder | Label words satisfying expression: PATTERN.right < WORD.left and abs((WORD.top + WORD.bottom)/2 - (PATTERN.top + PATTERN.bottom)/2) < 50 and WORD.right < 1275 with regex pattern assignee: | assignee | This LF labels words that are to the right and on the same row as "assignee:" as assignee, as long as it is on the left half of the page boundary |
The top-left corner x-y coordinate of each page is always (0, 0), and the bottom-right corner is (2250, 3300) when the page is in the letter size (8.5" x 11").
You can also encode your custom labeling function logic using the Python SDK. For examples using the RichDocWrapper object, refer to the SDK reference.
Train a model
You can aggregate the newly defined labeling functions to train a model.
- In the Models pane, select Train a model.
- For the Model architecture, select LayoutLM.
- Leave the default settings in Train options and Model options.
Once the model training is completed, you will see your first model in the Models pane.
Model metrics
Snorkel Flow provides word-level F1 (micro), precision, and recall metrics for trained models.
Metrics are computed at the word-level rather than the document-level.
For example, there are ten words in total that are all labeled as app #, eight words are predicted correctly as app #, and two words are predicted incorrectly as patent #, then the precision is 80%. It doesn't matter which document those ten words belong to.
If there is any labeled word in a page, all the unlabeled words in the same page are assumed to be labeled with the negative class.
For example, in the patent example above, some words are labeled as title, app #, etc.
All the unlabeled words in the same page are assumed to be labeled with NEGATIVE.
If there is no labeled word in a page, then all the words in the page remain unlabeled and they are ignored when computing the model metrics.
Words that are labeled and/or predicted as the negative class are ignored when computing the model metrics.
You can improve the performance of your model with these options:
-
Increase the
num_train_epochsin Model options. -
Add LFs for
NEGATIVEclass.LF Template Settings Label Explanation Word-based Expression Builder Label words satisfying expression PATTERN.bottom < WORD.top and WORD.right < 1275with regex patternPrior publication dataNEGATIVEThis LF labels words that are below "Prior publication data" and are in the left half of the page as NEGATIVE.Word-based Expression Builder Label words satisfying expression PATTERN.bottom < WORD.top and WORD.right > 1275with regex patternReferencesNEGATIVEThis LF labels words that are below "References" and are in the left half of the page as NEGATIVE.Word-based Expression Builder Label words satisfying expression WORD.right < 1275 and PATTERN.top <= WORD.bottomwith regex patterninventorsAND another regex patternWORD.right < 1275 and WORD.bottom < PATTERN.topwith regexassigneeNEGATIVEThis LF labels words that are below "inventors" but above "assignee" as NEGATIVEto prevent inventors from being predicted as assignee.
Snorkel Flow enables users to iteratively generate better labels and better end models. For information about getting metrics and improving model performance, see Analysis: Rinse and repeat.
Although it is not supported in the user interface, you can preview and create prompt LFs through the SDK:
# preview a prompt LF
sf.preview_prompt_lf(
    node,
    model_name='openai/gpt-4o',
    model_type='word_text2text_qa',
    prompt_text = 'Task: Identify and list all exact answers to the question found within the document. Return the answers separated by a semicolon (";"), with no additional commentary not found in the document. Question: What is the patent number mentioned in the document? Note that the patent number is only given to an awarded patent and different from the application number.',
    primary_text_field='rich_doc_text',
    label='patent #',
    split='dev'
)

# create a prompt LF
sf.create_prompt_lf(
    node,
    model_name='openai/gpt-4o',
    model_type='word_text2text_qa',
    prompt_text = 'Task: Identify and list all exact answers to the question found within the document. Return the answers separated by a semicolon (";"), with no additional commentary not found in the document. Question: What is the patent number mentioned in the document? Note that the patent number is only given to an awarded patent and different from the application number.',
    primary_text_field='rich_doc_text',
    label='patent #',
    lf_name='patent_LF'
)
For more about prompt LFs, see Foundation model suite.
For more about model configuration, see Configuring external models.
What's next
You have set up and iterated on a PDF extraction application in Snorkel Flow. To learning more about PDF extraction features in Snorkel, see these topics:
The Snorkel Flow Python SDK provides greater flexibility to define custom operations. Select Notebook on the left-side pane to access the SDK. See the SDK reference to learn more about custom operators and custom labeling functions.