Deploying Snorkel-built models to Azure Machine Learning
This tutorial walks through two options for deploying a Snorkel-built model on Azure Machine Learning (Azure ML):
-
Using Azure CLI
- Configure a Dockerfile to be compatible with Azure ML.
- Build and push the Dockerfile to Azure Container Registry.
- Create an endpoint and deploy your model.
-
Using Azure ML Studio UI
- Modify your MLflow model so that it is compatible with Azure ML.
- Upload your model to Azure ML.
- Create an endpoint and deploy your model.
Using the Azure CLI requires more configuration upfront, but is easier to debug and much more flexible for most use cases so is therefore the recommended method. Using the Azure ML Studio UI is easier to set up, but oftentimes has issues with external dependencies, so for most use cases it will not be the best option.
Requirements
- Ensure your environment meets all the requirements for deploying a Snorkel-built model.
- Azure CLI installed on your machine. For more, see the Azure CLI documentation.
- An Azure account with access to an existing Azure ML workspace.
- An MLflow model that was downloaded from Snorkel Flow.
Using Azure CLI
Configure a Dockerfile
Here's a standard Dockerfile that you can use as a starting point. You may need to make some modifications based on Model dependencies. The key components are:
- Install system dependencies
- Install Python & model dependencies
- Start MLflow serving with the explicit model path
# Build an image that can serve mlflow models.
FROM ubuntu:22.04

ARG MLFLOW_MODEL_NAME
ARG DEPLOY_PORT

ENV MLFLOW_MODEL_NAME=${MLFLOW_MODEL_NAME}
ENV DEPLOY_PORT=${DEPLOY_PORT}

# Install system dependencies
RUN apt-get -y update && DEBIAN_FRONTEND=noninteractive TZ=Etc/UTC apt-get install -y --no-install-recommends wget curl nginx ca-certificates bzip2 build-essential cmake git-core

RUN apt install -y python3.10 python3.10-distutils python3-dev\
    && ln -s -f $(which python3.10) /usr/bin/python \
    && wget https://bootstrap.pypa.io/get-pip.py -O /tmp/get-pip.py \
    && python /tmp/get-pip.py
RUN pip install gevent mlflow==2.16.0

ENV MLFLOW_DISABLE_ENV_CREATION=True
ENV ENABLE_MLSERVER=False
ENV GUNICORN_CMD_ARGS="--timeout 60 -k gevent"

# install dependencies for the MLflow model
COPY ${MLFLOW_MODEL_NAME} /opt/azureml/${MLFLOW_MODEL_NAME}
WORKDIR /opt/azureml/${MLFLOW_MODEL_NAME}
RUN pip install -r /opt/azureml/${MLFLOW_MODEL_NAME}/requirements.txt

# clean up apt cache to reduce image size
RUN rm -rf /var/lib/apt/lists/*

# Set the model path environment variable
ENV MODEL_PATH="/var/azureml-app/azureml-models/${MLFLOW_MODEL_NAME}/1/${MLFLOW_MODEL_NAME}"

# Start MLflow serving with the explicit model path
CMD ["sh", "-c", "mlflow models serve --model-uri \"$MODEL_PATH\" --no-conda --port $DEPLOY_PORT --host 0.0.0.0"]
Create deployment and endpoint configuration files
Azure ML requires two configuration files to deploy a model:
-
mlflow-deployment.yml, a deployment configuration file# mlflow-deployment.yml
$schema: https://azuremlschemas.azureedge.net/latest/managedOnlineDeployment.schema.json
name: {{DEPLOYMENT_NAME}}
endpoint_name: "{{ENDPOINT_NAME}}"
model:
name: {{MODEL_NAME}}
version: 1
path: ./{{MODEL_NAME}}
environment_variables:
MODEL_NAME: {{MODEL_NAME}}
environment:
name: {{ENVIRONMENT_NAME}}
image: {{ACR_NAME}}.azurecr.io/{{IMAGE_NAME}}:latest
inference_config:
liveness_route:
path: /ping
port: {{DEPLOY_PORT}}
readiness_route:
path: /ping
port: {{DEPLOY_PORT}}
scoring_route:
path: /invocations
port: {{DEPLOY_PORT}}
instance_type: Standard_E2s_v3
instance_count: 1 -
mlflow-endpoint.yml, an endpoint configuration file# mlflow-endpoint.yml
$schema: https://azuremlschemas.azureedge.net/latest/managedOnlineEndpoint.schema.json
name: "{{ENDPOINT_NAME}}"
auth_mode: key
For more, see the Azure ML docs on endpoint configuration files.
Create requirements file
Snorkel Flow MLFlow models include a conda.yaml file that specifies the dependencies for the model. For Azure ML, we recommend not using conda to manage dependencies, but instead using pip. To do this, create a requirements.txt file in the root of your MLFlow model directory and copy the python packages from the conda.yaml file to the requirements.txt file.
For convenience, here's a bash command that will do this for you if run from the root of your MLFlow model directory:
awk '/- pip:/ {flag=1; next} /^ - / && flag {print substr($0, 5)}' "conda.yaml" > "requirements.txt"
Set up local directory structure
The recommended directory structure for your MLFlow model, dockerfile, and deployment artifacts is as follows:
.
├── Dockerfile
├── mlflow-endpoint.yaml
├── mlflow-deployment.yaml
├── mlflow_model
│   ├── <model_files>
│   ├── requirements.txt
│   └── ...
The rest of the steps should be run from the root of this directory.
Build and push the Dockerfile
Once the dockerfile is configured, build and push the dockerfile to Azure Container Registry (ACR). Azure ML workspaces come with a default ACR, so you can use that. Other ACRs can be used as well, but permission will need to be configured so that the Azure ML workspace and the ACR can access each other.
The ID of the connected ACR is found in the Azure ML workspace's Overview page along with its other resources.
MODEL_NAME: The name of the model you are deploying. It should be the same as the name of the directory containing the model files.DEPLOY_PORT: The port you want to expose on the deployment to use for inference.IMAGE_NAME: The name of the image you want to build.IMAGE_TAG: The tag of the image you want to build.ACR_ID: The ID of the connected ACR.DOCKERFILE_PATH: The path to the dockerfile you want to build.
az acr build --build-arg MLFLOW_MODEL_NAME=$MODEL_NAME --build-arg DEPLOY_PORT=$DEPLOY_PORT -t $IMAGE_NAME:$IMAGE_TAG -r $ACR_ID $DOCKERFILE_PATH
Create an endpoint
RESOURCE_GROUP: The name of the resource group for your Azure ML workspace.WORKSPACE: The name of your Azure ML workspace.
az ml online-endpoint create -f mlflow-endpoint.yaml --resource-group $RESOURCE_GROUP --workspace-name $WORKSPACE
Deploy the model
ENDPOINT_NAME: The name of the endpoint you want to deploy the model to, which should match the name in the endpoint configuration file:
az ml online-deployment create -f mlflow-deployment.yaml --resource-group $RESOURCE_GROUP --workspace-name $WORKSPACE --endpoint-name $ENDPOINT_NAME
Inference
Once the model is deployed, you can test it by sending a request to the endpoint.
DEPLOYMENT_NAME: The name of the deployment you want to test, which should match the name in the deployment configuration file.PATH_TO_DATA_FILE: The path to the data file you want to send to the endpoint.
az ml online-endpoint invoke -n $ENDPOINT_NAME --resource-group $RESOURCE_GROUP --workspace-name $WORKSPACE --deployment-name $DEPLOYMENT_NAME --request-file $PATH_TO_DATA_FILE
Using Azure ML Studio UI
Modify your MLflow model
Snorkel Flow leverages MLflow's [add_libraries_to_model](https://mlflow.org/docs/latest/python_api/mlflow.models.html#mlflow.models.add_libraries_to_model) function to package Snorkel Flow's proprietary source code as a wheel file alongside the model. This action allows the model to run outside of the Snorkel Flow platform. Azure ML natively supports the MLflow model format, but does not support this pre-packaged wheel file. Because of this, you'll first need to modify your MLflow model to be compatible to Azure ML.
To modify your MLflow model:
-
Unzip the downloaded zip file. Unzip the wheel file to the
my-model/codefolder.$ unzip -d my-model my-model-downloaded-from-snorkelflow.zip
$ cd model
$ unzip -d code wheels/snorkelflowmlflow-0.XX.Y-py3-none-any.whl -
Open
my-model/conda.yamland delete this line of code:wheels/snorkelflowmlflow-0.XX.Y-py3-none-any.whl.channels:
- conda-forge
dependencies:
- python=3.8.10
- pip<=20.0.2
- pip:
...
- pydantic==1.10.13
**- wheels/snorkelflowmlflow-0.XX.Y-py3-none-any.whl <- delete this line**
- llvmlite==0.41.1
- cloudpickle==1.6.0
... -
Open
my-model/MLmodeland add this line of code:code: code.flavors:
python_function:
data: data
**code: code <- Add this line**
env: conda.yaml
loader_module: application_package.mlflow_utils
mlflow_version: 2.10.2
model_uuid: 7bf8f4cb4a7e4a5e998a10f3c92ea193
...
Upload the model to Azure ML
Once you've made the necessary modifications to your MLflow model, you can upload it to Azure ML!
- Using an Azure Machine learning studio session, select Models, and then select Register.
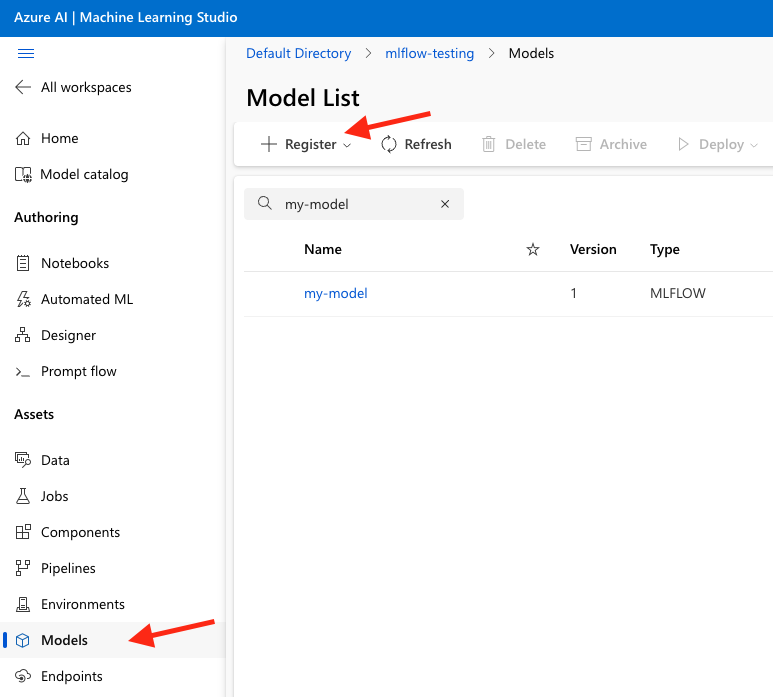
-
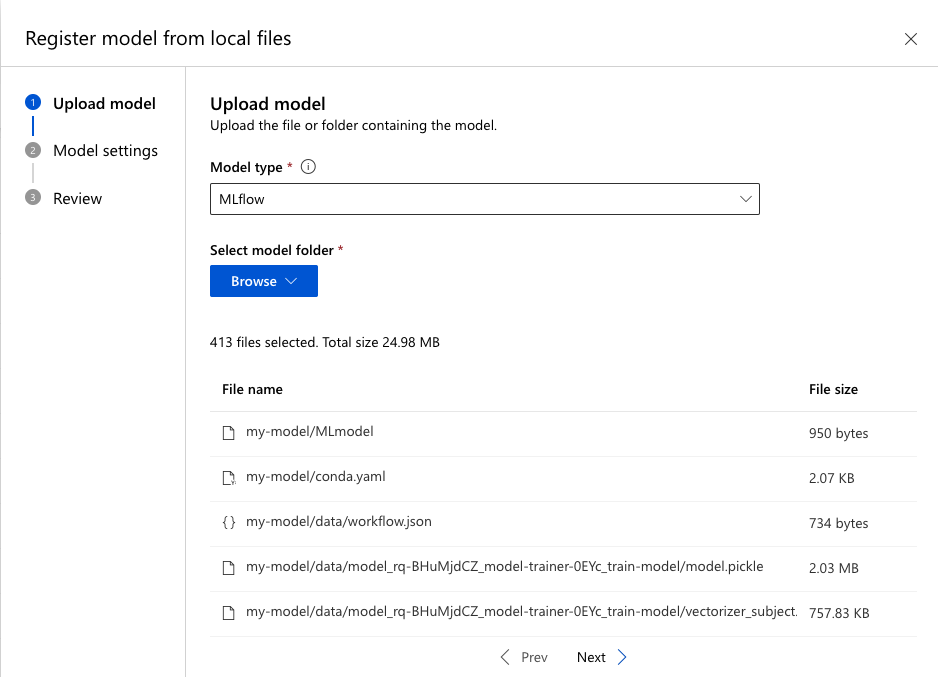
Adjust the following settings, then register the model to Azure ML:
-
Select MLflow as Model type.
-
Select the my-model folder.
-
Use the defaults for all other settings.
Create an endpoint and deploy the model
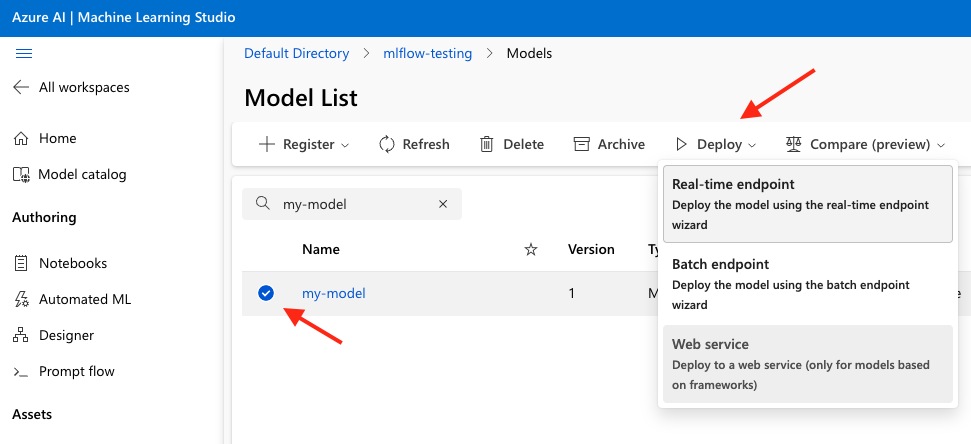
Once your model is registered to Azure ML, you can create an endpoint to deploy your model to.
- Select the model name in the model list, select Deploy, and then select Real-time endpoint.
- Choose a virtual machine with enough memory, then select Deploy. If you are having issues at this stage, see Azure's documentation for troubleshooting online endpoint deployments for more information.
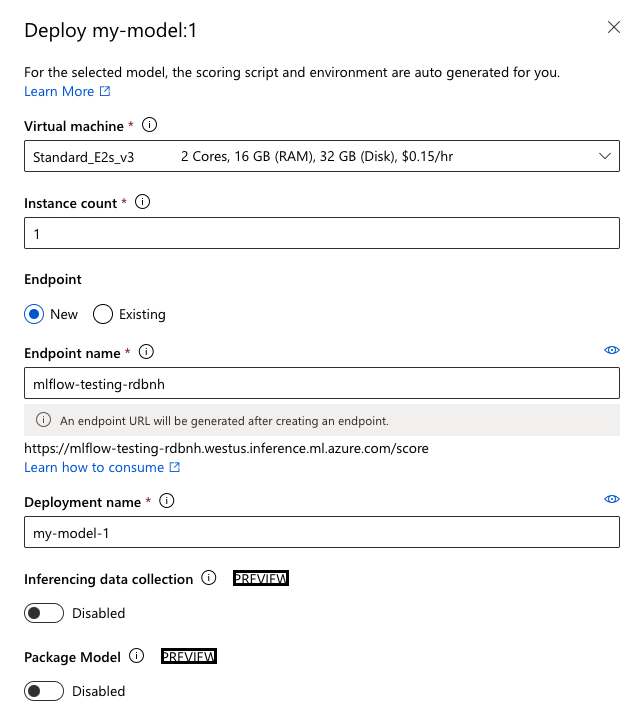
- Select Endpoints in the left-side menu to see the created endpoint.
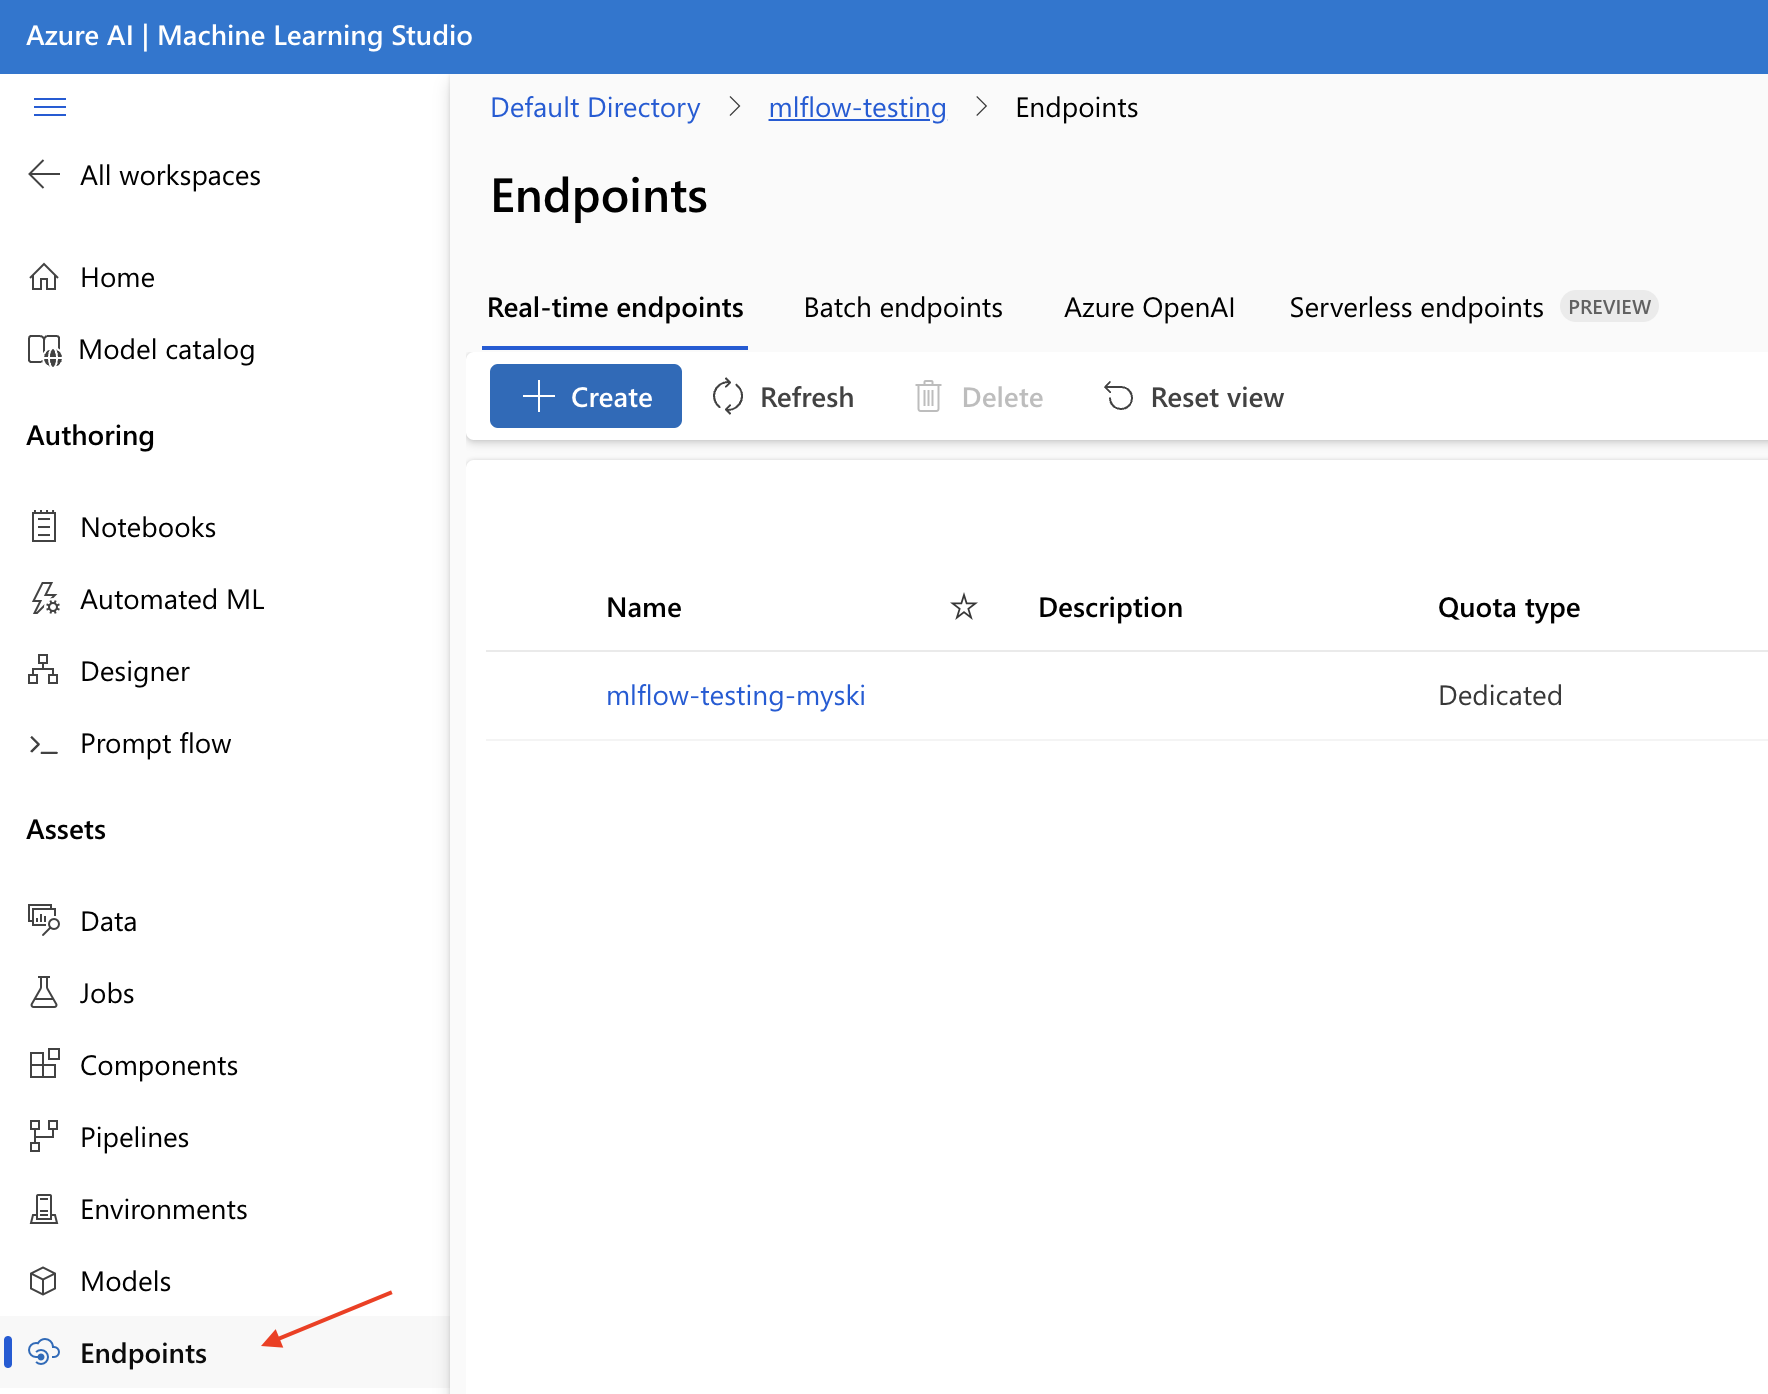
Once the endpoint boots up, you can start testing and running it!
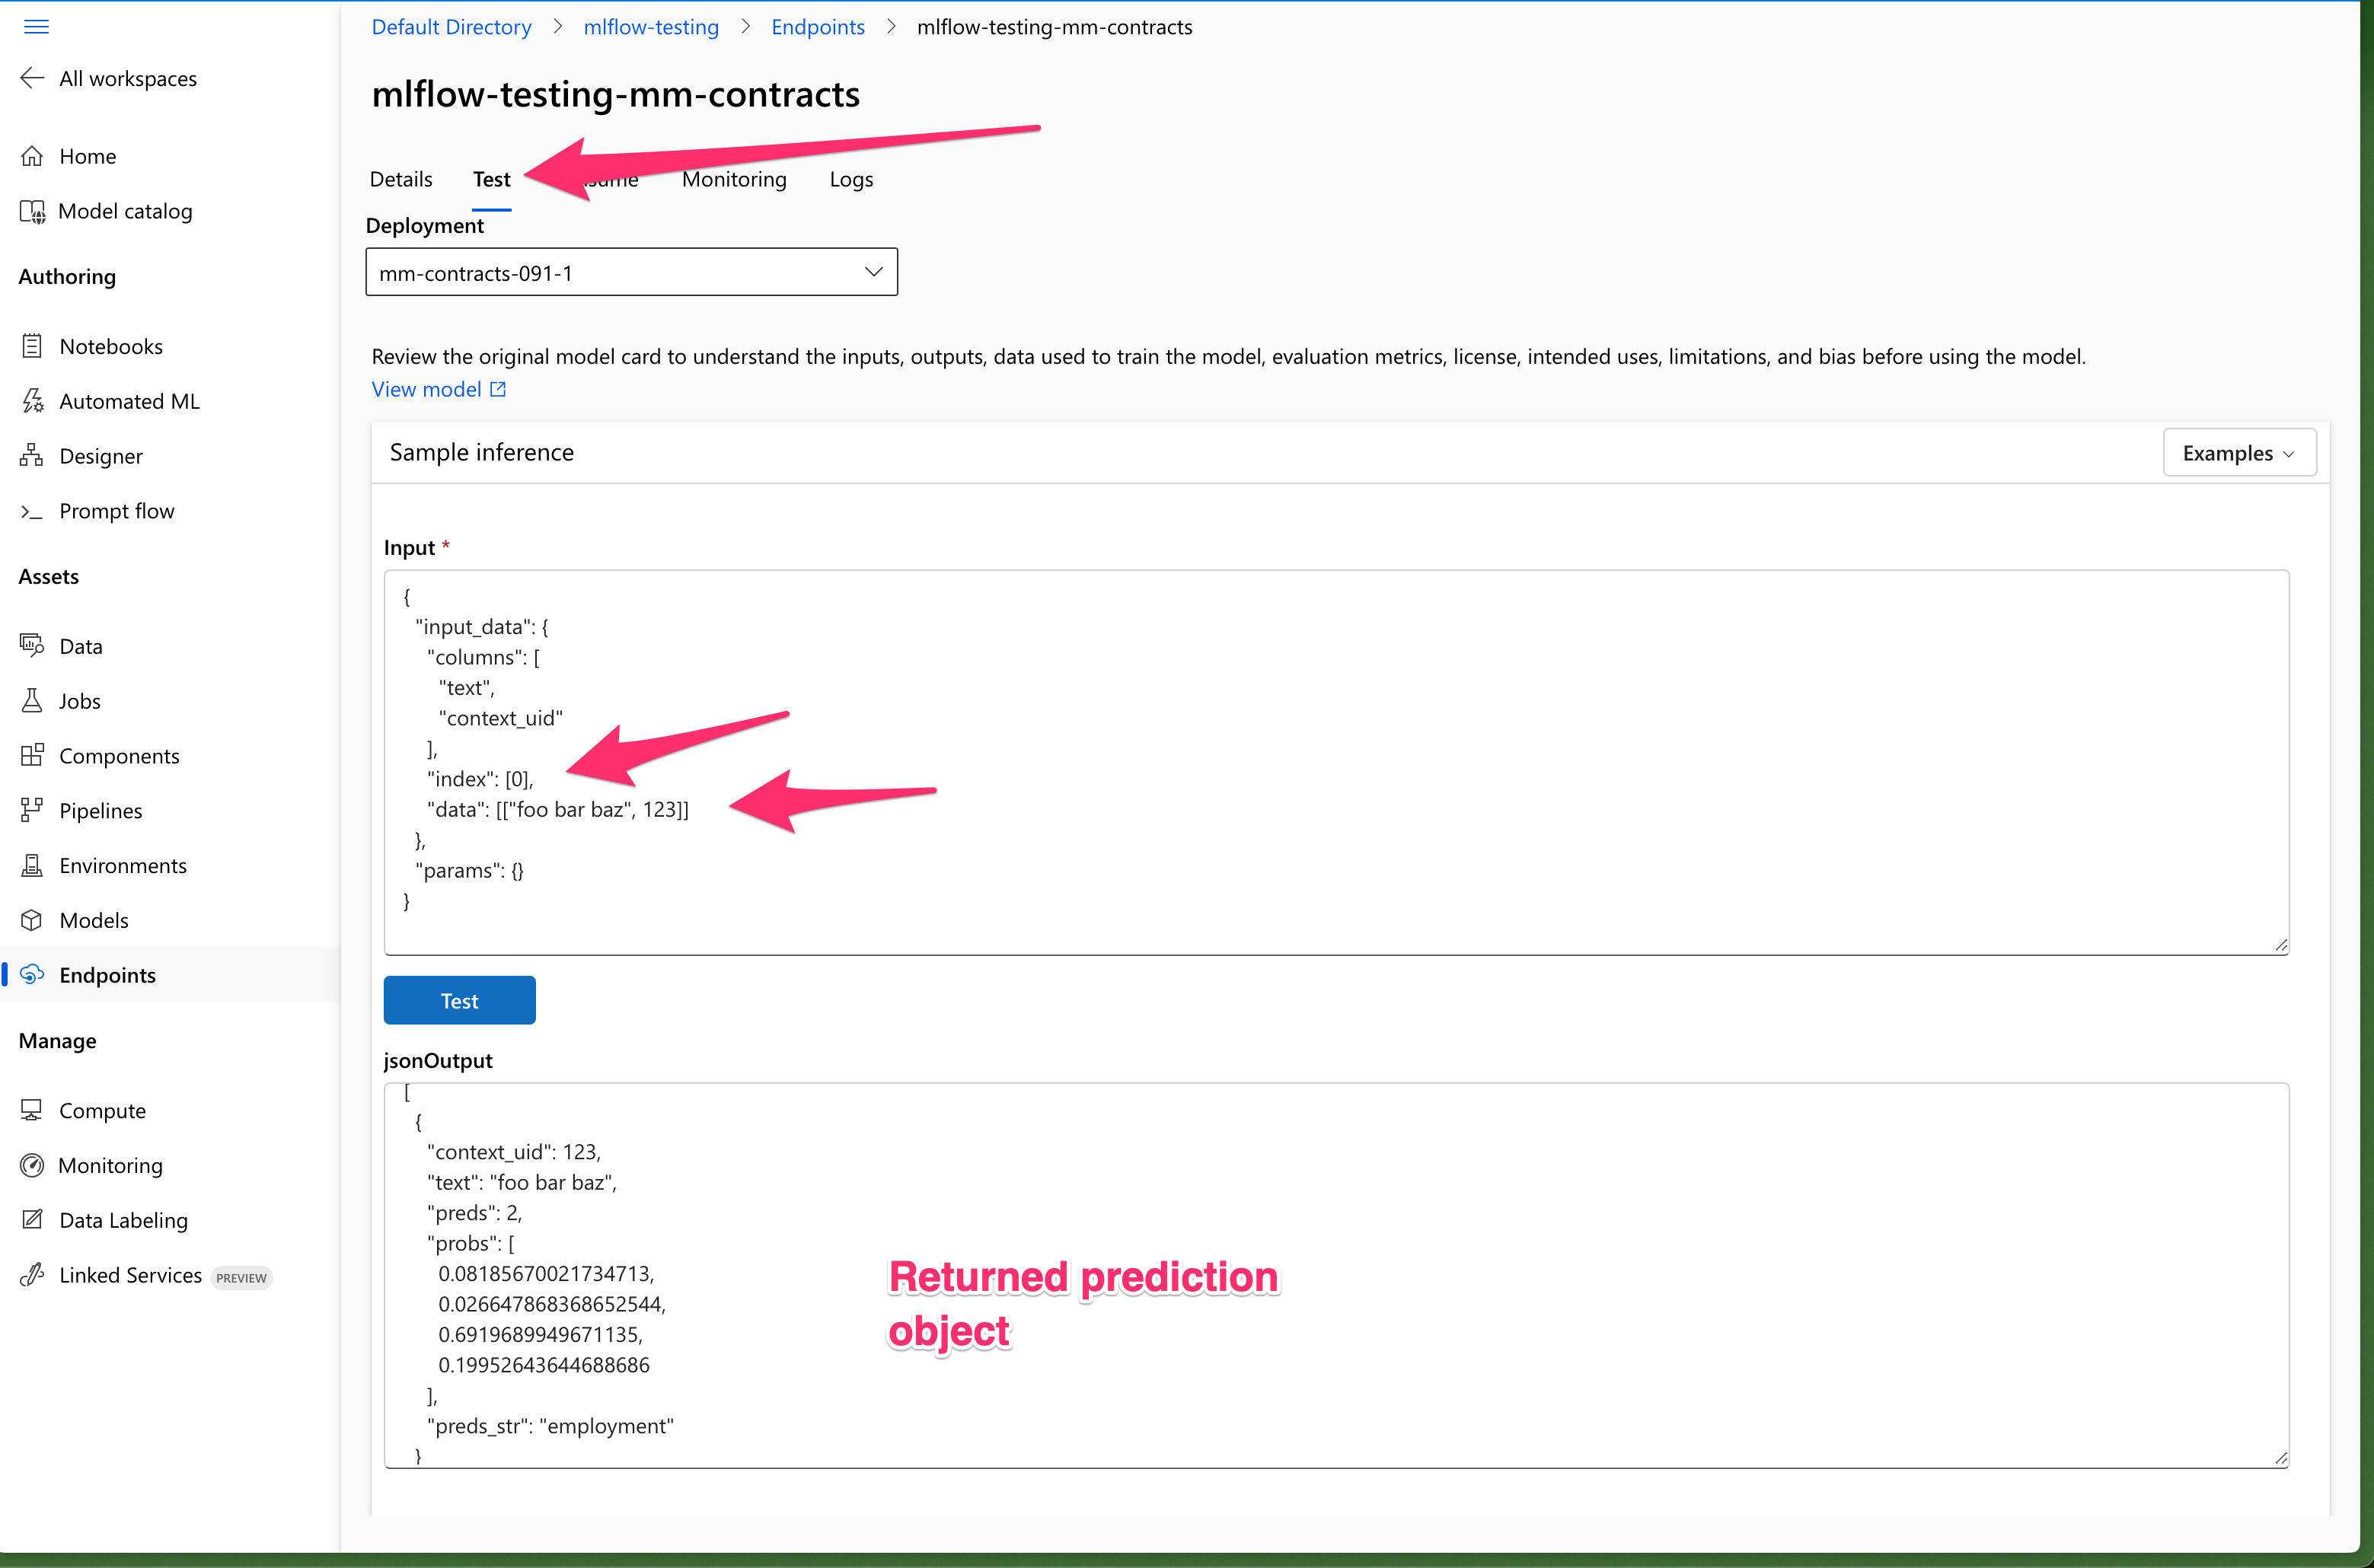
Testing deployed endpoints
From the Endpoints home page, select Test. Use an example record to ensure the returned prediction is returned as expected. Use the Logs section to debug any errors that arise while performing inference.
Conclusion
This article has demonstrated how to export a Snorkel-built model from Snorkel Flow, onboard it to Azure ML, create a deployment endpoint and validate the endpoint's results. If you encounter issues during this process, please reach out to support@snorkel.ai.