Walkthrough for annotators
This page walks through the process of manually annotating documents in Annotation Studio. This walkthrough is designed for users with the Annotator role, who need to access Snorkel Flow to annotate the documents that are assigned to them. Below, you'll find an interactive demo showing how to annotate your data.
The instructions below further outline what you saw in the interactive demo.
Access your batches
After you log in to Snorkel Flow, you need to access your batches to start annotating. Batches are a collection of documents that are assigned to you to manually annotate. A batch is typically a subset of the total documents. With Snorkel Flow, the number of documents that need to be manually annotated is significantly smaller.
To access your batches, click My work on the left-side menu.
The My work page shows a list of batches for you to annotate:

The following information about each batch is available:
- Batch: The name of the batch.
- Status: Specifies whether annotations on the batch have not be started, are in progress, or have been completed.
- Annotators: The list of annotators that have been assigned to annotate the batch.
- Annotated: The number of documents in the batch that have been annotated.
- Size: The total number of documents that are in the batch.
- Created: The date that the batch was created.
Now, you can start annotating your documents!
Annotate your documents
Once you click Annotate, your screen will look similar to the image below:
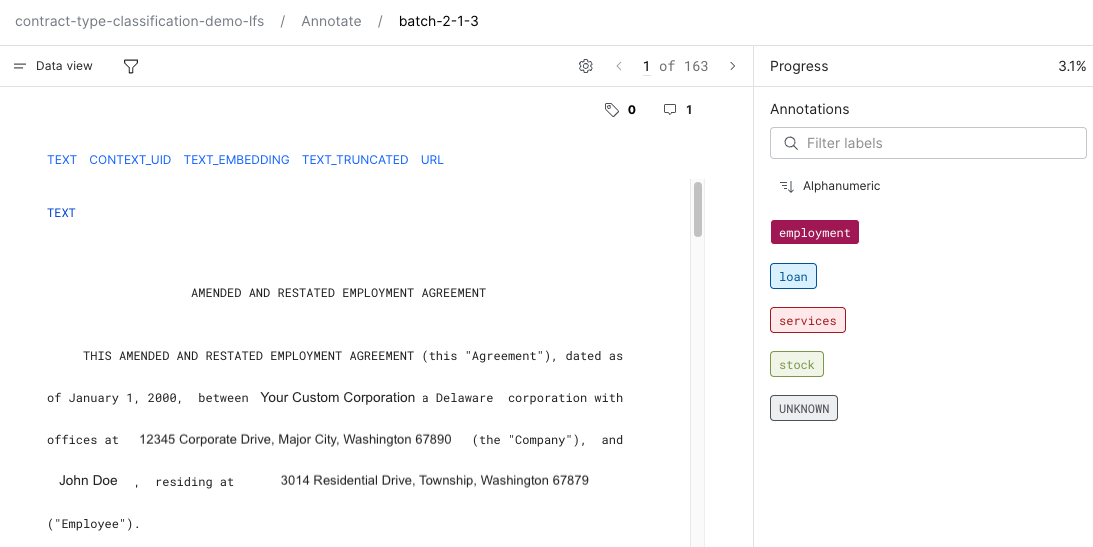
The main canvas shows the document text. For classification and extraction applications, the right side-pane shows all classes that you can label the document.
Here is some information about the various buttons that you can see on your screen:
- Click Data view (or Document view for extraction applications) to change the appearance of the documents in the main canvas. The views that are available differ based on the application type.
- Click the filter
 icon to filter the documents that are shown to you.
 - Click the gear
 icon to adjust various settings. We recommend that you adjust a few settings before you get started annotating.
 - Click the arrow
 icons to page through the documents.
 - Click the slice
 icon to add slices to the document.
 - Click the comment
 icon to add comments to the document. For example, you can write a comment to explain your reasoning behind a selecting a particular label.
Adjust settings
After accessing your documents, we recommend that you first adjust some settings to get some quality of life improvements while annotating! To change your settings, click the gear icon at the top-right corner of your screen. We recommend changing the following settings:
- Select display columns: This setting lets you select and display only the data columns that are necessary for marking your annotations (e.g., the text column). This removes clutter from the main canvas when you are reviewing documents.
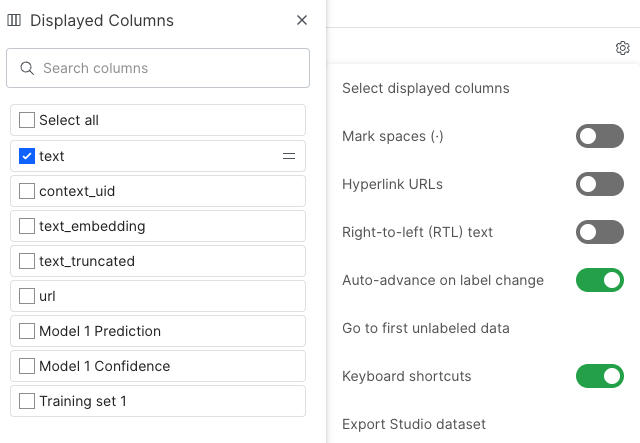
- Auto-advance on label change: With this setting enabled, after you label a document, you automatically go to the next document. This prevents you from having to manually click the arrow icons to page through the documents every time to view new, unlabeled documents. This setting is only available for single-label and text extraction applications.
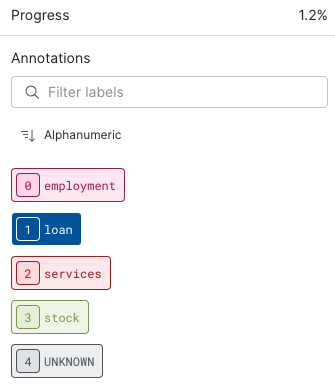
- Keyboard shortcuts: With this setting enabled, keys are assigned to each label class, which makes it quicker to assign a label. In the example below, if you want to label a document "employment," then you just have to press 0 on your keyboard.
Here are descriptions of the rest of the settings that are available when you click the gear icon:
- Mark spaces (·): Replaces all spaces in your document with a dot (·).
- Hyperlink URLs: Hyperlinks any URL in your document. This makes it easier to see links in your documents and allows you to click the hyperlink to go directly to the website.
- Right-to-left (RTL) text: Right justifies your document text. By default, the document text is left justified.
- Go to first unlabeled data: Brings you to the first document in the batch that has not yet been annotated. This option is helpful any time you re-enter a batch to continue annotating.
- Export Studio dataset: Export your dataset into a CSV file.
How to Annotate
The following sections walk through how to annotate documents for the four different task types:
Single-label classification applications
In single-label classification applications, your goal is to assign a single class to each document. For example, assigning banking contract documents to one of the following classes: "employment," "loan," "services," or "stock." For more information about this setting, see Set the default label for multi-label annotation applications.
On the right-side pane, you'll see all possible classes that you can label your document. To label a document, click the class in the right-side menu. Then click the arrow button to move on to the next document. If you adjusted the recommended settings, then you use can use the keyboard shortcut to assign a class, and then you will automatically be brought to the next document.
Multi-label classification applications
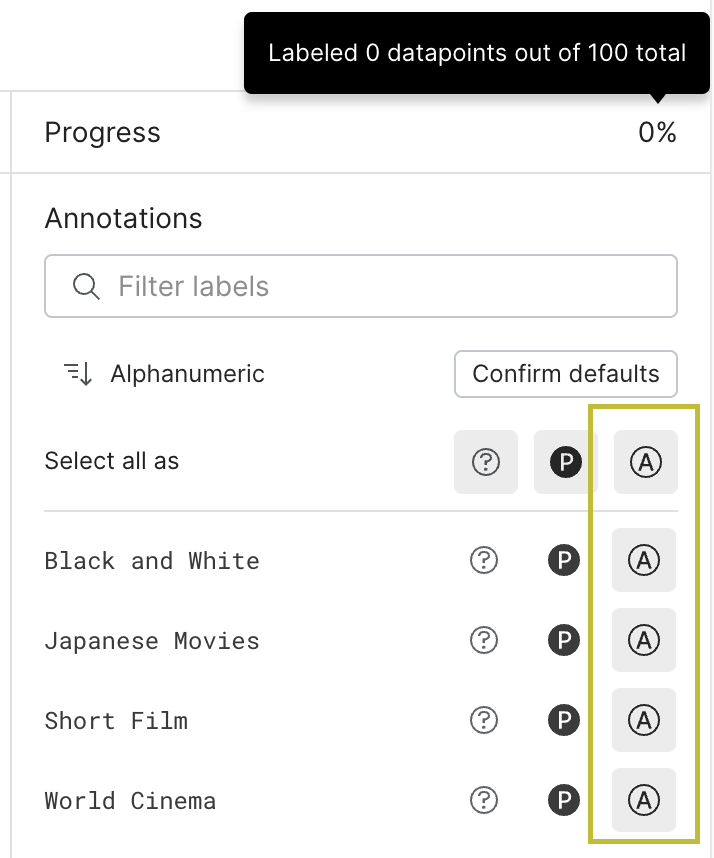
In multi-label classification applications, individual documents can have multiple label values. For example, let's say you are looking at movie review documents. You can label the movie as "Short Film," "Black and White," "Japanese Movies," or "World Cinema." Given these labels, you can see that a single movie can fall into multiple categories. In this case, for a given document, you can label each possible class as present, absent, or abstain from voting.
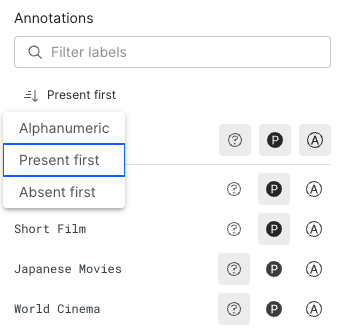
On the right-side pane, you'll see all possible classes. For each class, you can click:
 to label the class as Abstain.
 to label the class as Present.
 to label the class as Absent.
By default, all classes are initially labeled as Abstain. If enabled for your application, you can set the default label for each class to either Present, Absent, or Abstain.
You can also sort the classes, which is particularly helpful for applications with a large number of classes. You can sort classes marked as Present first, classes marked as Absent first, or in Alphanumerical order.
(Beta) Set the default label for multi-label annotation applications
This is a beta feature available to customers using a Snorkel-hosted instance of Snorkel Flow. Beta features may have known gaps or bugs, but are functional workflows and eligible for Snorkel Support. To access beta features, contact Snorkel Support to enable the feature flag for your Snorkel-hosted instance.
In multi-label classification applications, individual documents can have multiple label values. For a given document, you can label each possible class as present, absent, or abstain from voting. From the Overview page, you have the option to set the default label value for your application. This is helpful in situations where different teams in your organization want their default label to be different based on their particular use case. In addition, this setting is application specific so it will only affect your current working application.
This functionality is a beta launch that is only made available on a request basis. Please contact your Snorkel representative if you are interested in getting access.
Follow the steps below to set up your default label:
- Click the menu in the top right corner of your screen.
- In modal, select a default label of Present, Absent, or Abstain from the dropdown.
- Click the Save button to save your changes.
- Open a batch and then you'll see that for unlabeled documents, the default label is set as your selection.
- You can now take one of the following actions when reviewing a document:
a. You can select labels however you like.
b. You can go with the default labels by clicking the Confirm defaults button.
You can see the progress has gone up after you've completed either of the actions listed above and the state has changed to Labeled.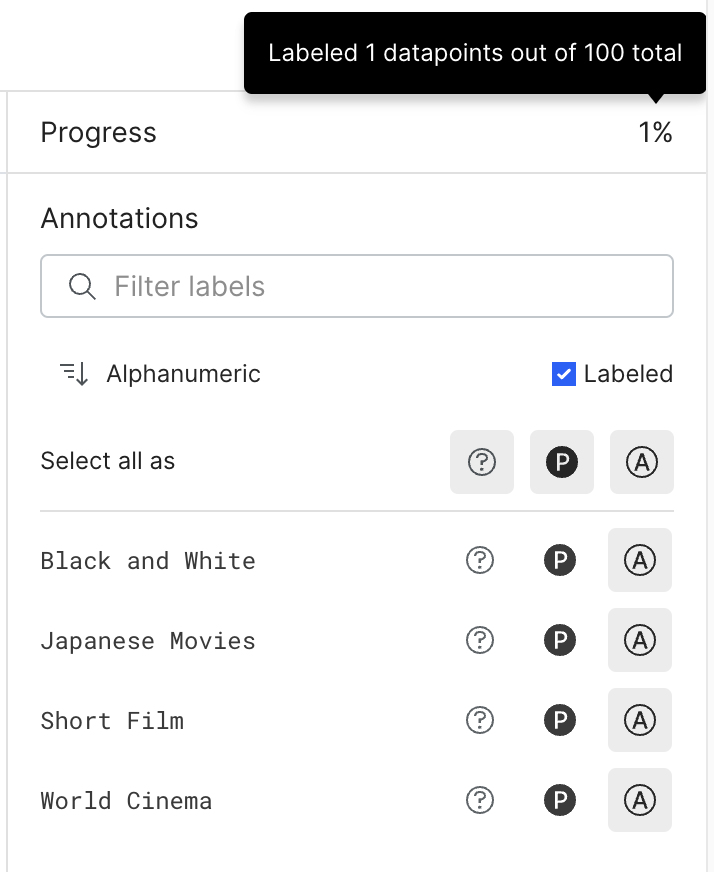
- If you want to revert your changes and go back to the unlabeled state, click Labeled. The modal asks for your confirmation as this action cannot be undone.
- After you confirm, the document returns to an unlabeled state. You'll also see the Confirm defaults button again along with the default labels and progress.
You can also change your default label while annotating your batches. This action will not affect any of the labeled documents and only reflect the default label for unlabeled ones.
Text extraction applications
In text extraction applications, the goal is to extract key information from a document. For example, let's say that we want to extract all dates from a document. In this case, a date is considered a span. Your goal in this example is to review all highlighted spans in a document and identify whether the highlighted spans are in fact dates. You can label each highlighted span as "NEGATIVE," "POSITIVE," or "UNKNOWN" in the right-side pane. In this example, "POSITIVE" means that the highlighted span is a date, and "NEGATIVE" means that the highlighted span is not a date.
If you adjusted the recommended settings, then you can use the keyboard shortcuts to label a span, and then automatically to be brought to the next highlighted span in the document.
By default, you will be viewing the spans in Document view. We recommend annotating in either Document view or Span view:
- Document view shows the entire document on the main canvas. You can use the up and down arrows on your keyboard to navigate between spans of text to annotate. This view provides you with all context surrounding a span.
- Span view shows a single span per page. With this view, you don't have all the context surrounding a span. However, the simplified view can enable you to more quickly annotate things like dates that are easy to identify with less context.
Sequence tagging applications
In sequence tagging applications, your goal is to highlight and label spans throughout a document. Spans are key pieces of information that you want to extract from a document. For example, let's say we want to identify all mentions of company names in a document. In this case, a company name is considered a span. Your goal is then to highlight and label all company names that you find while reading through the document.
To label spans in Annotation Studio:
- Highlight a span.
- Select the label that you want for that span in the Annotation modal.
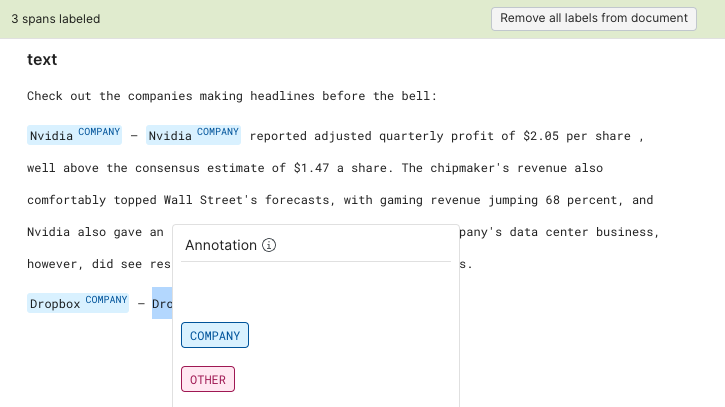
If you don't find any spans to label in the document, you can indicate this by clicking the Label entire document as OTHER button above the document text.

At any point, you can reset and clear all spans that you have labeled in the document by clicking the Remove all labels from document button above the document text.

Check progress
While you are annotating documents, you can see your progress percentage tick up in the right-hand corner of your screen.

Once you are finished, your progress bar will be labeled 100%, and the status will be updated to Complete on the Batches page.
Review comments and slices
Occasionally a reviewer will leave comments on documents. For example, if you left a comment asking a clarifying question, a reviewer may respond to your comment. To see all documents with comments:
- Click the filter icon.
- Click Comments.
- Under User, select the person that you want to see comments from. Alternatively, you can select Any user.
- Click the checkmark
 to save the filter.
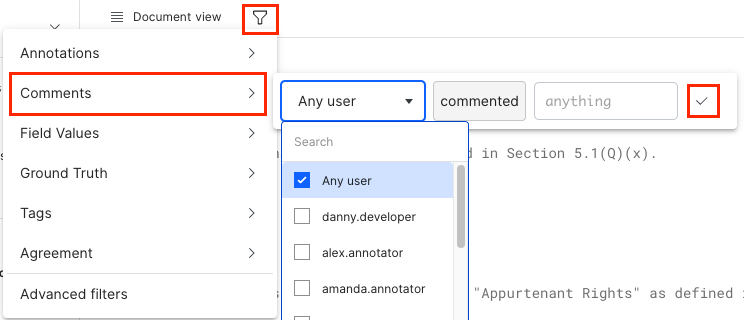
Now, just the documents with comments are shown, making it easier for you to review any comments.
Learn more about slices in Using data slices.
You can follow similar steps to filter documents based on slices:
- Click the filter icon.
- Click Slice.
- Under Slice, select a slice option.
- Under Operator, select is if you want to see all documents with that slice or is not if you want all documents with that slice removed from view.
- Click the checkmark to save the filter.