Create batches
This page walks through how you can create batches of documents for manual annotation when the dataset does not use multi-schema annotations.
To create batches and commit annotations to ground truth, you must have the Developer role. For more information about access and permissions, see Roles and user permissions.
What are batches?
Before documents can be annotated in Annotation Studio, they must be assigned to batches. A batch is simply an arbitrary collection of data points—it can be as large as an entire split or data source or as small as a few examples.
Typically, you'll want documents manually annotated at a couple different points during the data development process:
- At the beginning of a project so that you can get some initial ground truth to begin development.
- During labeling function (LF) and model development. The development cycle is an iterative process and you may find that your models are struggling to predict certain chunks of documents well. For example, if you are classifying documents into one of ten different classes, the model may predict some classes better than others. In this case, you'll want some additional ground truth on those classes that the model is struggling to predict.
How to create batches
There are three ways that you can create batches in Snorkel Flow:
- Annotation Studio: Best method to use at the beginning of a project to get some initial ground truth.
- Develop (Studio): Best method to use during the LF and model development process were you can pinpoint chunks of data points that need more ground truth.
- In-platform notebook: Best method to use if you have a specific list of x_uids that you want to create batches from. All batches that you create can be seen and managed in the Batches page. This page can be accessed by opening an application, then clicking Batches in the left-side menu.
Create batches in Annotation Studio
The easiest way to create batches is in Annotation Studio from the Batches page. This method is convenient at the beginning of a project when you need some initial ground truth to begin development.
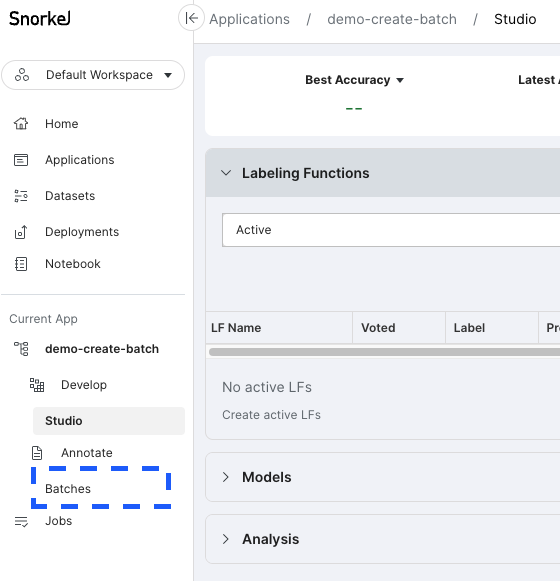
To access the Batches page, Click Batches on the left-side menu.
Then click + Create a new batch to bring up the Create new batch modal. Specify the following options:
-
Batch name: A name for the batch. If you choose to create multiple batches (by setting the Number of batches option to a value greater than 1), then each batch will be named the specified name with an appended numerical index to differentiate the batches.
-
Select a value: Specifies the data source from where to create the batch. Each batch comes from a single source—either a split, a data source, or an existing batch.
-
Shuffle data order: Shuffles the order of the data points in your data source. Batches are created by selecting data points in order up to the Batch size that you specify. This option enables you to randomly sample which data points go into each batch. If you select the dev split as the data source, then you can choose data selection strategy for sampling your data in the Data selection strategy option.
-
Data selection strategy: If you specify the dev split as the data source in Select a value option, then you can select a strategy for data selection. You can choose from the following options:
- Uniform random sampling: Randomly sample which data points go into each batch.
- Active Learning - Model confidence: If you have already developed labeling functions and built a model, then set this option to create a batch from the data points with the lowest model confidence.
- Active Learning - Model entropy: If you have already developed labeling functions and built a model, then set this option to create a batch from the data points with the highest model entropy.
-
Number of batches: Specifies how many batches to divide the data source into. The default value is 1 but you can specify a value up to 100.
-
Batch size: Specifies the number of data points in each batch. The maximum batch size that you can specify is 10,000 data points. If no value is provided, it will divide the data source as evenly as possible among the specified Number of batches.
noteFor extraction applications, the Batch size represents the number of spans. This means that if each document has a large number of spans, then the total number of documents in your batch will be significantly smaller than the Batch size that you specify.
For all other applications, the Batch size represents the number of documents. -
Assign to (optional): Optionally select one or more annotators to assign to the batch(es). You will have the option to add and remove annotators once the batch is created.
Once you are happy with your selections, click Create Batch. The new batch or batches can now be seen on the Batches page.
Create batches in Develop (Studio)
You can also create batches in Develop (Studio) during LF and model development. This method is convenient when you have certain chunks of data that your model is struggling to predict well. For example, if you are classifying documents into one of ten different classes, the model may predict some classes better than others. In this case, you'll want some additional ground truth on those classes that the model is struggling to predict.
To create a batch in Develop (Studio):
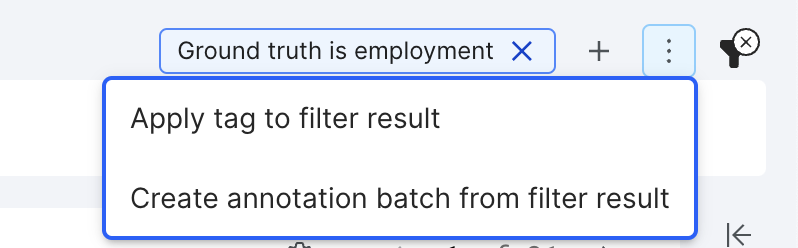
- Filter you data to just the types of documents that you want manually annotated. See Dataviewer: Filter data for more information about the types of filters that are available.
- Click the three dot overflow menu, then click Create annotation batch from filter result.
- The Create new annotation batch modal will pop up and tell you how many filters have been applied to your data. Specify the following options:
- Batch name: A name for the batch.
- Assign to: Select one or more annotators to assign to the batch. You will have the option to add and remove annotators once the batch is created.
- Sampling rate: The percentage of documents from the filtered data set to sample in the new batch. Specify a decimal up to 1. If you specify 1, then the batch will contain all data points from the filtered set.
- Document overlap: If more than one annotators is assigned to the batch, then this option specify the percentage of in documents that will overlap
- Split set equally: If more than one annotators is assigned to the batch, then this option specify if the documents should be split equally among the annotators.
- Click Create batch.
- In the Batches created modal, you can see information about the batch that you just created. Click the
 icon to copy a link that takes you to the batch in Annotation Studio.
 - Click Cancel to return to Studio.
To manage the batches that you create in Develop (Studio), click Batches in the left-side menu to get to the Batches page.
Create batches with the in-platform notebook
You can also create batches using the SDK in the in-platform notebook. This method is convenient if you have a specific list of x_uids that you want to create batches from.
You can create batches in the SDK using the create_batches function. Some examples of how to use the function can be seen below. You can search create_batches in the SDK documentation for more information about the parameters.
# Creating batches with default parameters.
sf.create_batches(node, username="assigner", assignees=["user 1", "user 2"])

# Creating a batch with specific data points using the index. Data points must be from the same split.
sf.create_batches(node, username="assigner", assignees=["user 1"], x_uids=["span::5", "span::7"])

# Creating batches with a fixed number of data points.
sf.create_batches(node, username="assigner", assignees=["user 1", "user 2"], batch_size=10)

# Creating batches with a fixed number of documents.
# In candidate-based extraction applications the data points are spans, but users would like to create batches of documents.
sf.create_batches(node, username="assigner", assignees=["user 1", "user 2"], batch_size=5, sample_by_docs=True)
To manage the batches that you have created with the SDK, open your application in Snorkel Flow, then click Batches in the left-side menu to get to the Batches page.