Azure Infrastructure Setup - Terraform (Recommended)
This page walks through the steps that are required to deploy a new Kubernetes cluster to your existing Azure account, including the creation of all required resources. This process requires both the Azure CLI and the web interface.
Pre-requisites and Azure features
In this section, we walk through the pre-requisites for creating a new cluster in Azure, and enable any Azure features that Snorkel Flow requires to run.
To begin, you will need a few command line tools. Install the current versions of the following tools if you do not have them already installed.
Now you can run az login to login with an Azure account or service principal with appropriate admin permissions. Ensure that you specify the --tenant flag.
We require Azure features that are currently only available in Preview. You must ensure that they are activated and registered for your account. You can register for the required Azure Preview features with the following commands.
- Azure Preview
-
az extension add --name aks-preview -
az extension update --name aks-preview
-
- Azure Files NFS mounting in AKS
-
az feature register --name AllowNfsFileShares --namespace Microsoft.Storage -
az provider register --namespace Microsoft.Storage -
Wait around 15 minutes, and ensure that outputs are "Registered"
az feature show --name AllowNfsFileShares --namespace Microsoft.Storage --query properties.state
-
Provision the required infrastructure and run Terraform
Once you have set up the required pre-requisites, you can create the cluster that Snorkel Flow runs in, alongside any required resources.
- Create a new resource group where your account / service principal that you previously logged in with is an Owner of the resource group.
- Ensure that an Azure AD group where members will have admin access to the newly created cluster exists (your account / service principal is an owner and/or member of this group).
- Create a new virtual network with a subnet (suggest at least /18 address space) in the resource group.
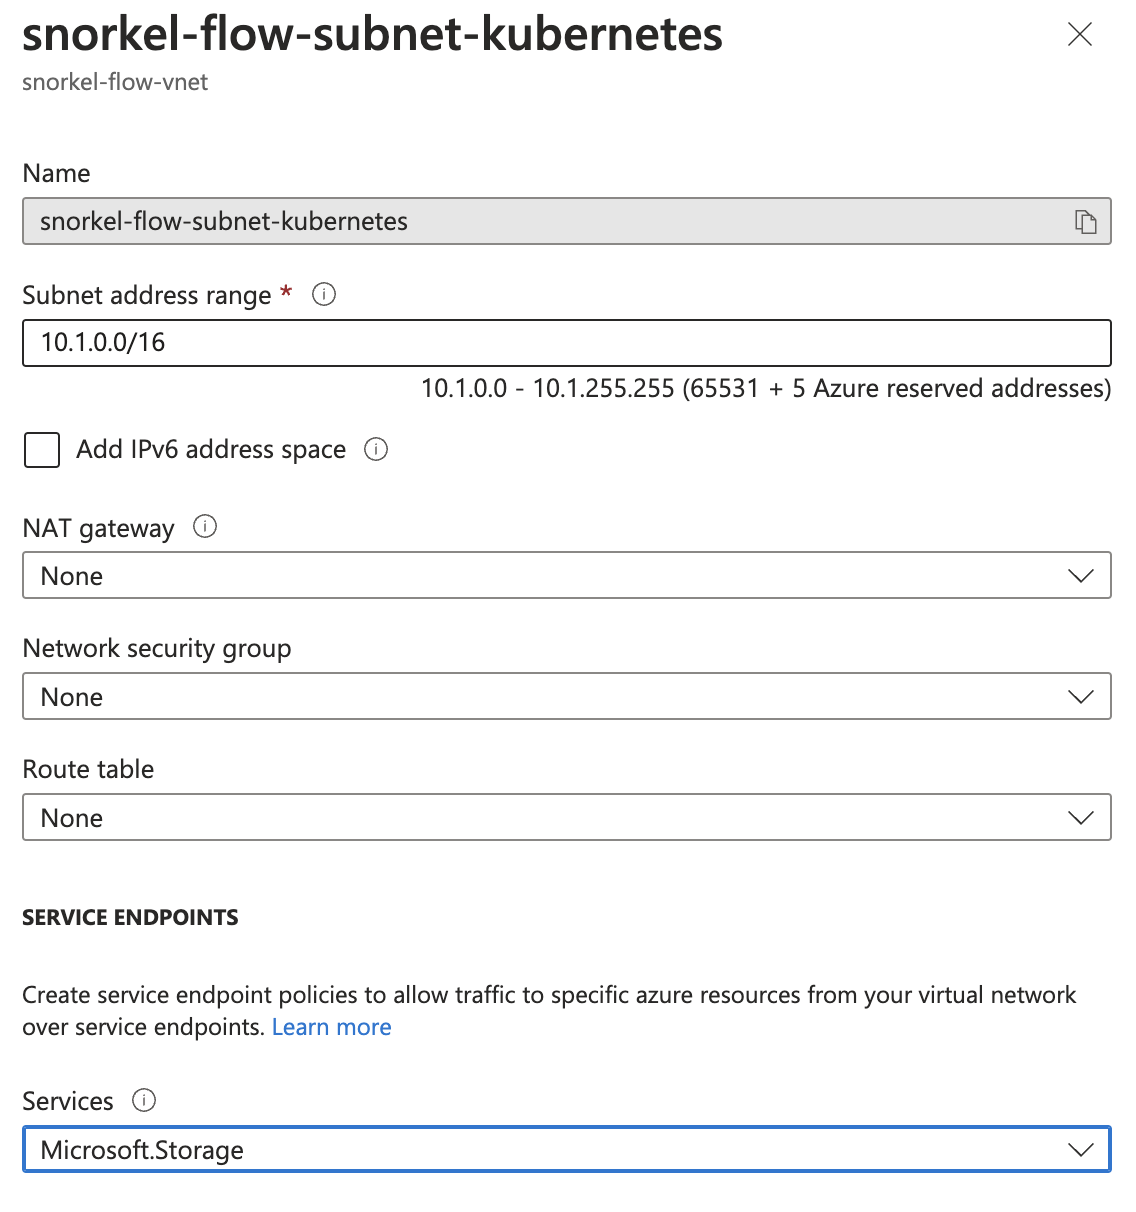
- After creating the subnet, go to the Azure UI and find the subnet in the Virtual Networks page. Ensure that Microsoft.Storage is checked under Service Endpoints in the subnet configuration (see the screenshot below).
-
Select both options under Network policy for private endpoints ( i.e., Network security groups and Route tables).

-
You can use your existing Azure DNS zone, or create a new one for Snorkel Flow (learn how to create an Azure DNS with a delegated domain).
-
[OPTIONAL] If you would like to configure TLS, then create a new Azure Key Vault and generate and/or import certificates:
az keyvault create -g snorkel-flow-rg -l <Location> -n <KeyVaultName> --enable-rbac-authorization -
Gather the required variables:
-
Open variables.tf to see the resource groups that are defined. Note that getting the subnet ID may require you to use the CLI if it is not available in the UI.
az network vnet subnet list --resource-group snorkel-flow-rg --vnet-name snorkel-flow-vnet | grep id -
Open terraform.tfvars and fill in the exposed variables. Here are a few important ones:
- subnet_id: The ID of an existing subnet to deploy into.
- admin_group_id: The ID of the group that will be granted admin access to the new cluster.
- vm_size_node: The VM size of the cluster node.
- gpu_support: Enable GPU support for the cluster.
- vm_size_gpu_node: The VM size / type of the GPU node. This requires gpu_support to be enabled.
-
-
Initialize Terraform.
terraform init -
Check that the resources to be created are correct.
terraform plan -
If everything looks good, then you can apply the configuration.
terraform apply -
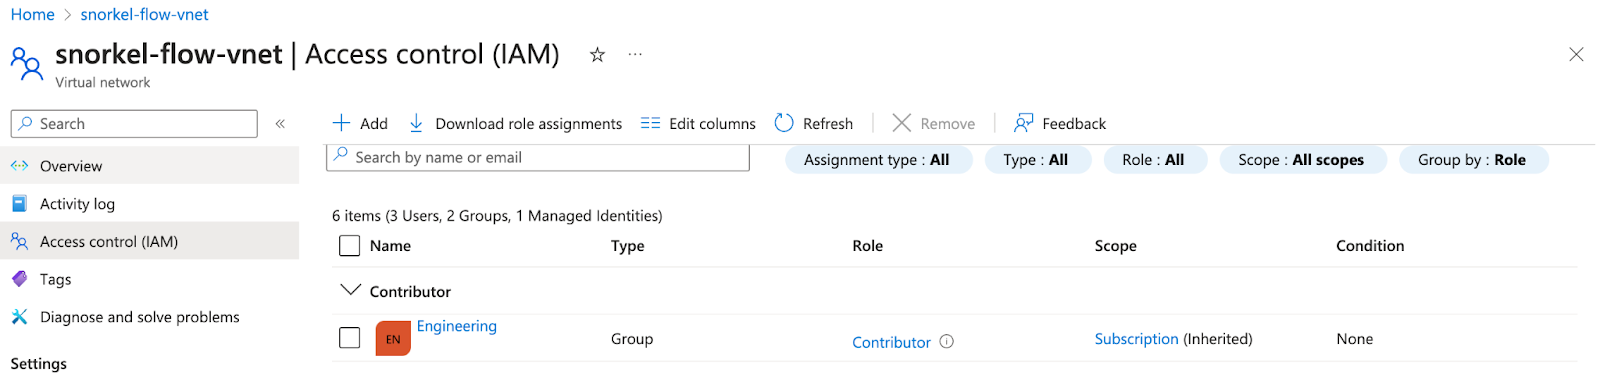
Configure the Virtual Network Role Assignment for the manually provisioned resources:
-
Go to the overview page of the virtual network that you created in step 3, and click Access control (IAM)
-
Click Add, then click Add role assignment.
-
Select Network Contributor, then click next.
-
Check Managed identity (this is next to Assign access to).
-
Click Select members, then select Kubernetes service (this is under Managed identity).
-
Select the snorkel-flow-cluster (ensure it is the cluster that you created by terraform in the previous step), then click Select.
-
Click Review and assign to finish.
-
Set up kubectl access.
az aks get-credentials --resource-group snorkel-flow-rg --name snorkel-flow-cluster --adminIf this command doesn't work:
- Go to the cluster overview page.
- Click the cluster configuration tab on the left-hand side.
- Ensure that the Kubernetes local accounts checkbox is checked.
-
Enable the ingress controller add-on.
az aks enable-addons -g snorkel-flow-rg -n snorkel-flow-cluster --addons azure-keyvault-secrets-provider,web_application_routing --enable-secret-rotation -
Get the object (principal) ID of the managed identity of the web-app-routing add-on from the Azure UI and save it under the name MANAGEDIDENTITY_OBJECTID.
-
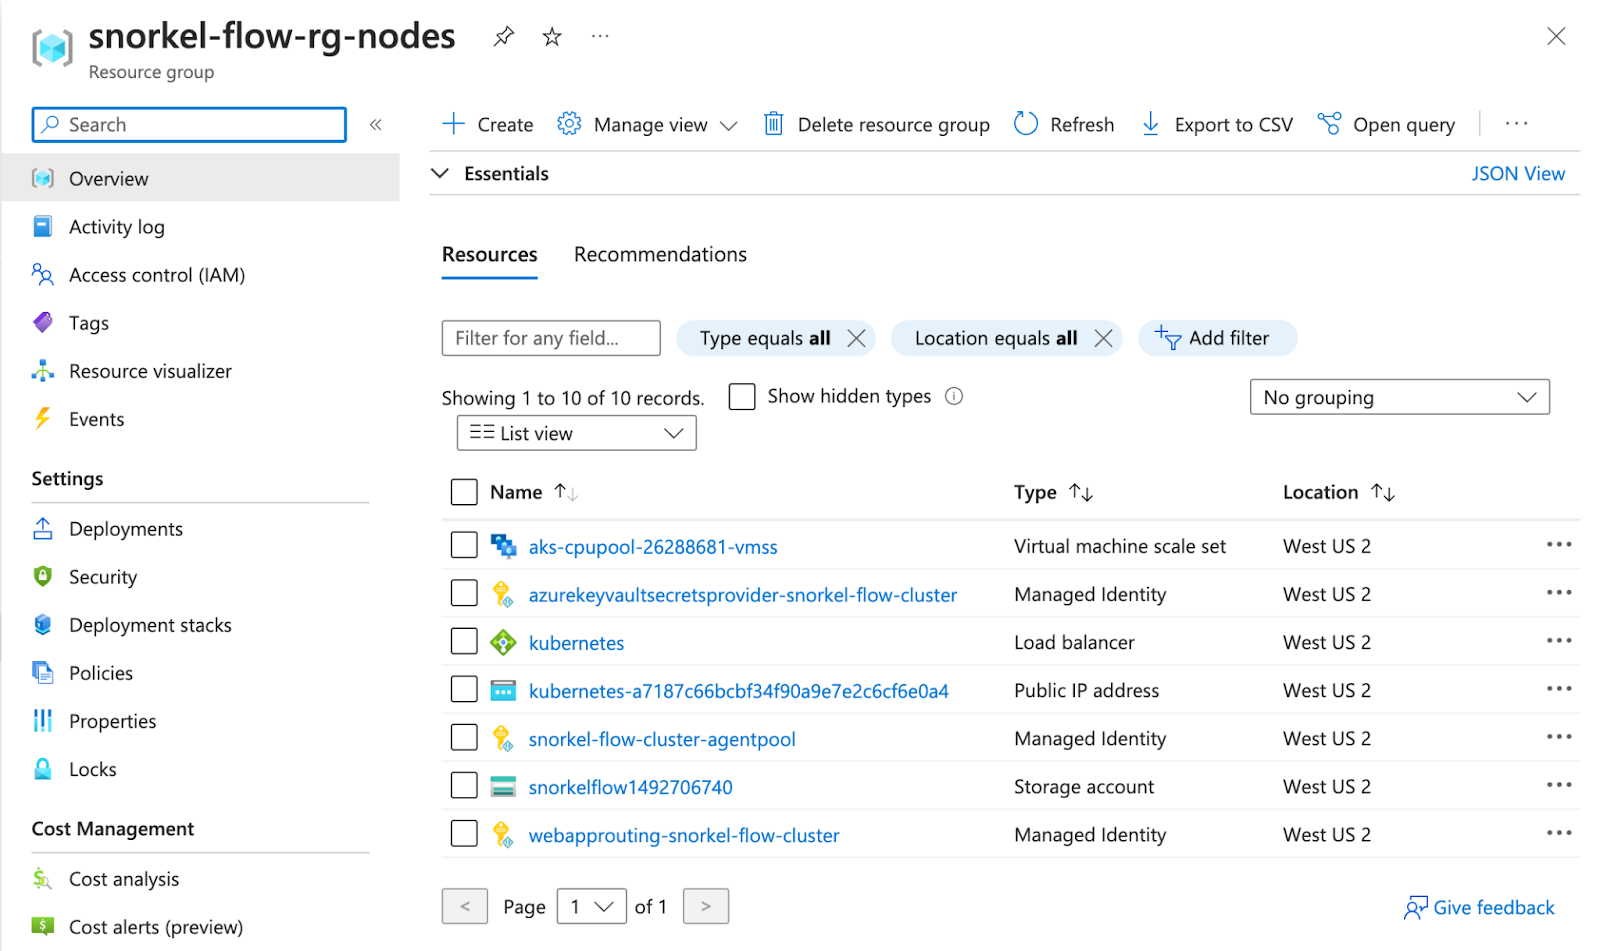
From the Azure console, go to Resource Groups.
-
Select the resource group that was created by the Snorkel Flow installation process. This is not the one that is defined in variables.tf, but rather the other automatically created one that ends in -nodes (e.g., snorkel-flow-rg-nodes).
-
Search for the appropriate managed identity. This should start with webapprouting- (e.g., webapprouting-snorkel-flow-cluster at the bottom of the list below).
-
To enable automatic management of DNS records, connect the ingress controller add-on to Azure DNS. Get the resource ID of the Azure DNS zone that you created in step 5 from the Azure UI (select the DNS Zone, then click Properties), then save it under the name ZONEID.
-
az role assignment create --role "DNS Zone Contributor" --assignee $MANAGEDIDENTITY_OBJECTID --scope $ZONEID -
az aks addon update -g snorkel-flow-rg -n snorkel-flow-cluster --addon web_application_routing --dns-zone-resource-id=$ZONEID -
Connect the ingress controller add-on to Azure Key Vault (for automatic management of TLS certs).
-
KEYVAULTID=$(az keyvault show --name <KeyVaultName> --query "id" --output tsv) -
az role assignment create --role "Key Vault Secrets User" --assignee $MANAGEDIDENTITY_OBJECTID --scope $KEYVAULTID