Dataviewer: Filter data
This page walks through how to filter the data points that you see in the dataviewer.
Add and delete filters
To add a filter:
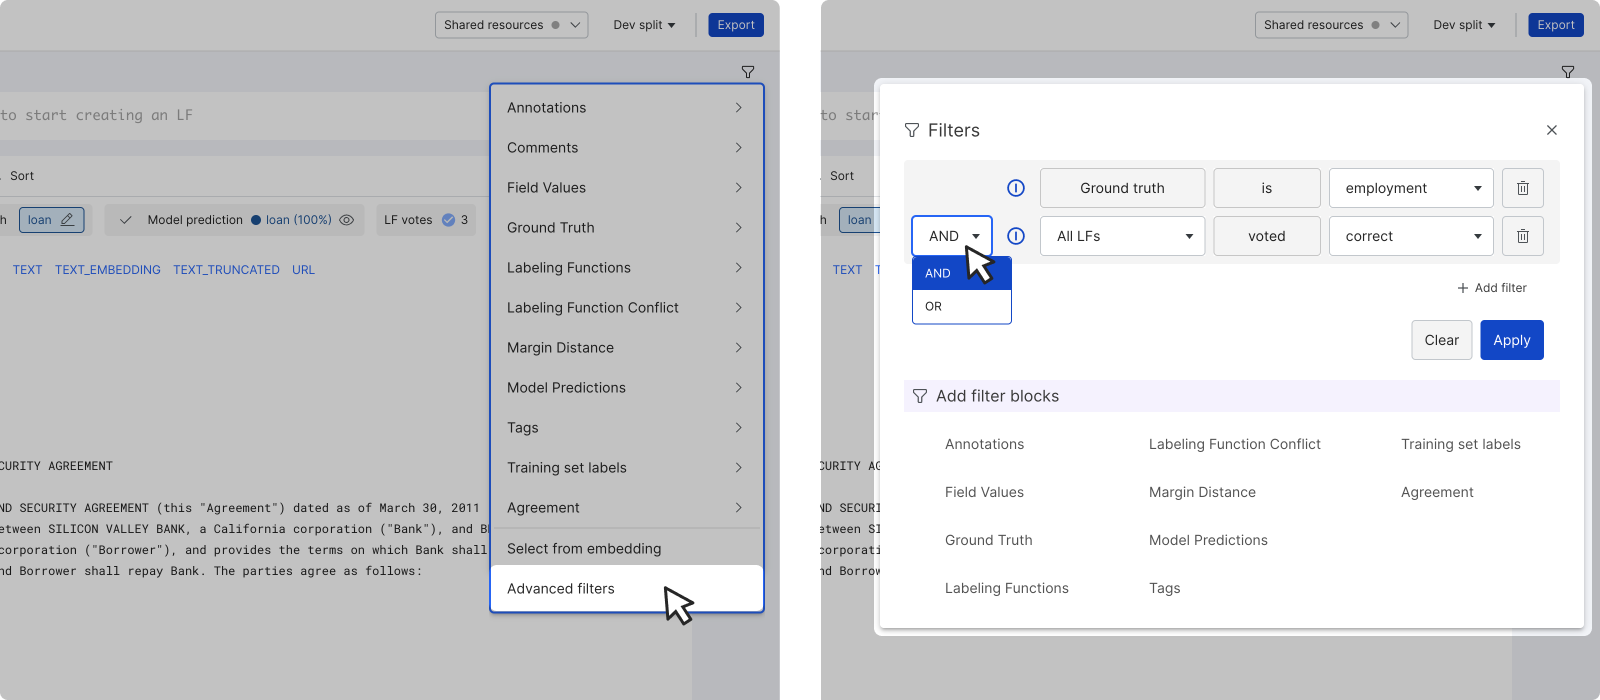
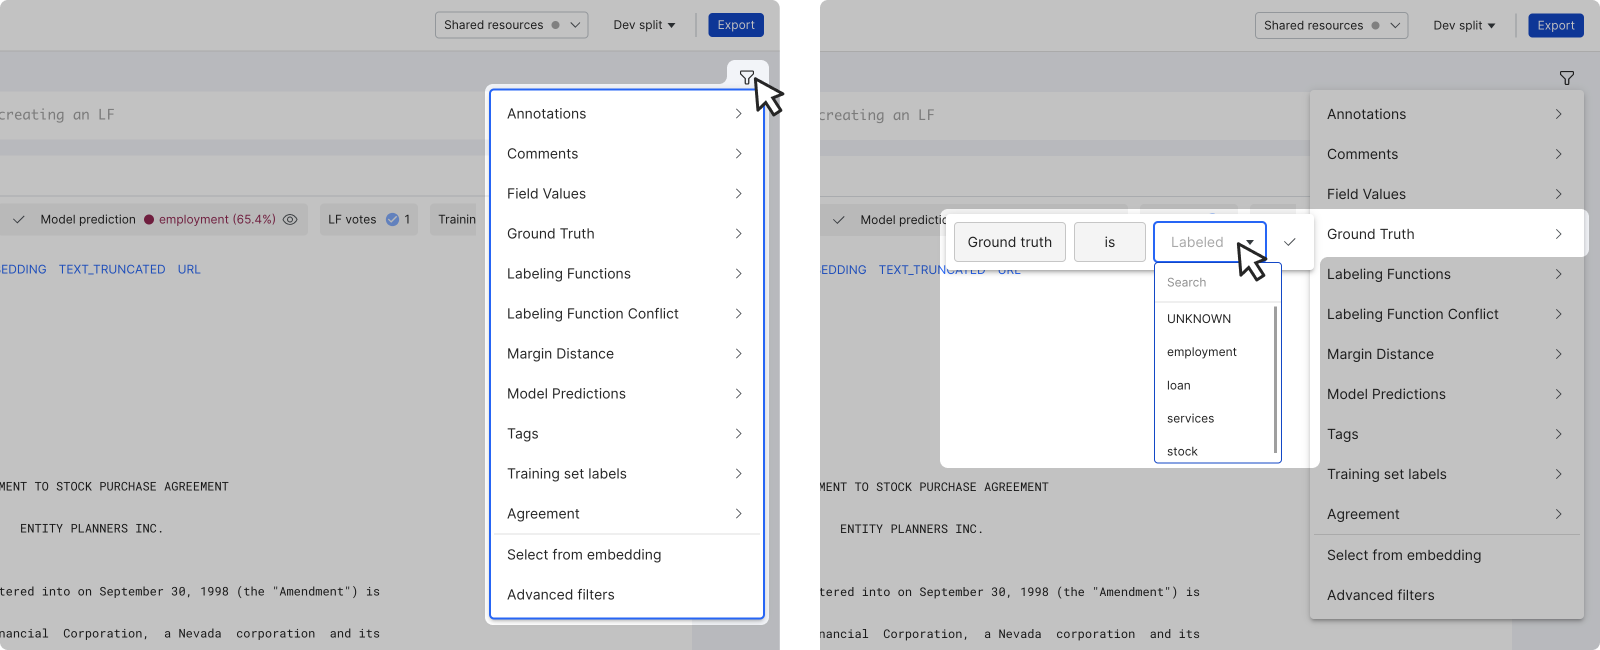
- Click the filter icon on the top right corner of the dataviewer to open the filter menu.
- Choose the desired filter type and input the parameters.
- Click the checkmark to save the filter.
To add more filters, click the + icon to open the filter menu.

To clear all filters, click the filter (x) icon.

Create tags and batches from filters
To apply tags or create a batch from the filtered set, click the three dot overflow menu.
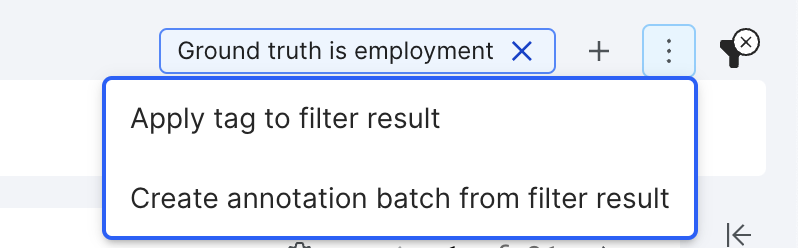
Click Apply tag to filter result to bulk add tags to the filtered set of data points. In the modal, you have the option to select an existing tag or create a new one.
Click Create annotation batch from filtered set to assign a new batch of data points to an annotator. In the modal, you can select which annotator to assign the new batch to as well as the percentage of documents from the filtered dataset to be sampled in the new batch. See Annotation Studio overview and Create batches for more information about annotating in Annotation Studio.
This option is particularly useful when your model is struggling to predict certain chunks of your data well. You can filter your data to just the problem documents, and then send a sample of those to annotators to get more ground truth for model training. This targeted approach decreases the amount of documents that need to be manually annotated to improve model performance, saving both time and money!
Available filters
The following filters are available in Snorkel Flow:
- Annotations: Filter by how a particular data point was labeled by an annotator. You can filter by a particular label or by whether or not the annotator labeled the data point correctly.
- Comments: Filter by comments from a user.
- Field Values: Filter by the value of one of the fields in your data. You can use a number of different operators (e.g., matches or contains).
- Ground Truth: Filter by a particular ground truth label.
- Labeling Functions: Filter by how a particular data point was labeled by a labeling function. You can filter by a particular label or by whether or not the labeling function labeled the data point correctly.
- Labeling Function Conflict: Filter on datapoints where the labeling functions voted incorrectly.
- Margin Distance: Select two labels, one being the most confident label and the other being the second most confident label, that the model predicted and specify the margin distance between them.
- Model Predictions: Filter by a particular label that a model predicted.
- Tags: Filter by data points that have or have not been tagged.
- Training set labels: Filter by how a particular data point in the training set was labeled by the model. You can filter by a particular label or by whether or not the model labeled the data point correctly.
- Agreement: Filter by whether two annotators agreed or disagreed on a document label.
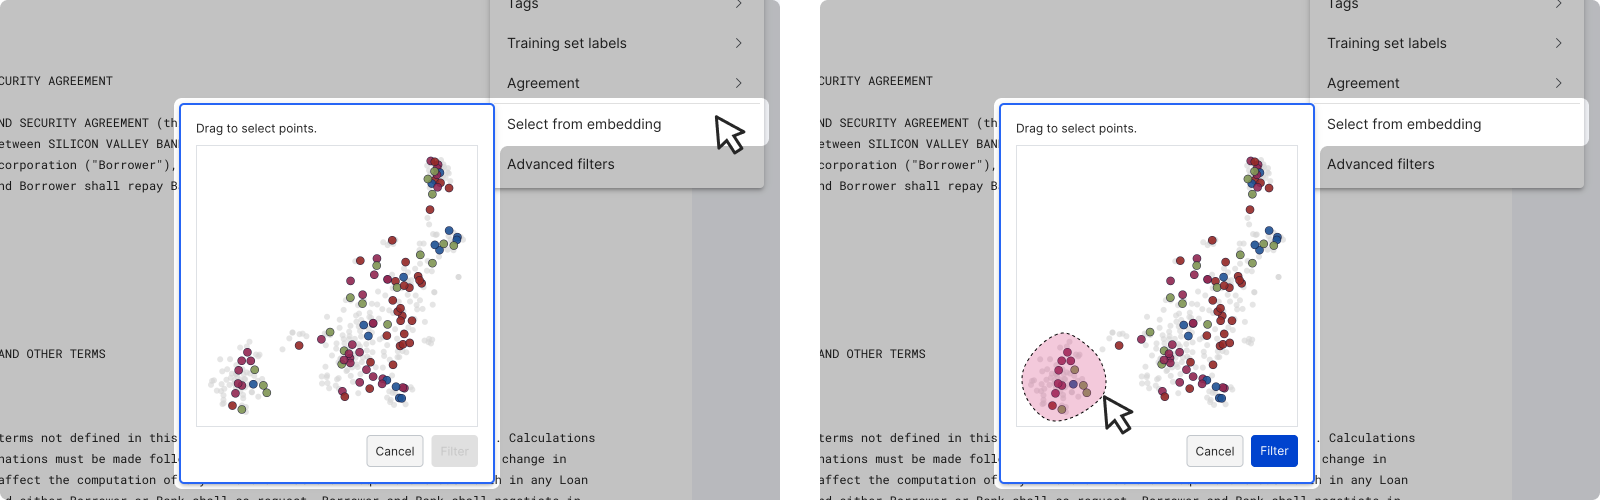
- Select from embeddings: Use a lasso tool to select clusters from an embedding map. This option is only available on applications with embeddings.
- Advanced filters: Further customize your filter and apply more complex logic, such as OR or NEGATE.