Prompt Builder
Version: 0.94
Prompt Builder offers the ability to precisely inject foundation model expertise into your application through an interactive workflow.
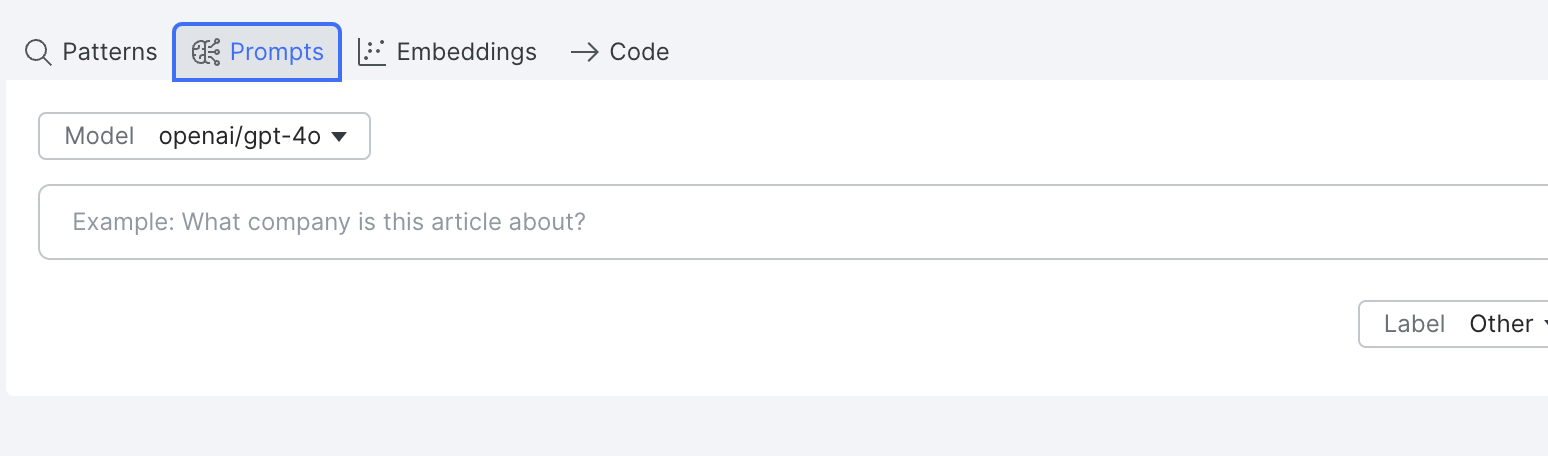
To open the Prompt Builder, click the Prompts icon and text within the LF composer toolbar as shown below. If you do not see the icon, ensure that the application type is supported. Application types that are currently supported include:
- Single-label text classification
- Sequence tagging
- PDF candidate-based extraction

As a user, you should feel empowered to try out any prompt engineering technique and observe how well it performs on your data. Once you are happy with the prompt, click Create prompt to capture this signal inside a Snorkel labeling function (LF). This enables you to go further by building with additional signal to surpass the original prompt scores.
Configuring Available Models
Prompt Builder workflows rely on third-party external services to run inference over your data. In order to configure these, you will need to use an account from your organization. Once an account has been established, you can configure the instance-wide settings for the Prompt Builder according to the instructions in Using external models. If your Snorkel Flow instance has GPUs available, you can also contact a Snorkel representative to run foundation models locally.
Prompting Workflows
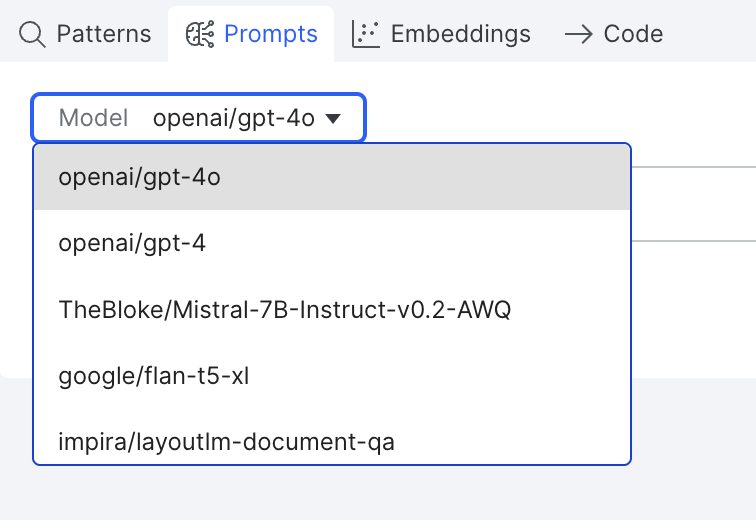
Across all workflows, you can select your desired configured foundation model. Different types of foundation models are available for each workflow. For more information on which foundation models are supported for your application, refer to About external models. For information on configuring supported models, refer to Using external models.
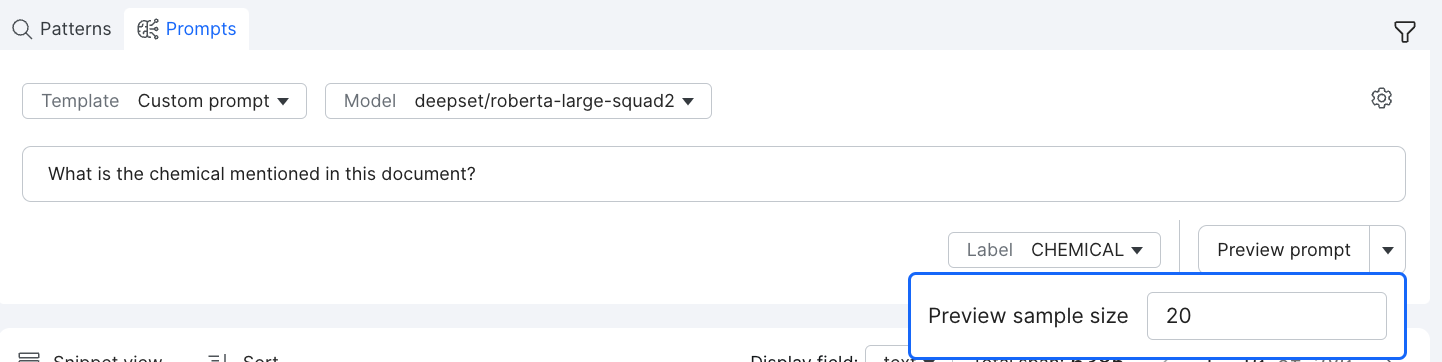
In all workflows, start by drafting a prompt to send to the model. Click Preview prompt to analyze the live-streaming results as the model processes a sample of the current data split.
At any point, you can cancel the running job, and progress will be saved. Clicking Resume will begin sending data to the model again for processing. Once you are satisfied with the LF performance on your current data split, click Create prompt to run the prompt over all of your active data sources.
Text Classification Prompt Workflow
The classification workflow provides a flexible way to prompt engineer your data where any instruction can be passed to the foundation model. There are some template examples that are pre-populated for you, but you should feel empowered to explore a variety of prompt engineering techniques.
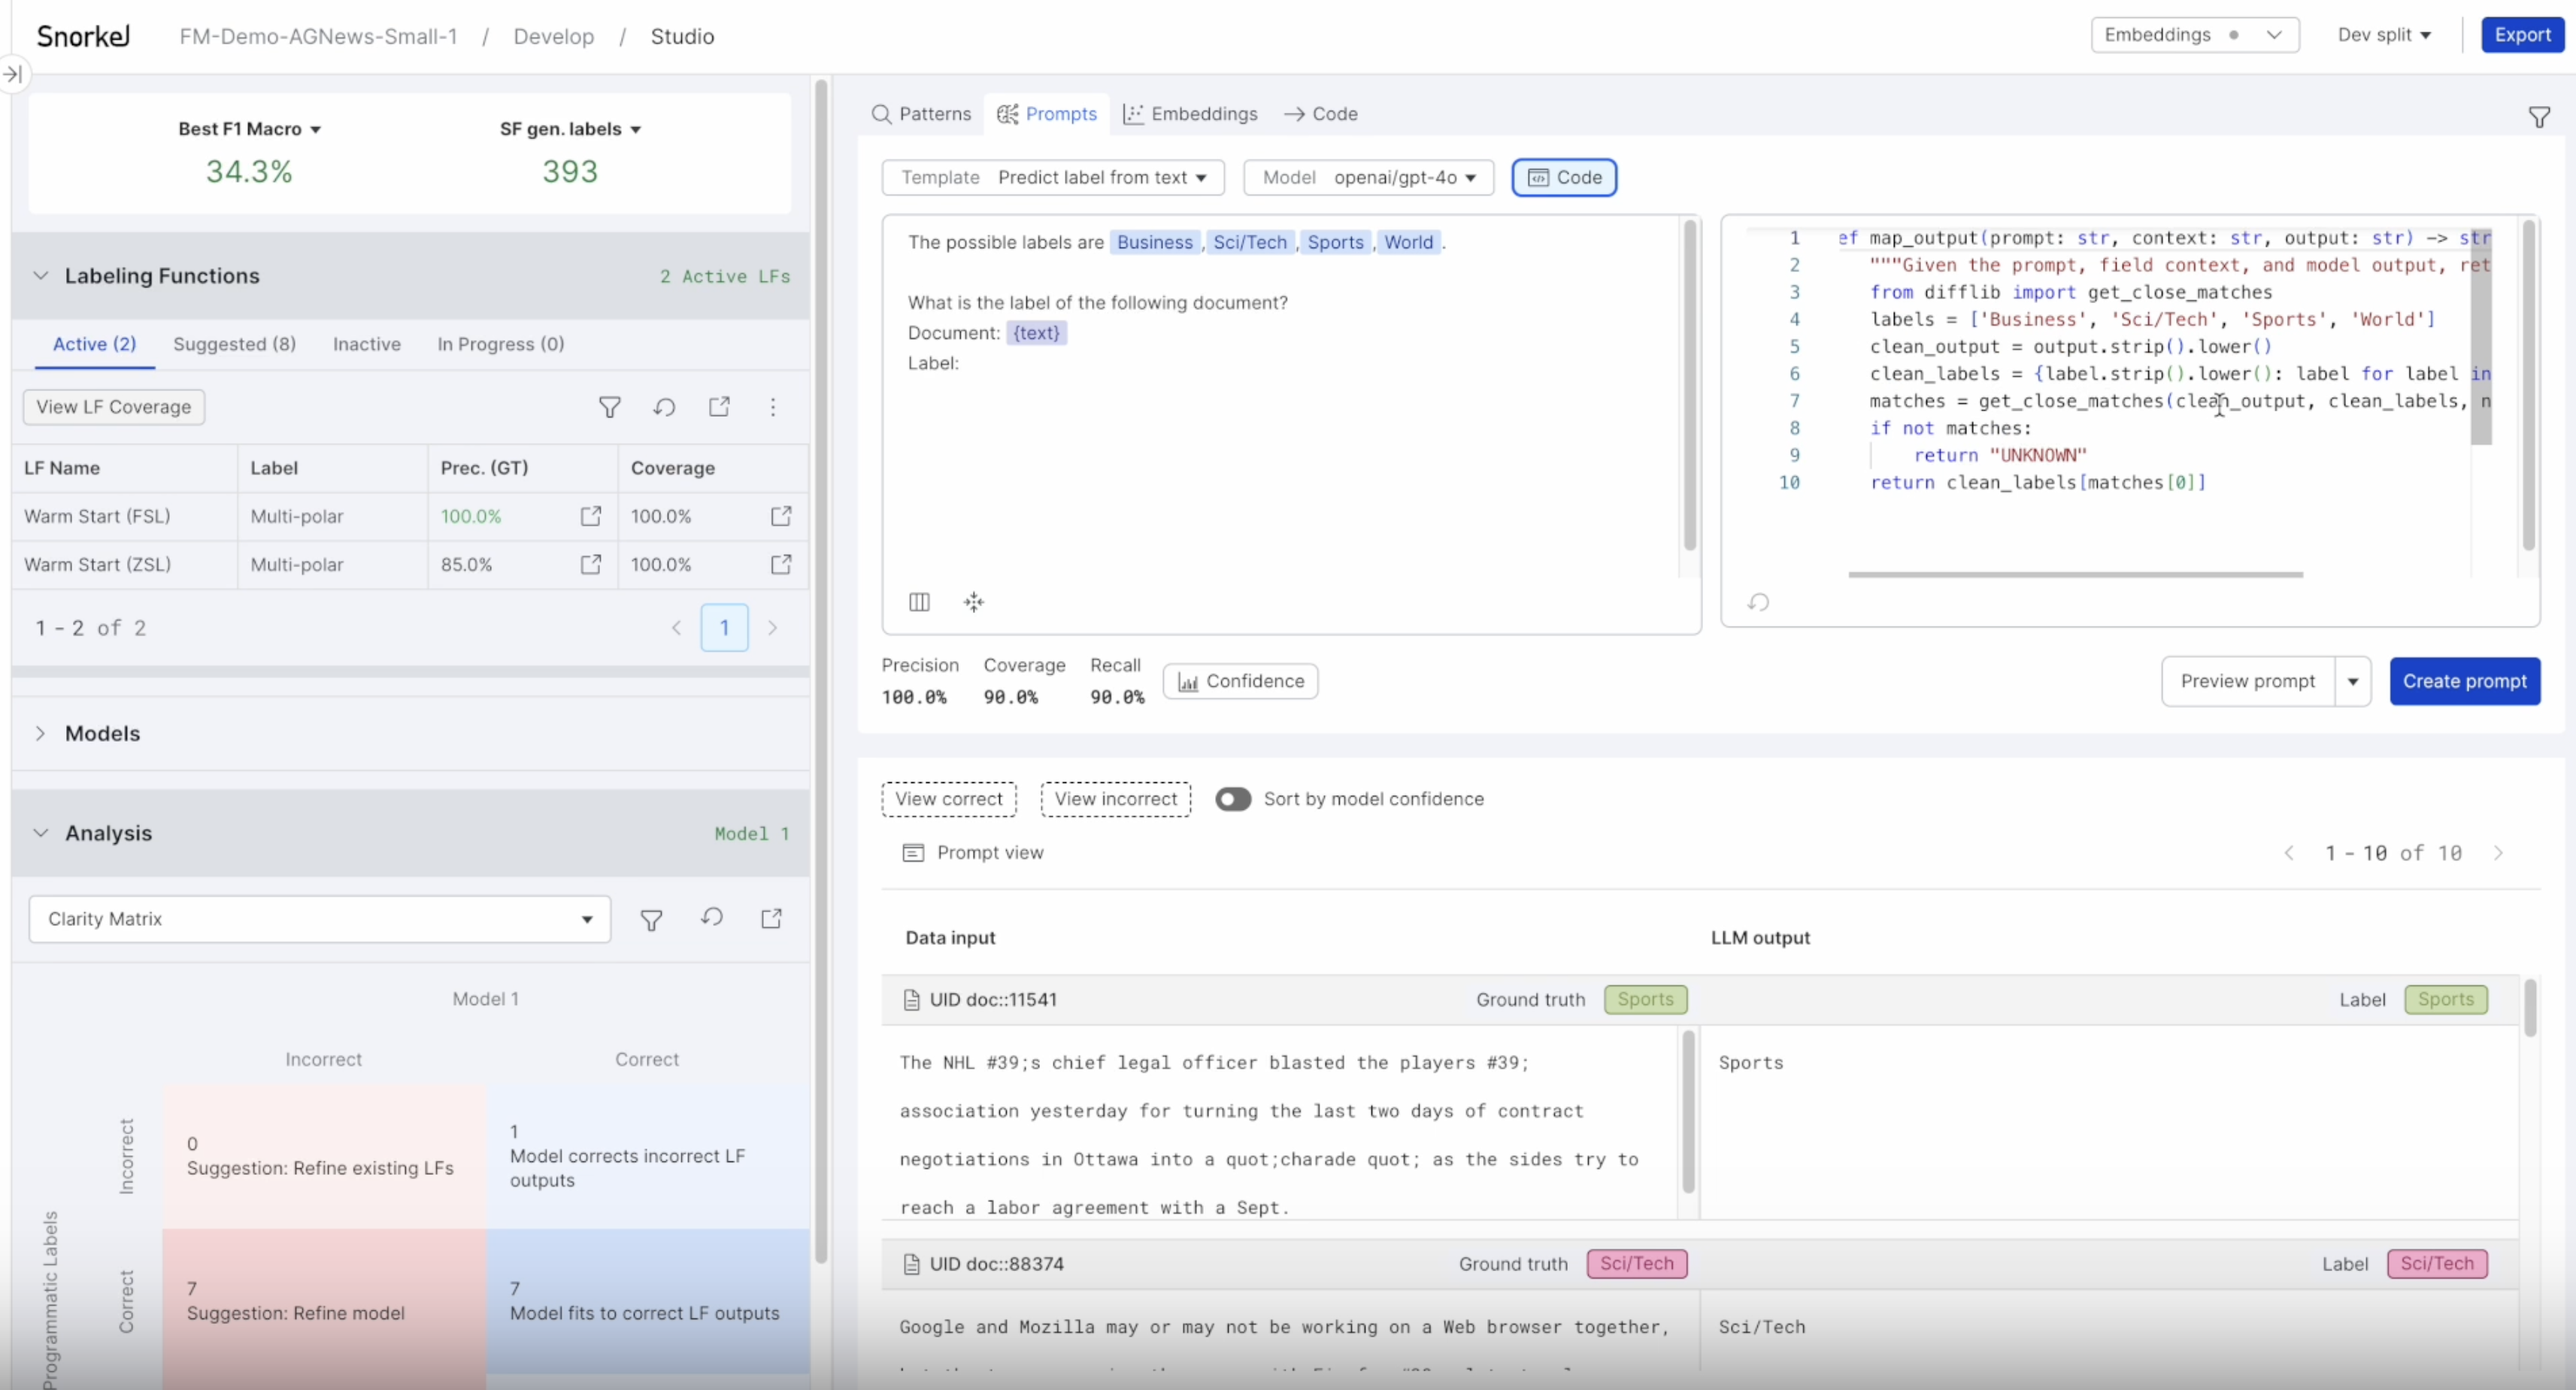
In the workflow, you can fully specify both the prompt that you want to send to the model, including how the context of each example appears, along with the code to map the foundation model output to your classes.

In the screenshot above, {text} refers to a specified text field within your dataset. In each request to the model, any field name appearing between braces will be replaced with the value for that field in that example. This allows you to specify multiple fields in a single prompt to the model if necessary. In this example, we are asking openai/gpt-4 to label a document as one of four classes (employment, loan, services, or stock) based on the document text.
In addition, the text classification prompt workflow allows you to customize the mapping from model output to label. To do this, click the Code icon. There are several templates with pre-defined prompts and code that you can edit to output label mappings. Upon selecting any of these templates, you can modify each area as you see fit. This gives you significant low-level control over the input and output to the model.
Code Requirements:
- All logic must be contained within the body of a single function.
- The single defined function must include
outputas its only parameter. - The defined function should return the exact label name when voting for that label. Any other return value (including
NoneandUNKNOWN) will be treated as abstentions for the LF.
Once you make changes to the code, the refresh icon in the bottom left corner of the editor will become enabled. Clicking it will update your metrics and the Code Mapped Label column to reflect the latest code in the editor.
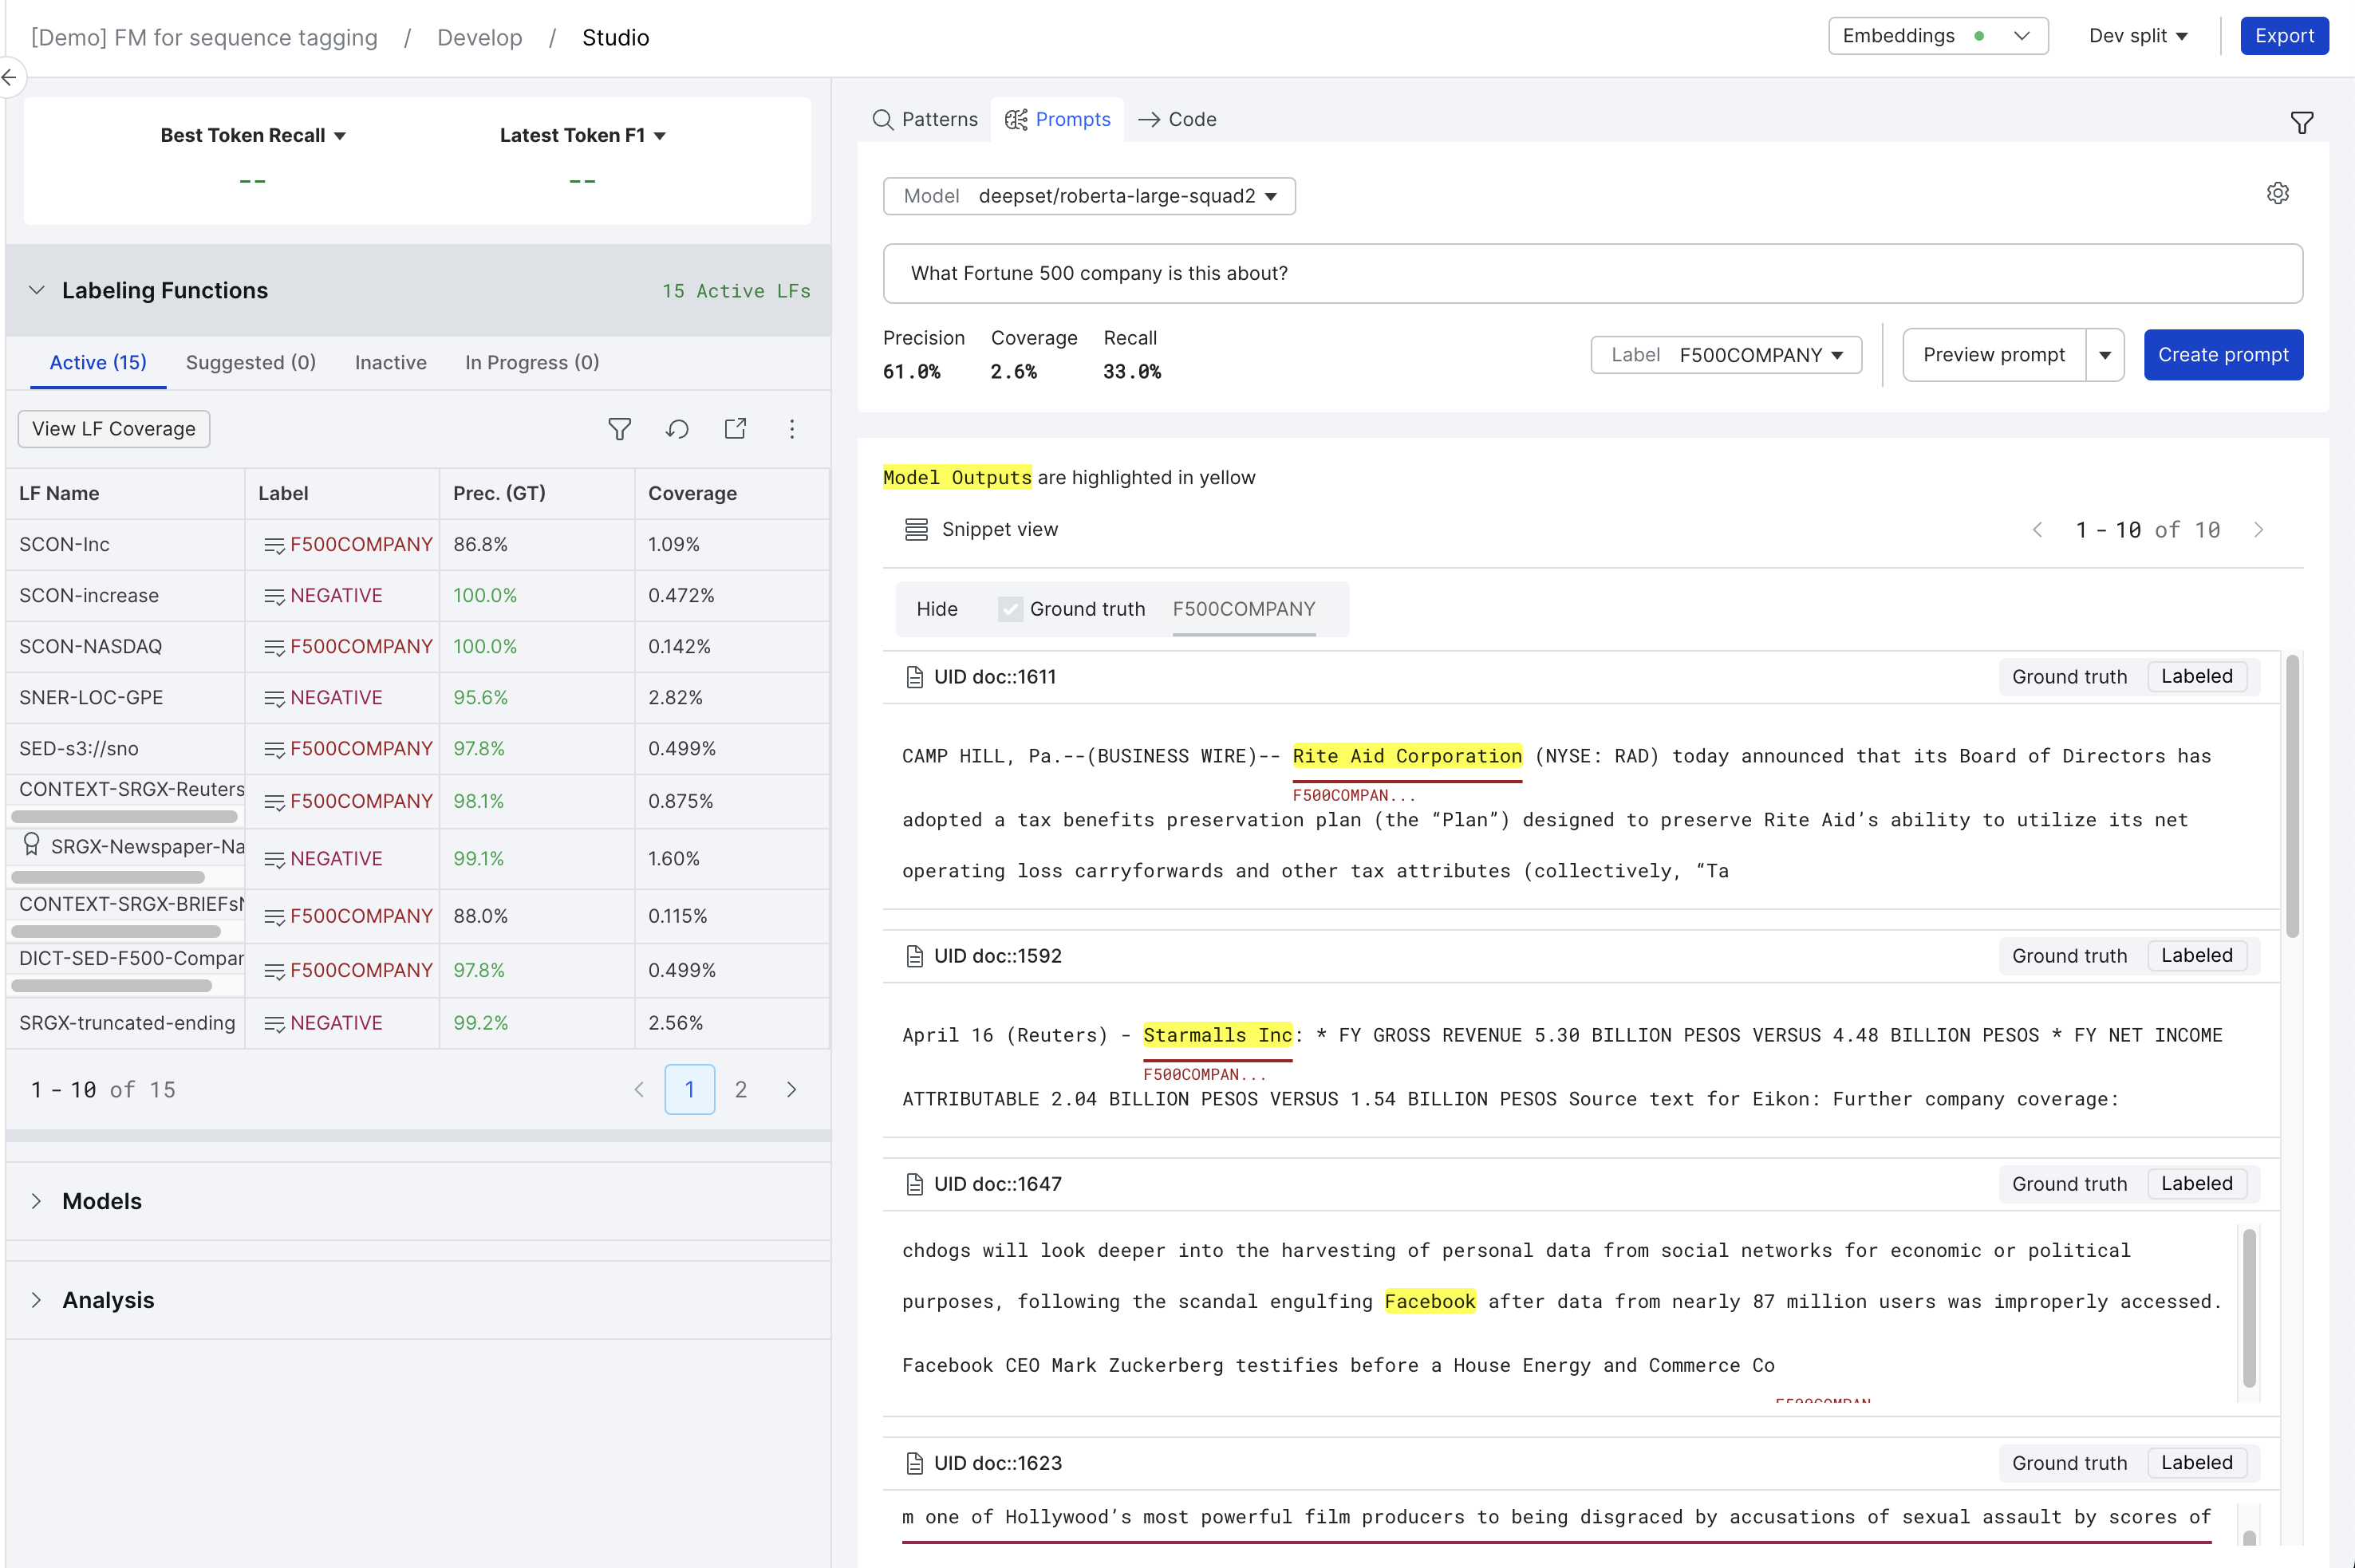
Sequence Tagging Prompt Workflow
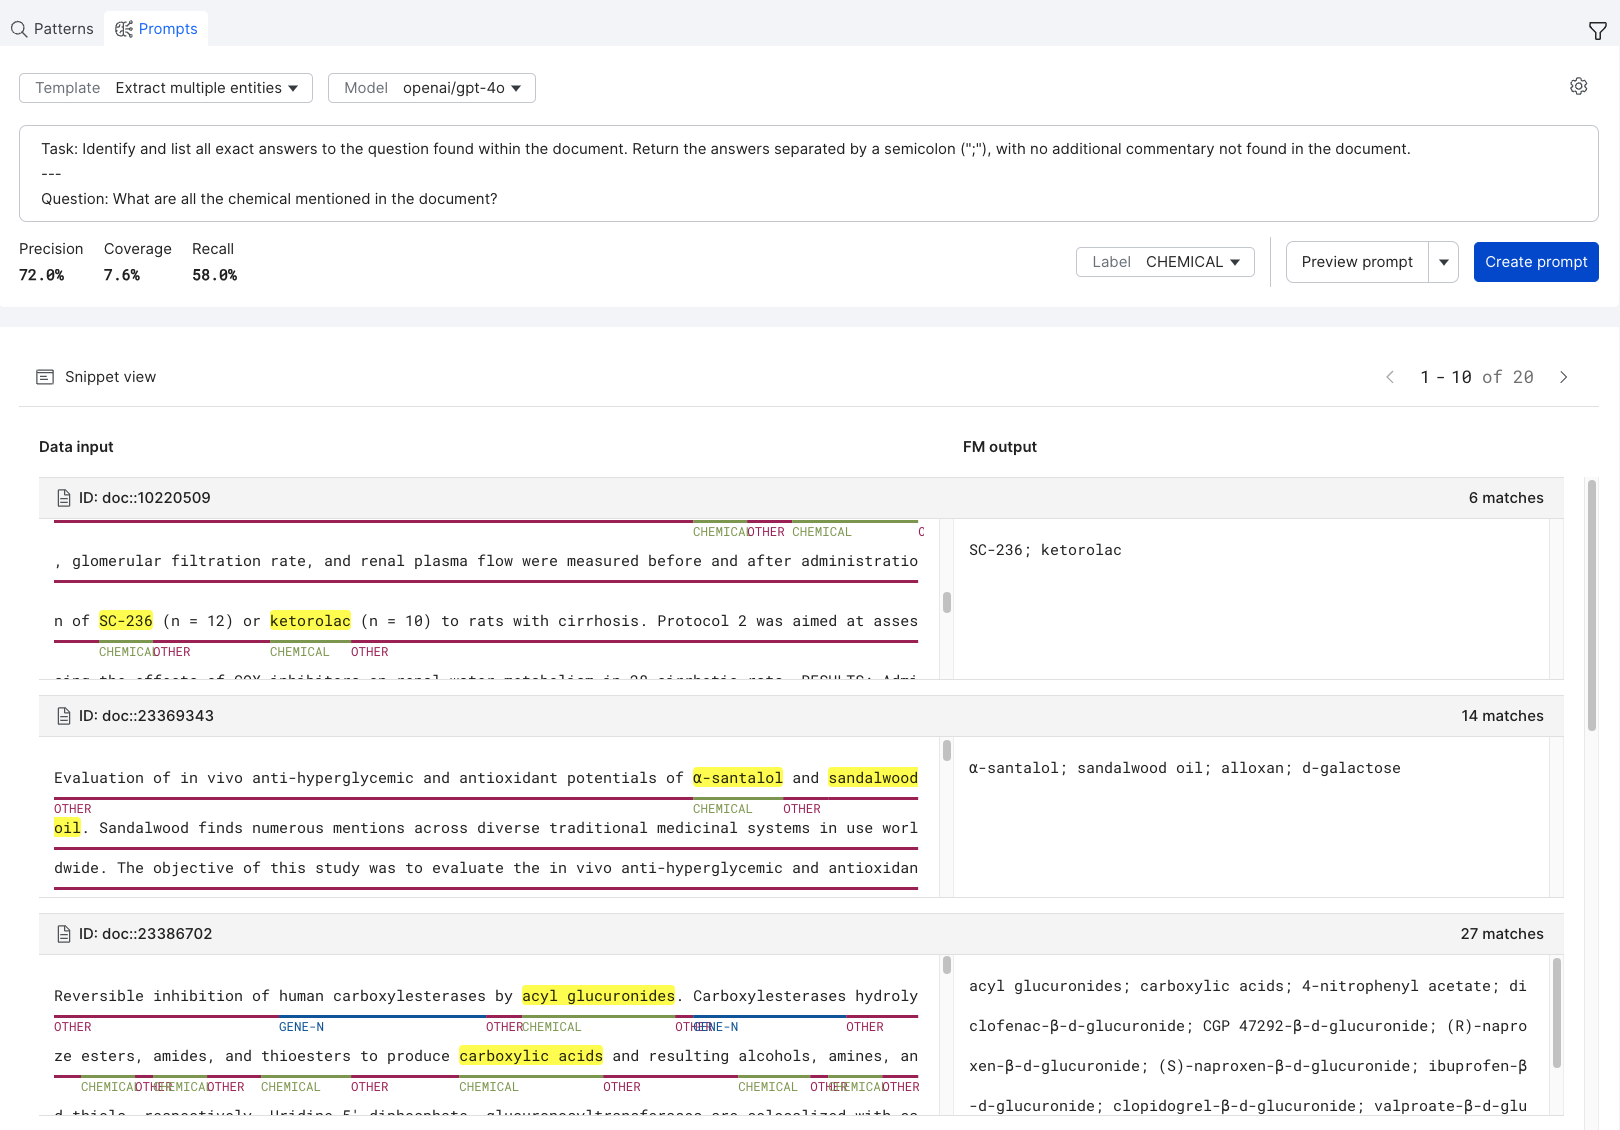
The sequence tagging workflow provides an intuitive interface for extracting information from your documents. Similar to the classification workflow, you should feel empowered to explore a variety of prompt engineering techniques to see how well they perform on your data. This workflow involves asking a question about your document. The model then extracts the spans from the text that it thinks best answers your question. The sequence tagging prompt workflow supports Text2Text and Question-Answering (QA) models.
For Text2Text models, you can extract multiple entities for each document. To do this, prompt your foundation model to separate each entity to extract using the semi-colon (";") delimiter. All relevant matches for each identified entity will be extracted.
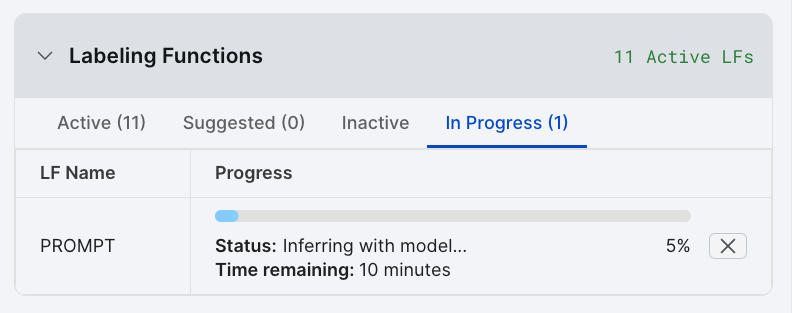
After previewing your result, select Create prompt to create a prompt LF. You can view the progress of the LF in the In Progress tab of the Labeling Functions table. Once prompt inference has completed, the LF will be available from the Active tab of the Labeling Functions table.
PDF Extraction Prompt Workflow
The PDF extraction prompt workflow allows you to extract entities from PDF documents in a PDF candidate-based extraction application. The PDF extraction prompt workflow supports Text2Text (e.g. openai/gpt-4o) and Document Visual Question Answering (DocVQA) (e.g. impira/layoutlm-document-qa) models.
This prompting workflow can be accessed through the Prompts icon in Studio for PDF extraction applications.
Select the desired model to run the prompt against. All configured Text2Text and DocVQA models are available for selection.
Select the label from the dropdown menu. The label should correspond to the entity to be extracted from the PDF documents.

Write a prompt to extract entities from the PDF documents; the prompt will be run against PDF documents. Preview the results by clicking on Preview prompt. Review the extracted spans and the metrics for the previewed sample.
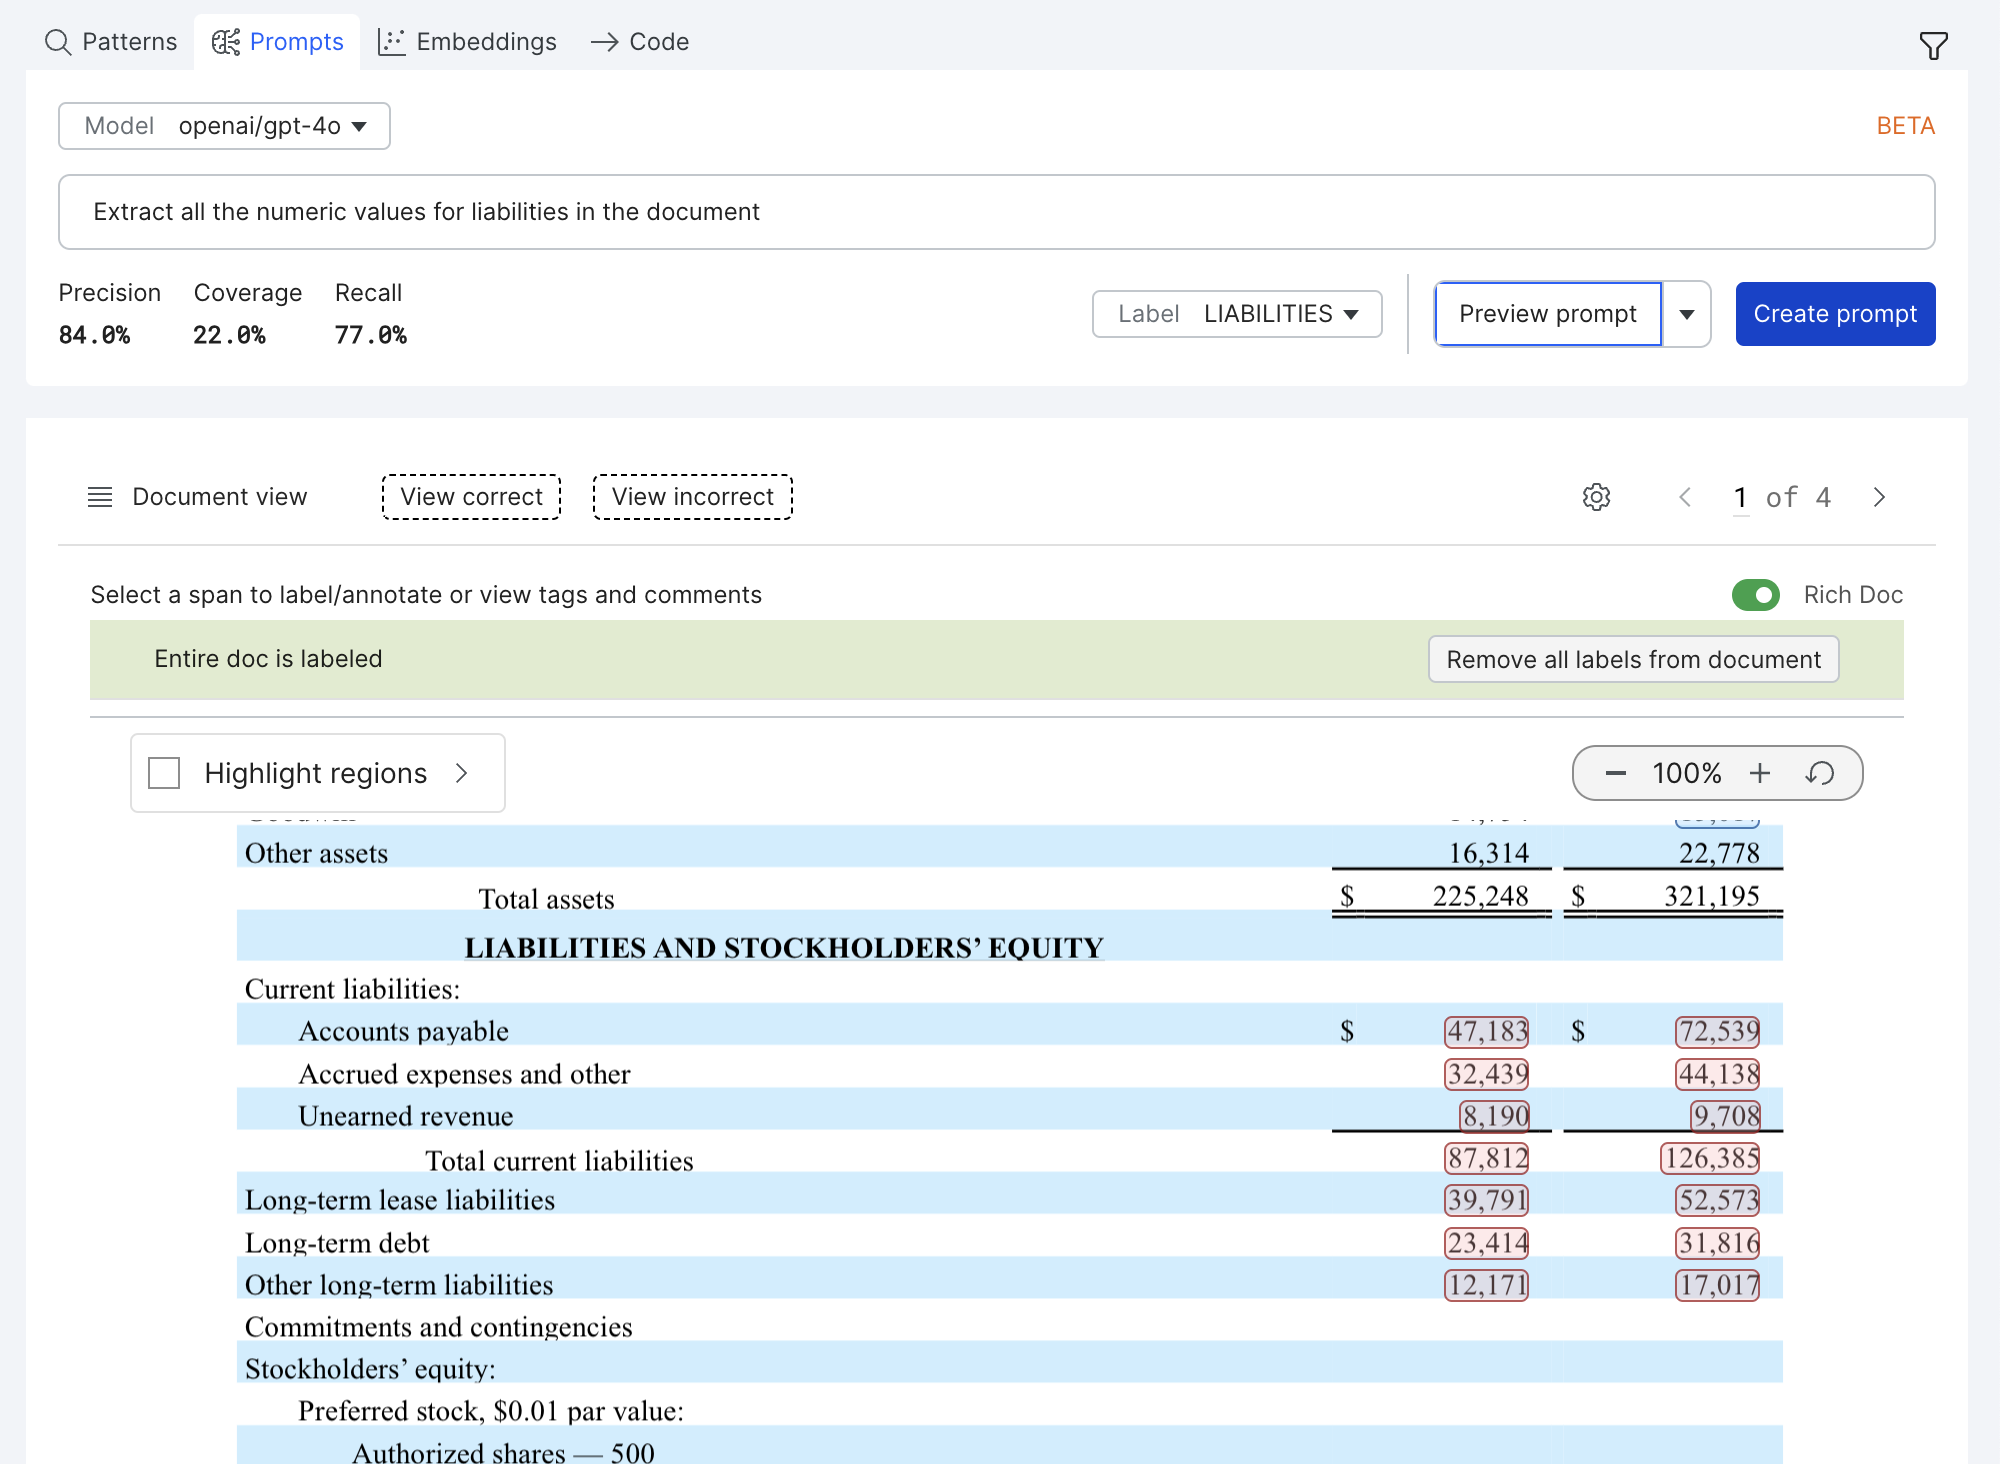
Select Create prompt to create a prompt LF to run across all splits in the dataset.
Advanced Features
Thresholding Model Confidence
Model confidence is a number between 0 and 1 for each datapoint/row that indicates the foundation model's certainty that its prediction is correct. Extractive models provide a confidence score with each prediction. In some cases, thresholding this confidence provides a useful tradeoff between precision and recall. To visualize this, click the Graph icon to open a threshold metrics view.
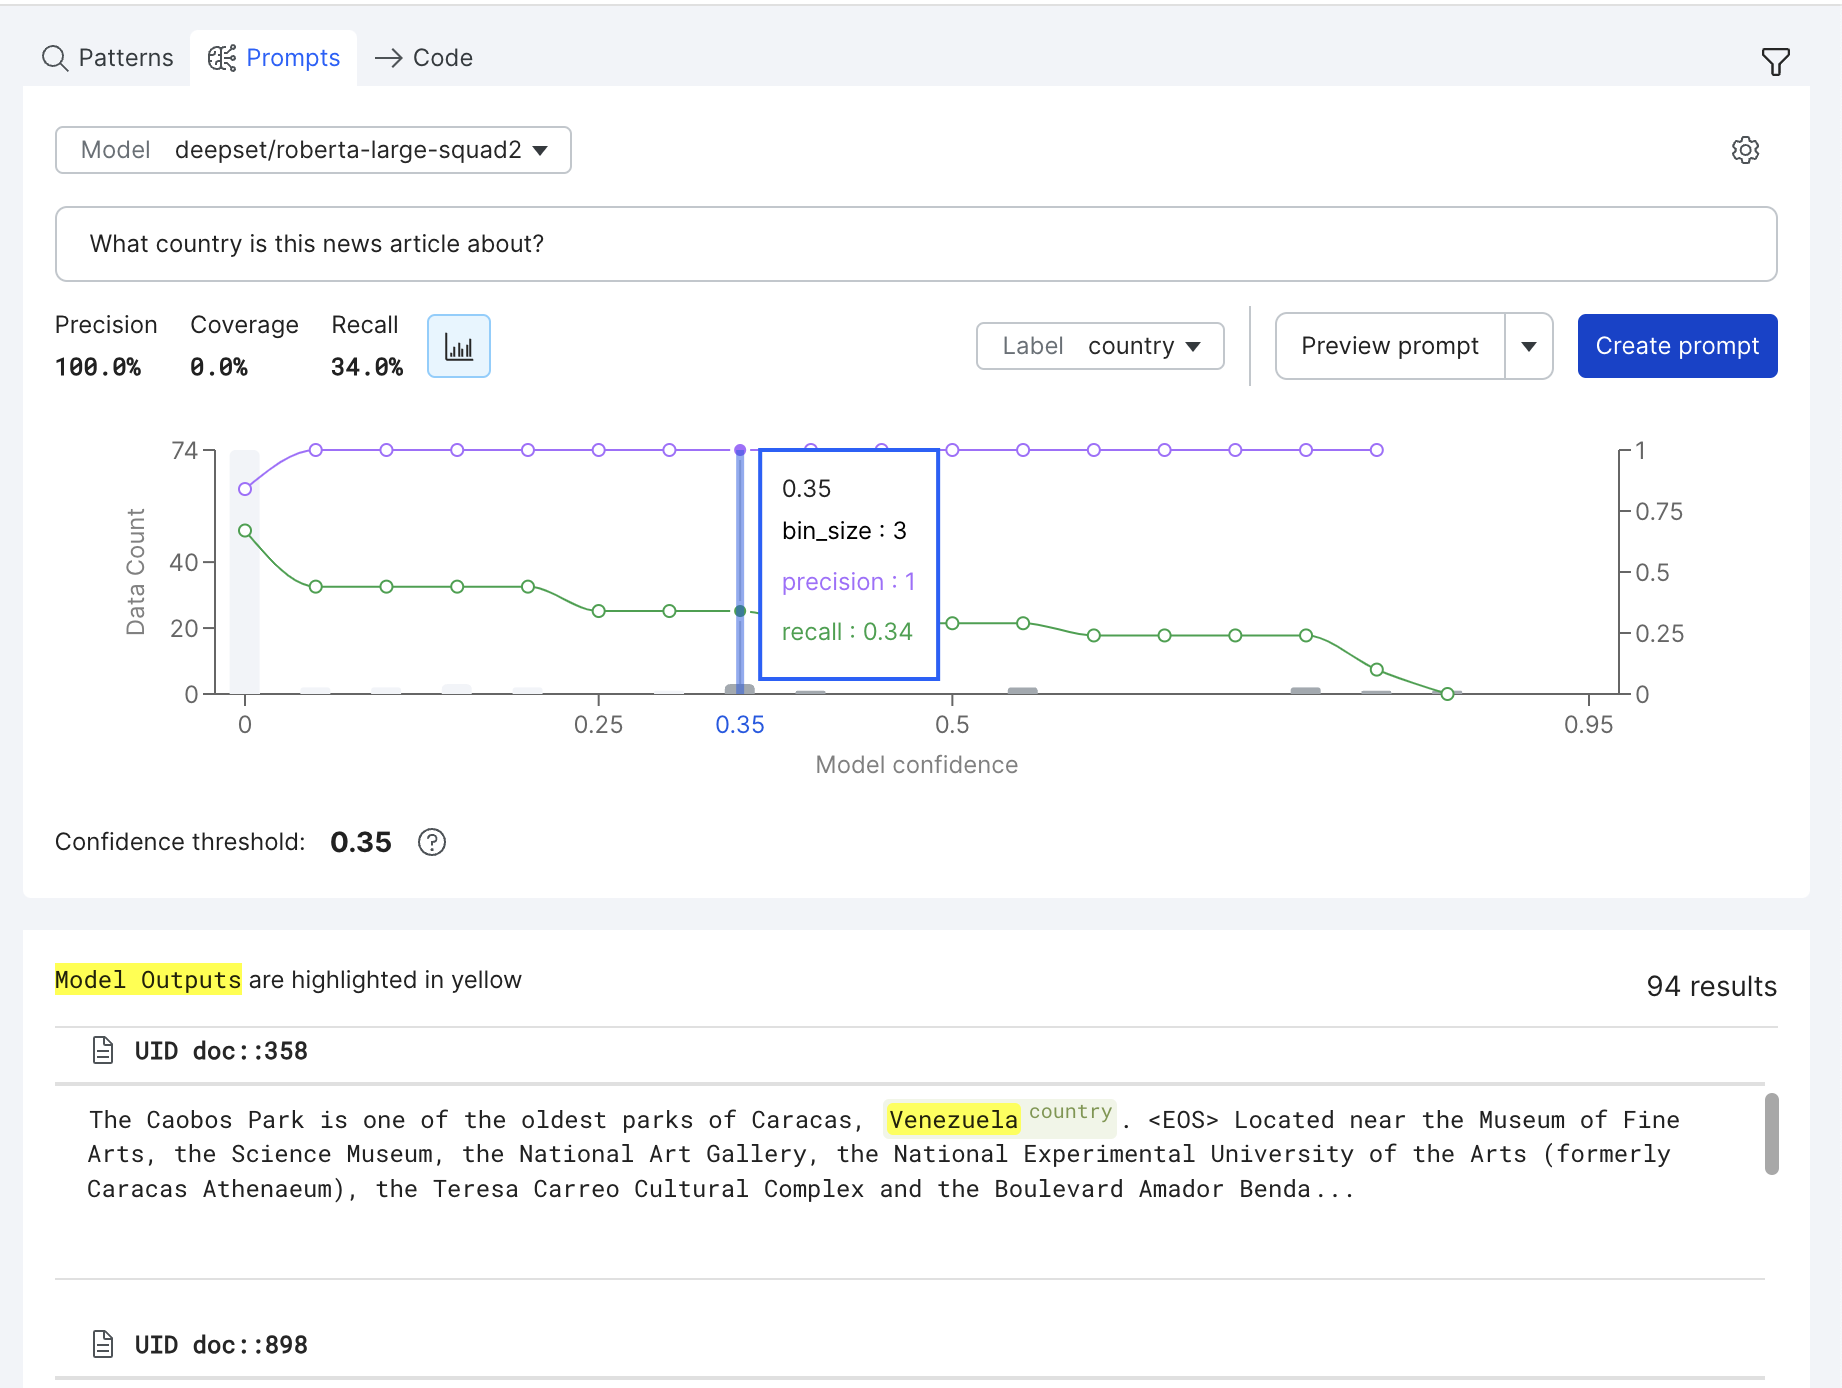
In this view, the purple line shows the precision of the LF at different thresholds, while the green line shows the recall of the LF at different thresholds. Additionally, histogram bars represent the number of examples that fall into each threshold bucket.
You can control the threshold used by selecting different operating points on the graph.
Prompting with Document Chunking (RAG)
Document chunking is a retrieval-augmented generation (RAG) technique available within the sequence tagging prompt workflow. This aims to improve prompt results, particularly on longer documents. Leveraging RAG unlocks prompting on long documents that may fall outside of the maximum context length of the foundation model. RAG can also help circumvent the “Lost in the Middle'' phenomenon by including only the most relevant document information in the input context.
Follow these steps to enable document chunking with RAG on your application:
- Compute embeddings for RAG. Click Embeddings in the application data pane (top-right corner of your screen). If no RAG embeddings exist, select Add new embeddings.

- Once the Add new embeddings modal pops up, select RAG embeddings as the embeddings model to use, and then select the primary text field of the application.
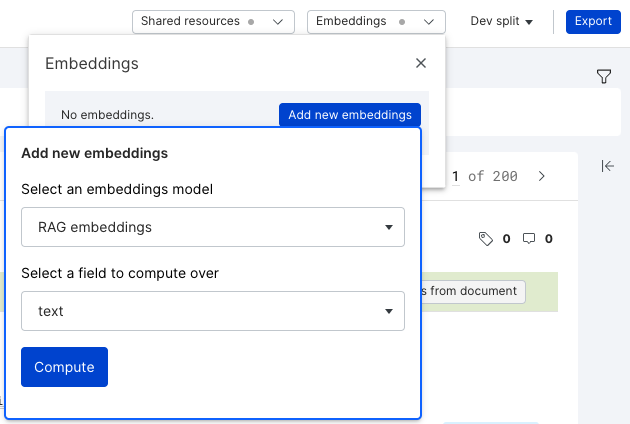
- Kick off embeddings by selecting Compute, which will trigger a success notification.
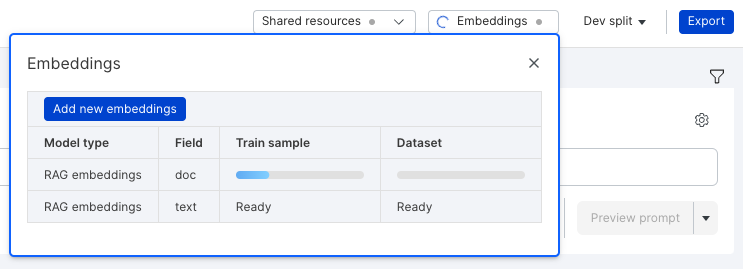
- View the progress of the embeddings by hovering over the Train sample and Dataset columns in the embedding home.
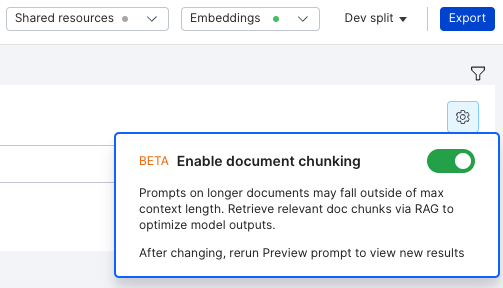
- Once RAG embeddings have been generated, enable document chunking by clicking the settings icon next to the prompt toolbar. Toggle document chunking on and then click Preview prompt.
- After clicking Preview prompt with document chunking enabled, you can observe the previewed results in real-time. Finally, click Create prompt to create a prompt labeling function for use in the broader Snorkel data-centric workflow.