Updating the label schema
In this guide we will demonstrate how to update the label schema (list of classes) of your application. There are two ways to update your label schema: from the Label Studio or from the Application Studio.
Updating the label schema creates a new model node with the updated label schema and also transfers assets such as ground truth labels and labeling functions (LFs). Transferring LFs to the new model node will fail if the original model node has multi-polar LFs (note that warm start LFs are multi-polar). Use the SDK functions sf.delete_lf_package and sf.delete_lf to delete any multi-polar LFs before updating the label schema.
From the label studio
Accessing the editor
From Studio, click the collapse icon on the right side of the dataviewer (this pane may already be visible when you enter Studio). From there, select Edit ground truth from the dropdown.
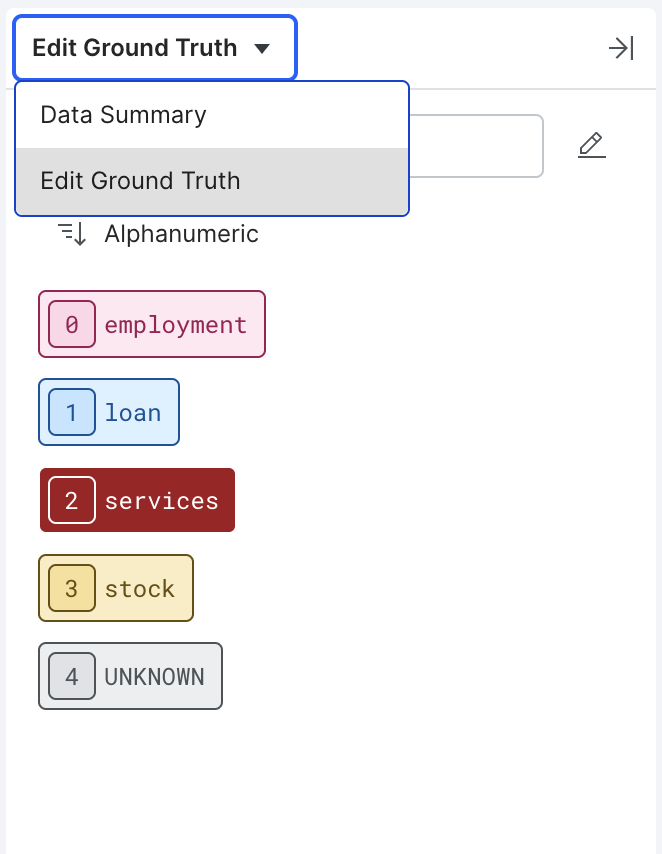
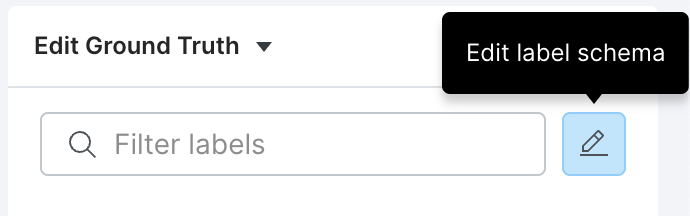
Next, click the pencil icon to access the label schema editor.
Using the editor
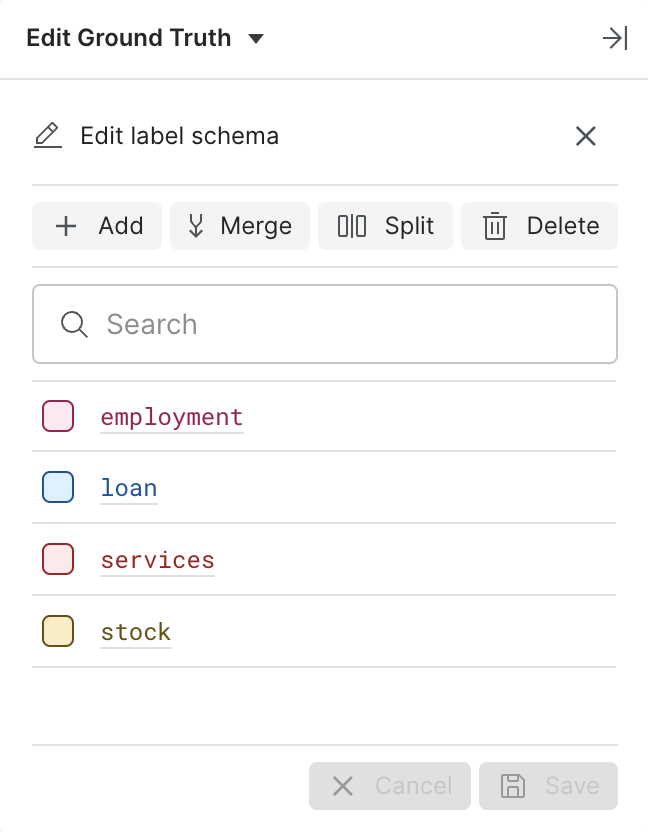
You can rename, add, merge, split, and delete your labels using the buttons near the top of the editor. Upon clicking Save, Snorkel will automatically update your existing ground truth and labeling functions to reflect your changes.
Merging labels for multi label text classification is somewhat complex to understand. If any of the to be merged labels is marked PRESENT, the target label is marked PRESENT, else if any of the to be merged labels is marked ABSENT, the target label is marked ABSENT, otherwise ABSTAIN. For example,
 {
   "class_1" : "PRESENT",
   "class_2" : "ABSENT",
   "class_3" : "ABSENT",
   "class_4" : "PRESENT",
 }
merging class_1, class_2, and class_3 to class_2 in the above example, will result in the label to be modified as
{
  "class_2" : "PRESENT",
  "class_4" : "PRESENT",
}
and merging class_2, and class_3 to class_2 in the prior example, will result in the label to be modified as
{
  "class_1" : "PRESENT",
  "class_2" : "ABSENT",
  "class_4" : "PRESENT",
}
Reverting your changes
Every change to the label schema is saved as a block. To access previous versions of your label schema you can visit the Application Studio, locate the block containing your preferred version, and then enter the Label Studio from there.
From the application studio
While it’s not possible to edit the label schema of an existing block, you can accomplish the same goal by copying the block and updating the label schema during that process.
The three basic steps are:
- Make a copy of the existing block with the current label schema
- Update the label schema for the new block
- Delete the original block
Copying a block
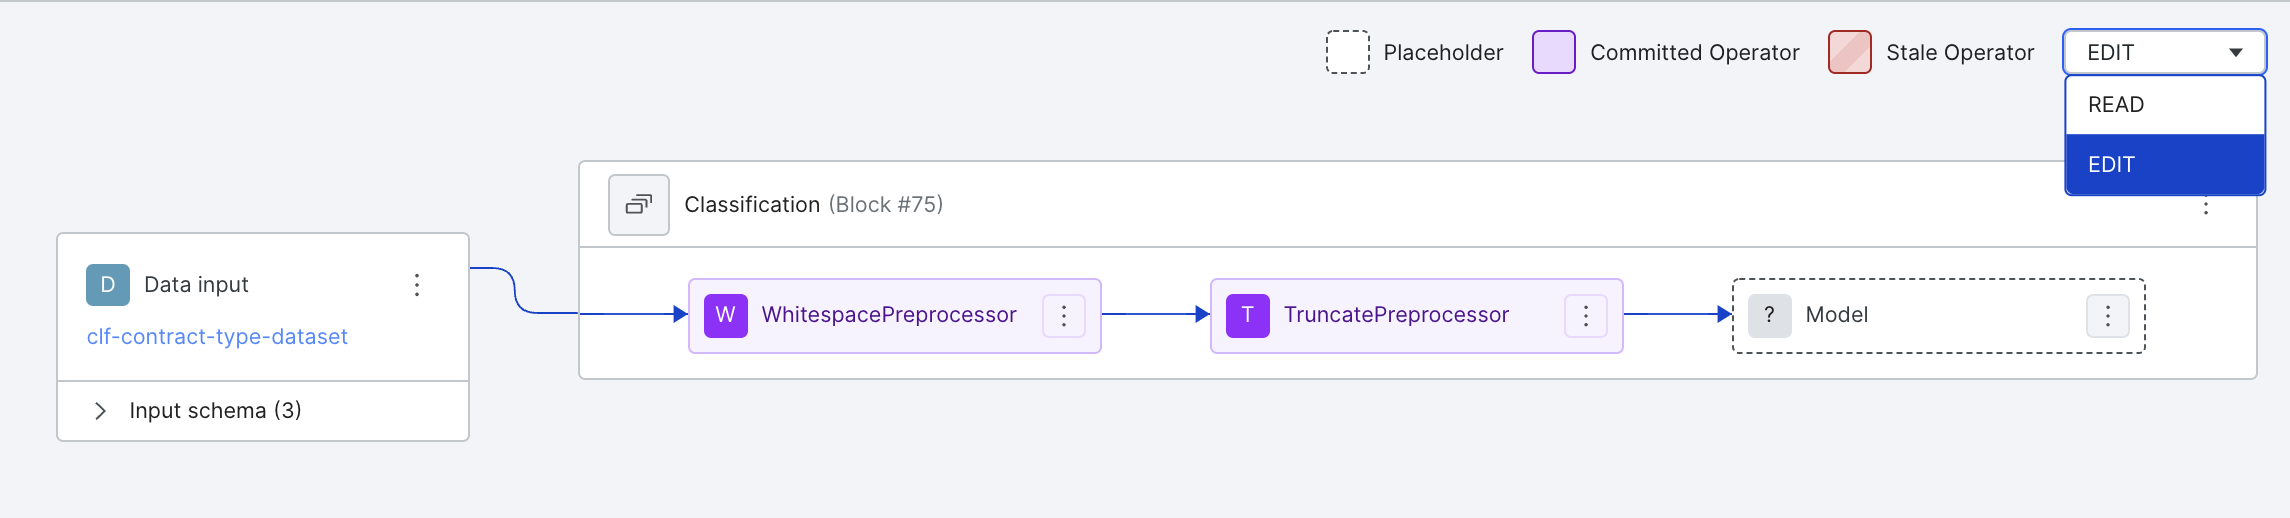
You can update the label schema by making a copy of the relevant block. To copy a block, first go to Application Studio and make sure you select “EDIT” mode in the dropdown on the upper-right.
Then, navigate to the block whose label schema you would like to update and click on the menu icon at the upper-right of that block and select “Copy block”.
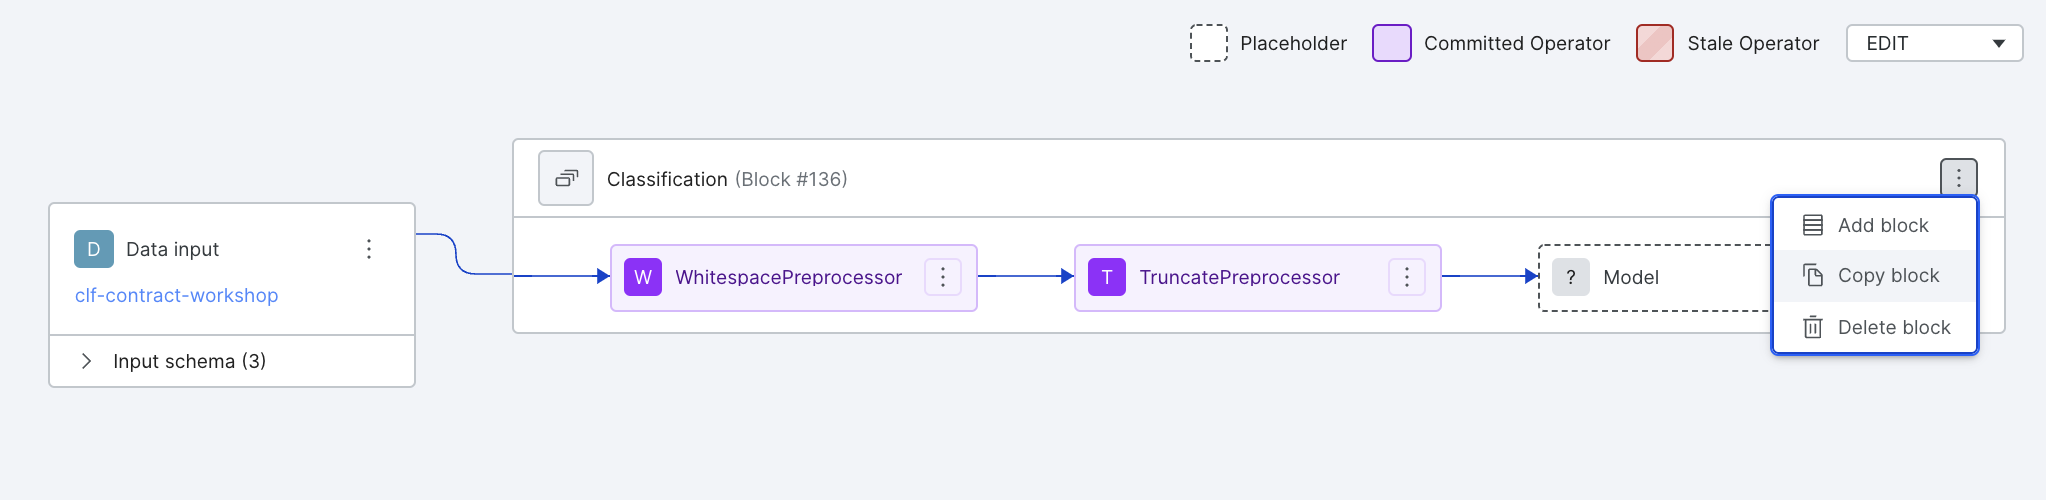
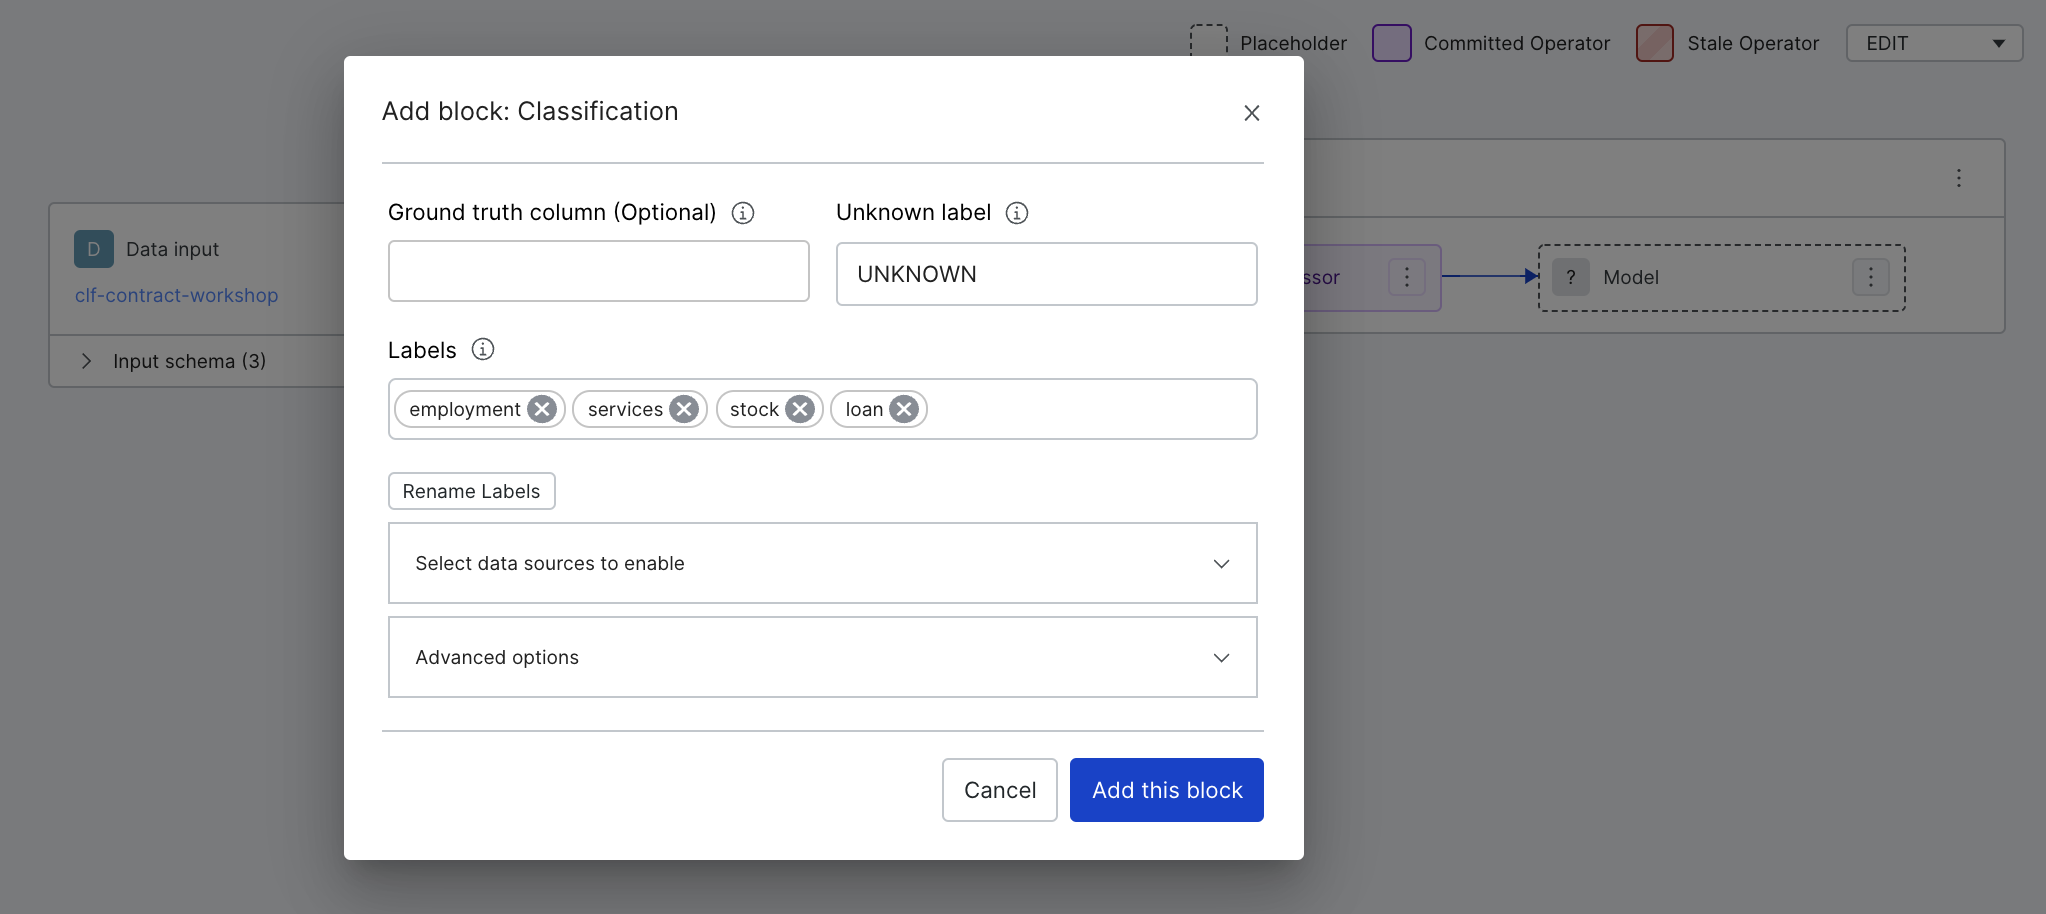
You will now see an “Add block” modal.
Adding, removing, and renaming labels
In the “Labels” box of the “Add block” modal, you’ll be able to see the current label schema. You can add labels by typing them in and remove labels by clicking on the “X” next to each label.
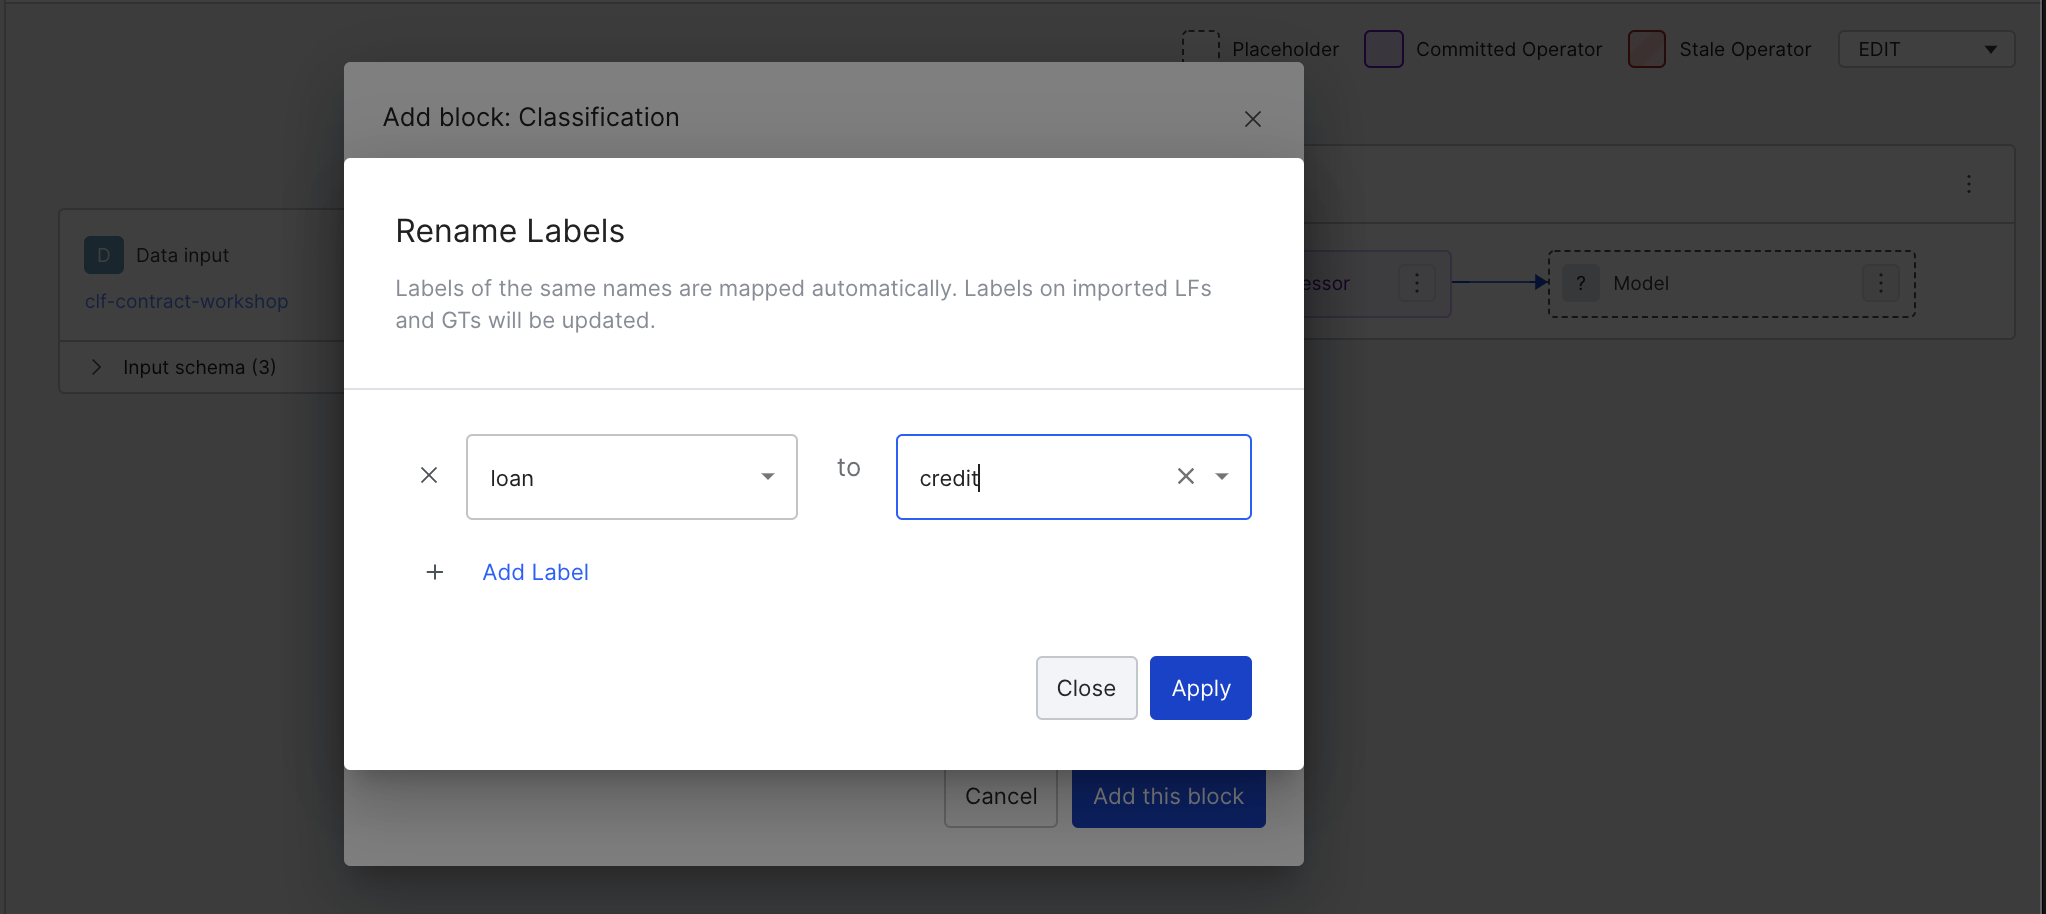
To rename labels, click on the “Rename Labels” button after updating the Labels box above. You’ll now be able to create mapping(s) from an old label to one in the new label schema by clicking on “Add Label”. Note that copied LFs and GT will be updated automatically with respect to this renaming.
Once you update the label schema, click on “Add this block” and a new block will be created with the new label schema.
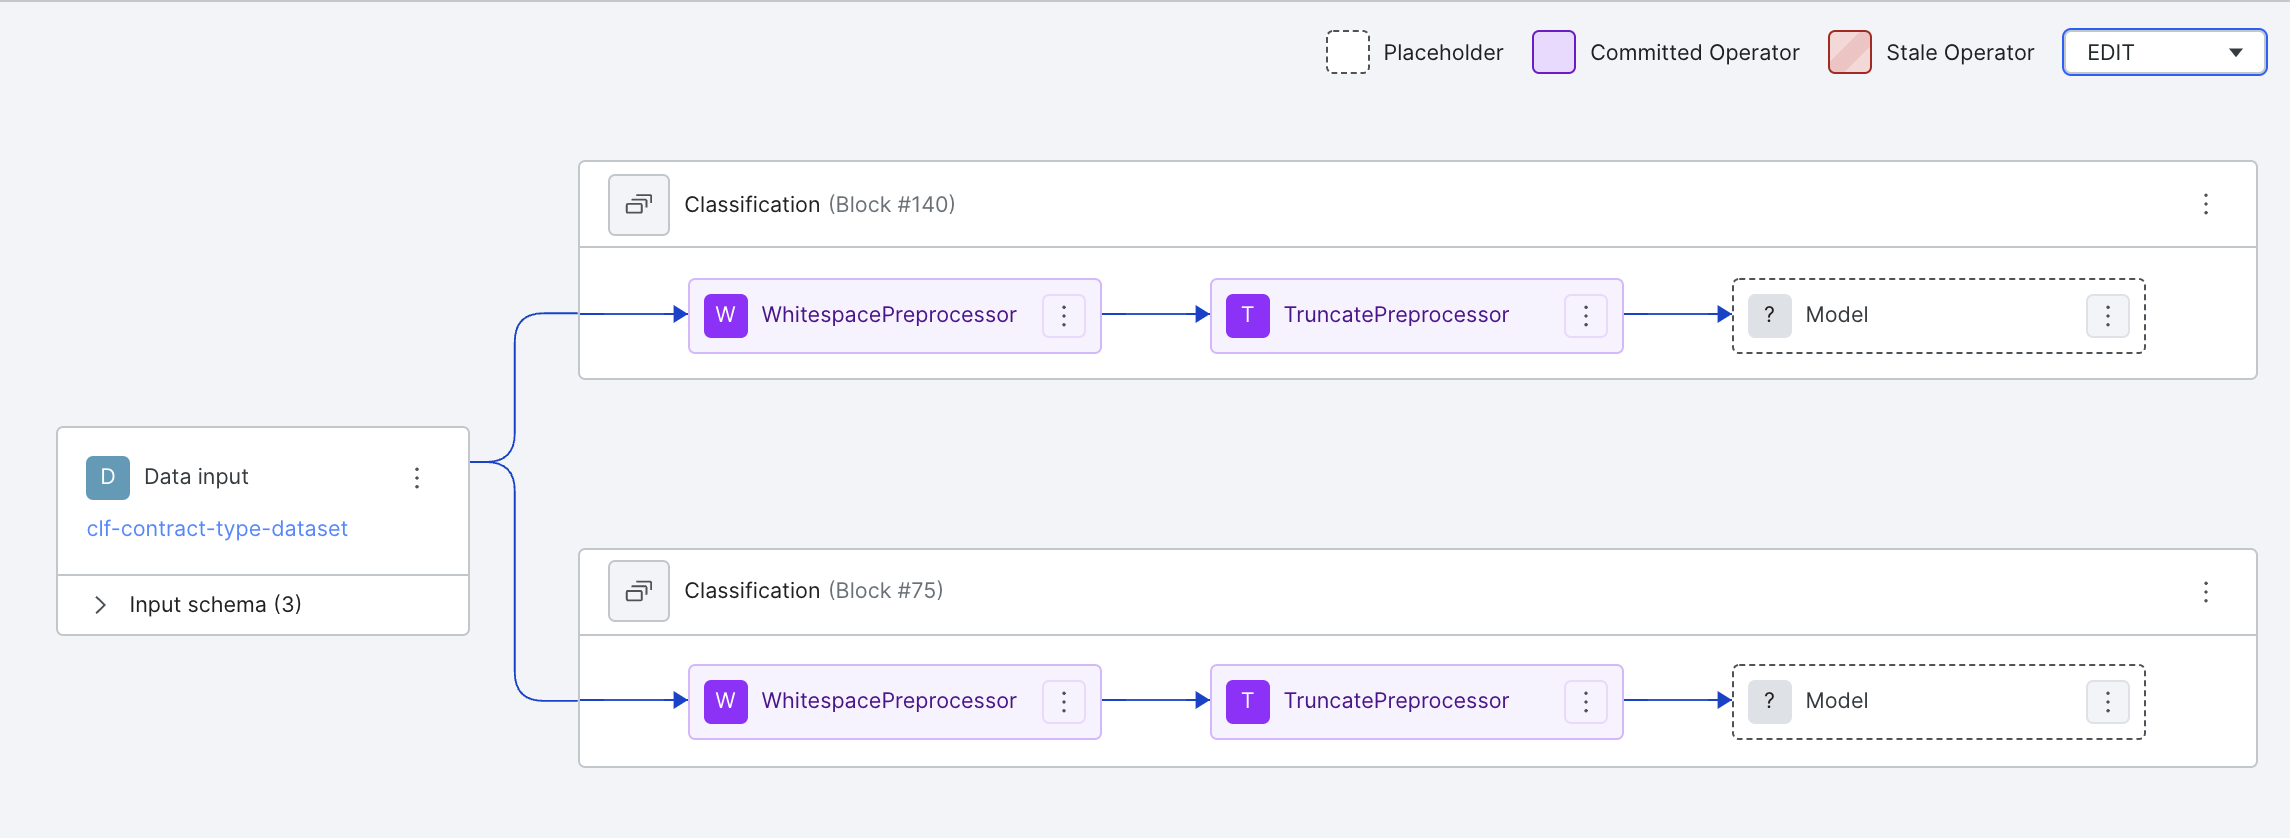
Deleting the original block
You can now delete the old block from the Application Studio view. Use the menu icon in the upper-right of the block and select “Delete block”.