Create application from template
An alternative way to create an application in Snorkel Flow is through the templates. You may consider choosing this experience (as opposed to the new guided workflow) if you want to:
- Include more than one model nodes in your application;
- Establish a hierarchical structure;
- Customize preprocessing/post-processing modules beyond defaults; or
- Have the flexibility to perform any advanced action.
Create application
To create a new application from a template:
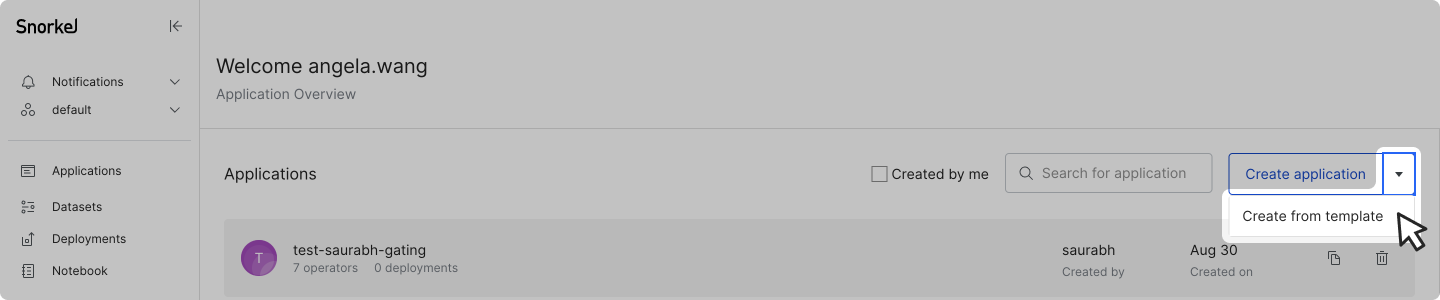
- Click the Applications option in the left-side menu.
- Click the drop-down arrow on the Create application button (top right corner of your screen), then click Create from template to be brought to the list of pre-set application templates.
Application templates
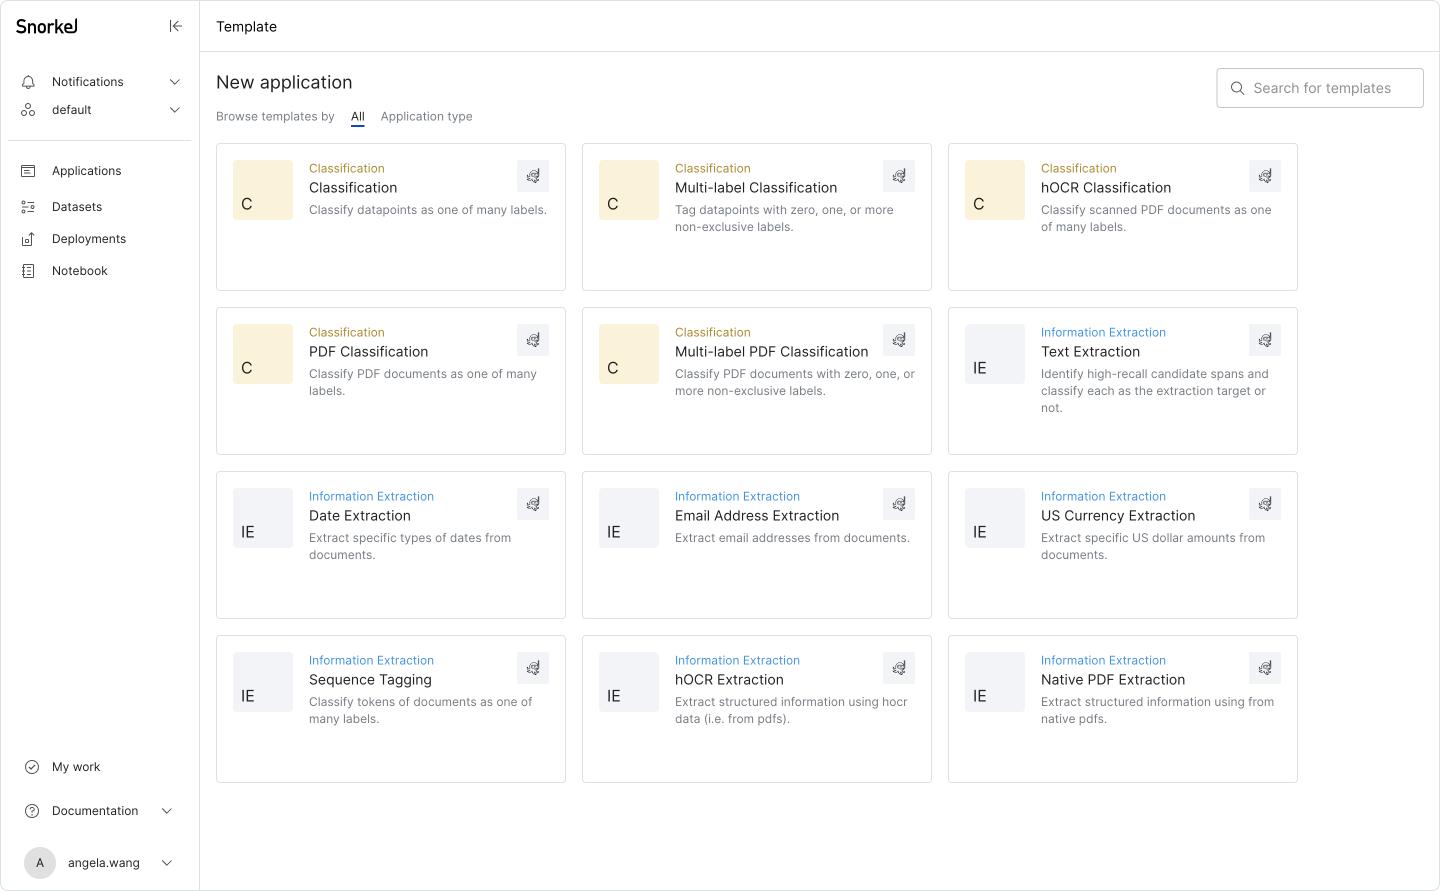
There are a total of 12 templates that support various:
- data formats (raw text and PDF)
- task types (classification and extraction of various types)
- label types (single and multi-label)
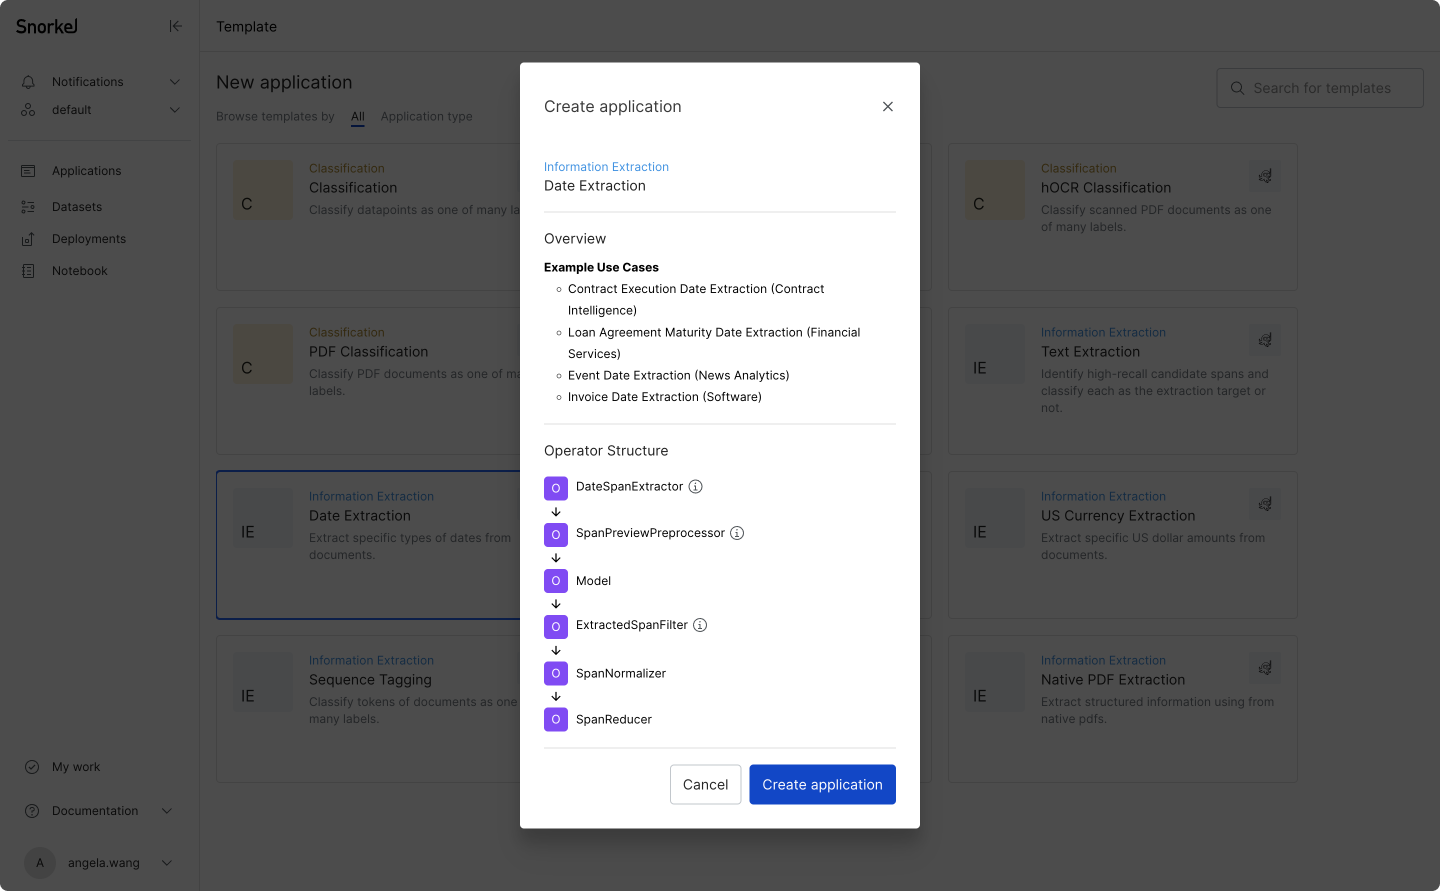
Select any template to preview the default preprocessors setup before opening the template. Below shows the preview for the Information Extraction: Date Extraction template.
Template overview
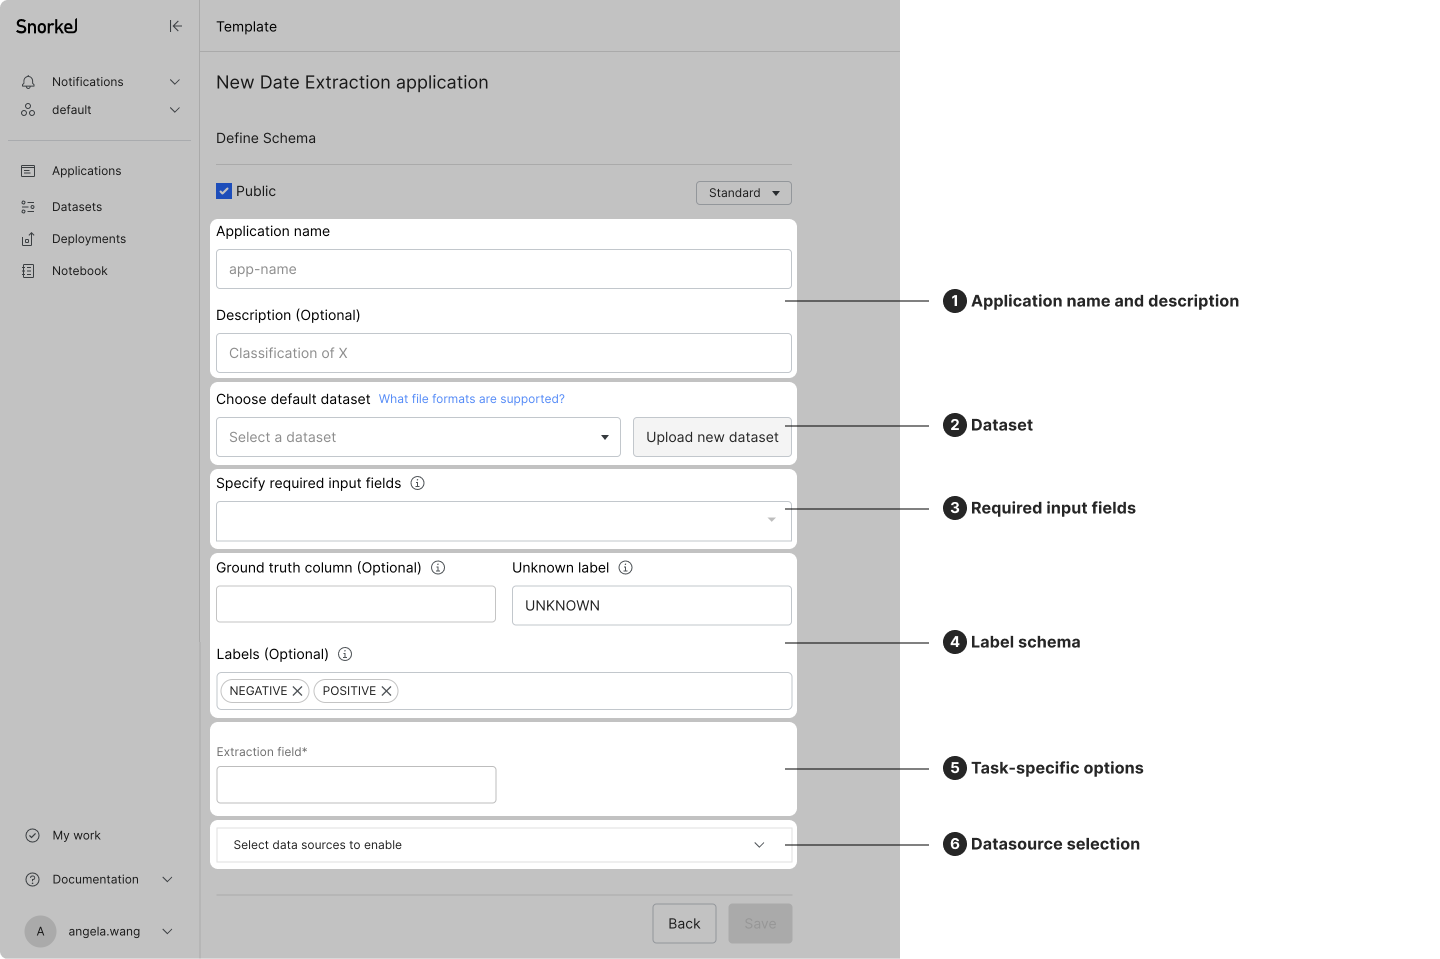
The type of user inputs that are required vary across templates, but are in the following general categories:
- Application name and description
- Dataset: Either select an existing dataset in your workspace in the dropdown, or click Upload new dataset to upload a new dataset (see Data upload for more information).
- Required input fields (during application deployment)
- Label schema definition: ground truth (GT) column, name for an unknown label, and custom label names
- Template-specific options
- Datasource selection
Below shows the New Date Extraction application screen for the Information Extraction: Date Extraction template.
Template-specific options
Below is a table of all the template-specific options:
| Option | Template | Description |
|---|---|---|
| Add embeddings | Single-label classification Single-label candidate-based extraction | Tuning this on allows you to use embedding related features such as Cluster view. |
| Tuning this on allows you to use embedding related features such as Cluster view. | ||
| Split doc by page |
| Turning this on will add a PageSplitter placeholder operator to the application. | | Run OCR on PDF |
- hOCR
| Turning this on will add a hOCR placeholder operator to the application. | | PDF field |
| Split doc by page | PDF | Turning this on will add a PageSplitter placeholder operator to the application. | | Run OCR on PDF | hOCR | Turning this on will add a hOCR placeholder operator to the application. | | PDF field | Native PDF | Select the column in which the PDF URL or relevant info is stored. | | | Extraction field |
| Extraction field | Information extraction (excluding sequence tagging) | Select the column from which you want to extract information. | | Negative label |
- Sequence tagging
| Customize name of the negative label. | | Seq field | Sequence tagging | Select the column from which you want to extract information. | | Auto-generate negative ground truth labels | Sequence tagging | This automatically assign Ground Truth to the negative label where it is currently missing. | | Filter out docs > 10 KB |
- Sequence tagging
| Turning this on will skip docs larger than 10 KB in the application to improve performance. |
Launch application
After you fill in the required fields, click Create to launch the application.
- If no additional input is necessary (e.g., the Classification template), you will land in the Development Studio and proceed with developing labeling functions and model iteration.
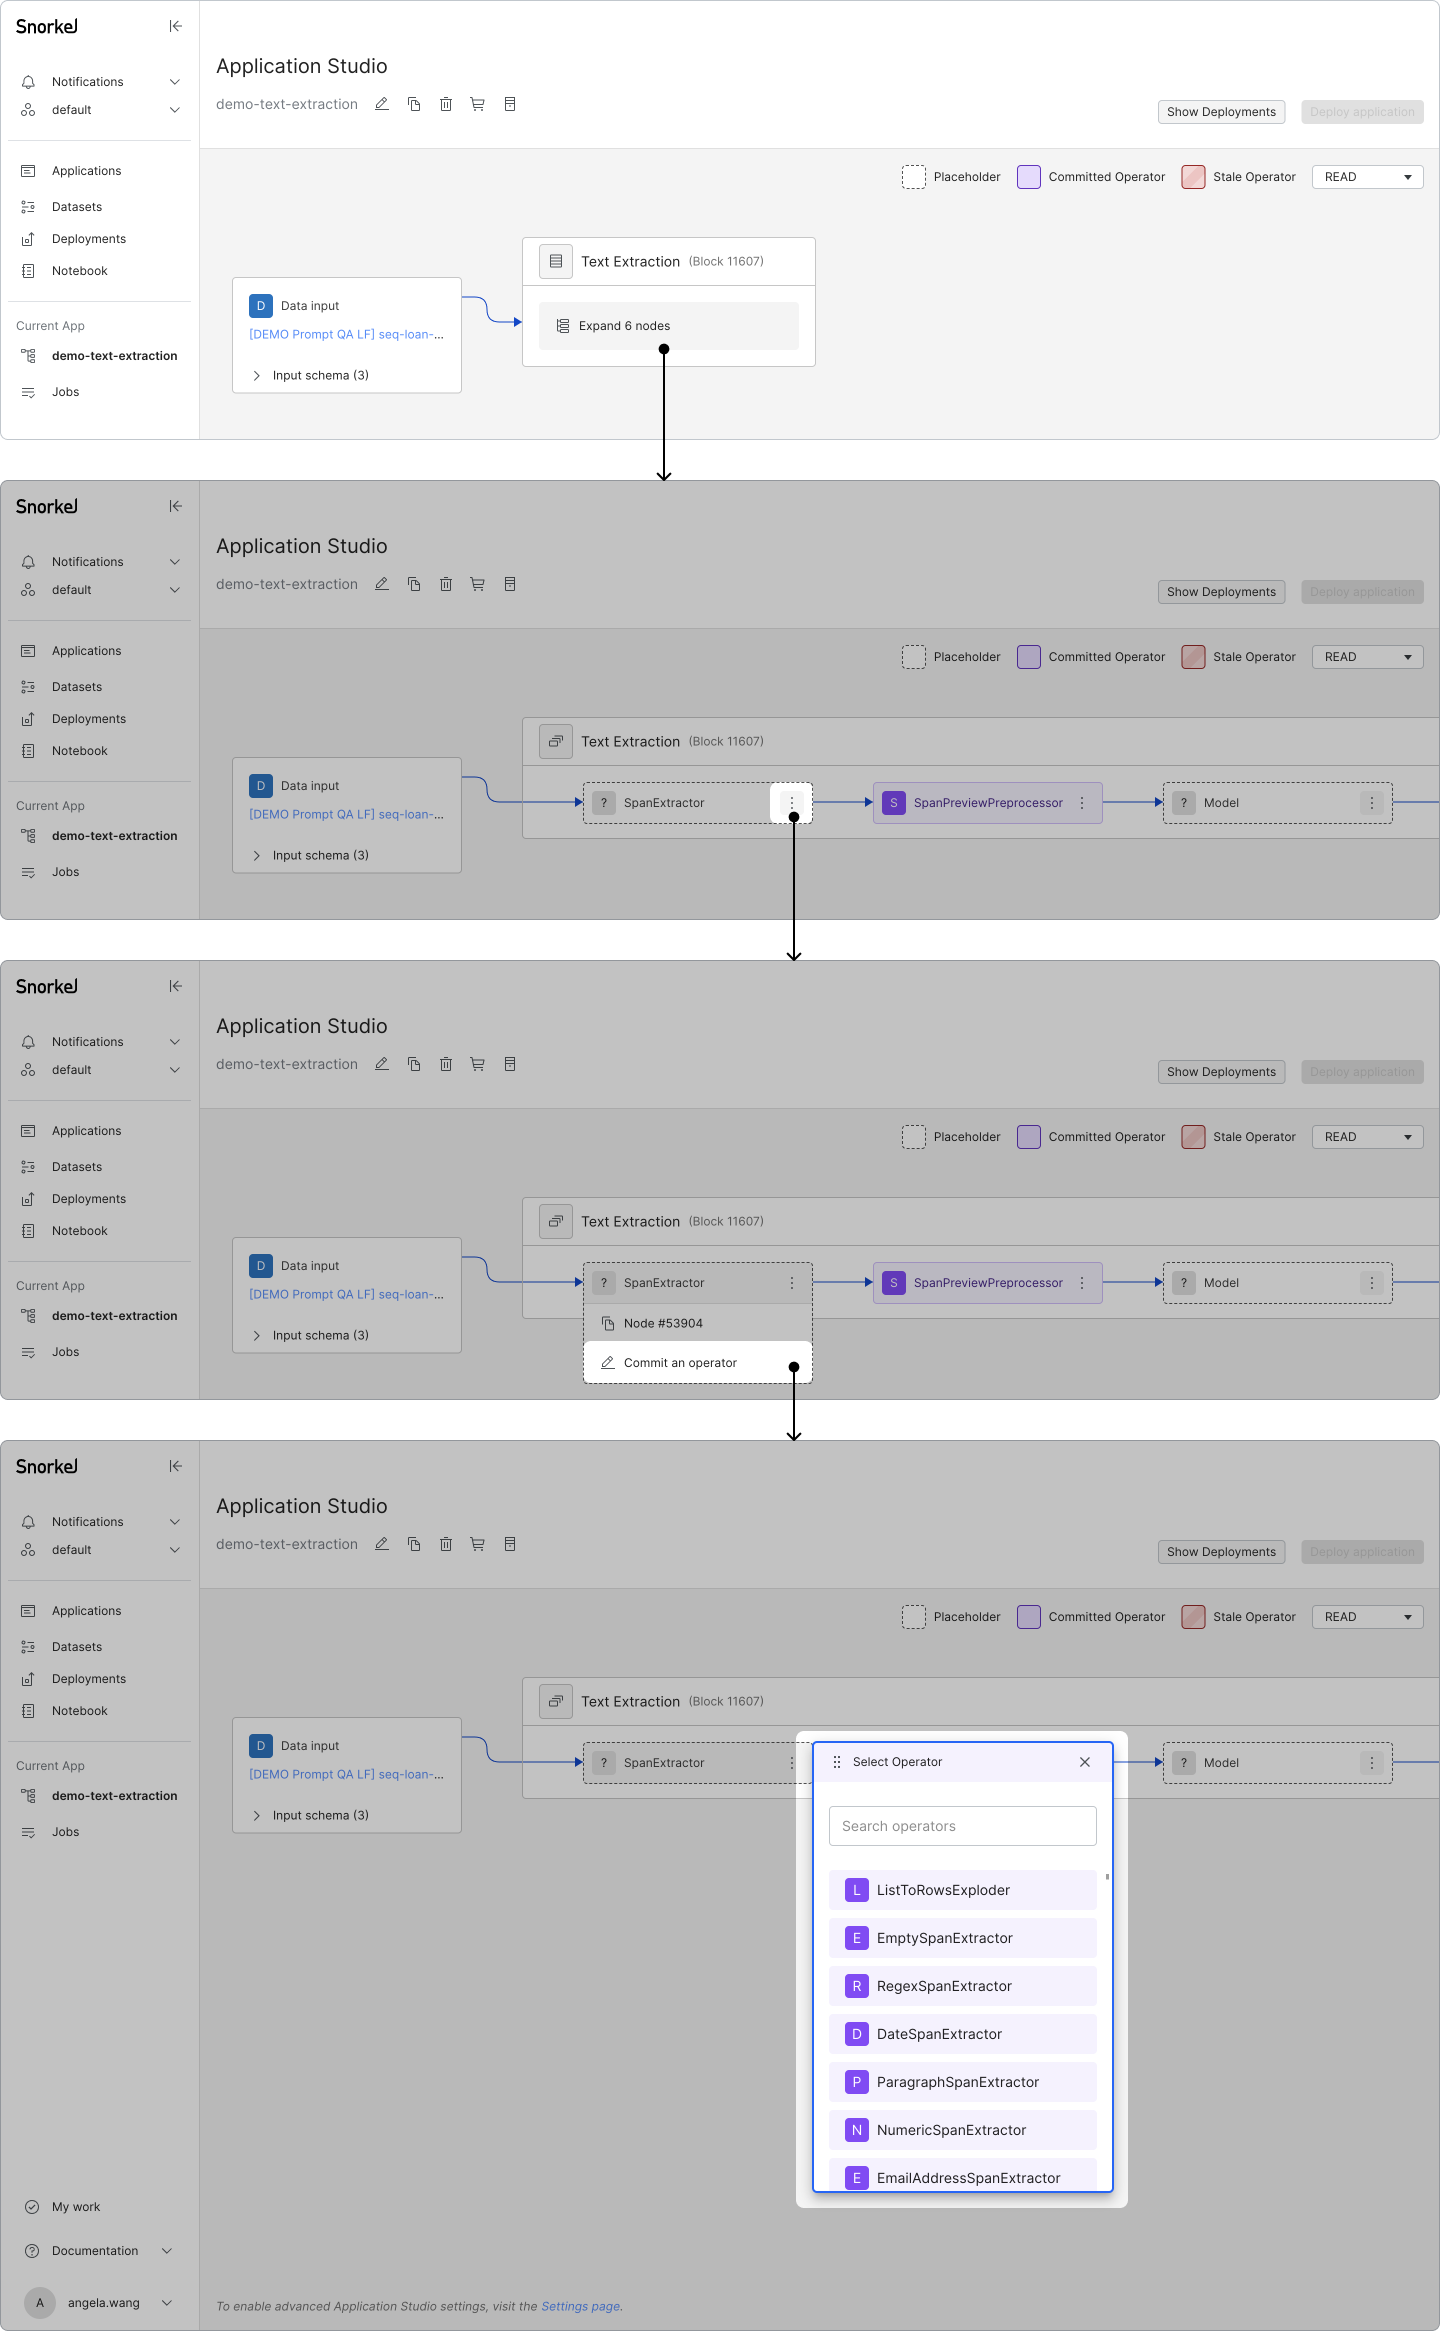
- If a template requires additional input to the preprocessors, you will be guided to the DAG page to complete the preprocessor setup.
- Once all operators before the Model node are committed (the node is a purple color), click the Model node to enter the Development Studio.
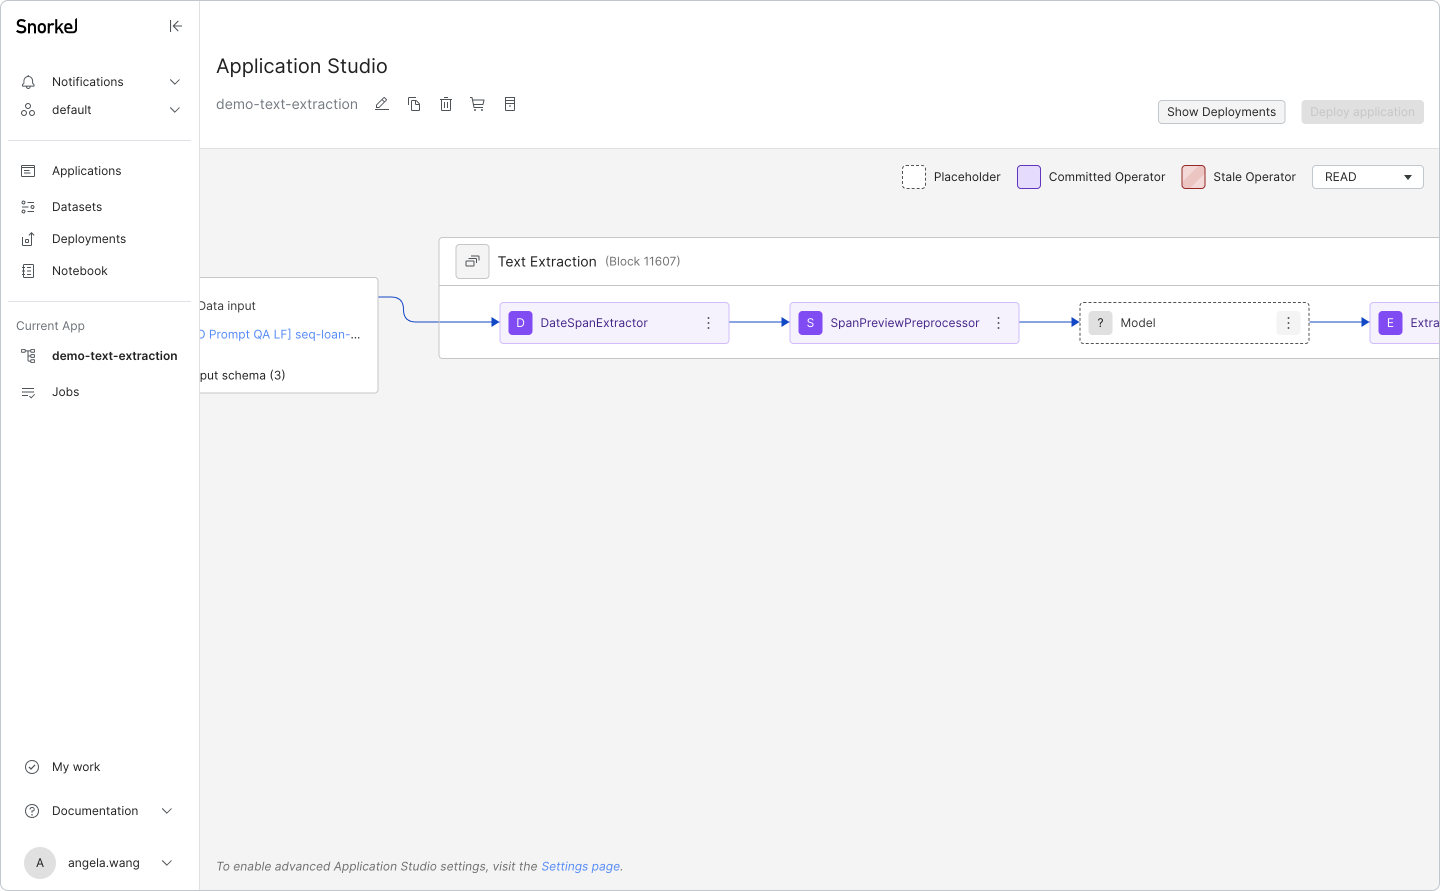
Below shows an example flow of how to define the operator that is used for the SpanExtractor node.