Deploying Snorkel-built models to Azure Machine Learning
There are three required steps for deploying a Snorkel-built application to Azure Machine Learning (Azure ML):
- Modify your MLflow model so that it is compatible with Azure ML.
- Upload your model to Azure ML.
- Create an endpoint and deploy your model.
NOTE
For more complex deployments, see creating a custom container to deploy a model to an online endpoint in Azure ML's documentation.
Prerequisites
To deploy Snorkel-built models to Azure Machine Learning, we require the following:
- An Azure account with access to Azure ML.
- An MLflow model that was downloaded from Snorkel Flow.
Modify your MLflow model
Snorkel Flow leverages MLflow's [add_libraries_to_model](https://mlflow.org/docs/latest/python_api/mlflow.models.html#mlflow.models.add_libraries_to_model) function to package Snorkel Flow's proprietary source code as a wheel file alongside the model. This package enables the model to run outside of the Snorkel Flow platform. Azure ML natively supports the MLflow model format, but does not support this pre-packaged wheel file. Because of this limitation, you'll first need to modify your MLflow model to be compatible to Azure ML.
To modify your MLflow model:
-
Unzip the downloaded zip file into
my-modelfolder.$ unzip -d my-model my-model-downloaded-from-snorkelflow.zip -
Unzip the wheel file to the
my-model/codefolder.$ unzip -d my-model my-model-downloaded-from-snorkelflow.zip
$ cd my-model
$ unzip -d code wheels/snorkelflowmlflow-0.XX.Y-py3-none-any.whl -
Open
my-model/conda.yaml, and delete this line of code:
wheels/snorkelflowmlflow-0.XX.Y-py3-none-any.whlchannels:
- conda-forge
dependencies:
- python=3.8.10
- pip<=20.0.2
- pip:
...
- pydantic==1.10.13
**- wheels/snorkelflowmlflow-0.XX.Y-py3-none-any.whl <- delete this line**
- llvmlite==0.41.1
- cloudpickle==1.6.0
... -
Open
my-model/MLmodel, and add this line of code:
code: codeflavors:
python_function:
data: data
**code: code <- Add this line**
env: conda.yaml
loader_module: application_package.mlflow_utils
mlflow_version: 2.10.2
model_uuid: 7bf8f4cb4a7e4a5e998a10f3c92ea193
...
Upload the model to Azure ML
Once you've made the necessary modifications to your MLflow model, you can upload it to Azure ML.
- Using an Azure Machine learning studio session, select Models, and then select Register.
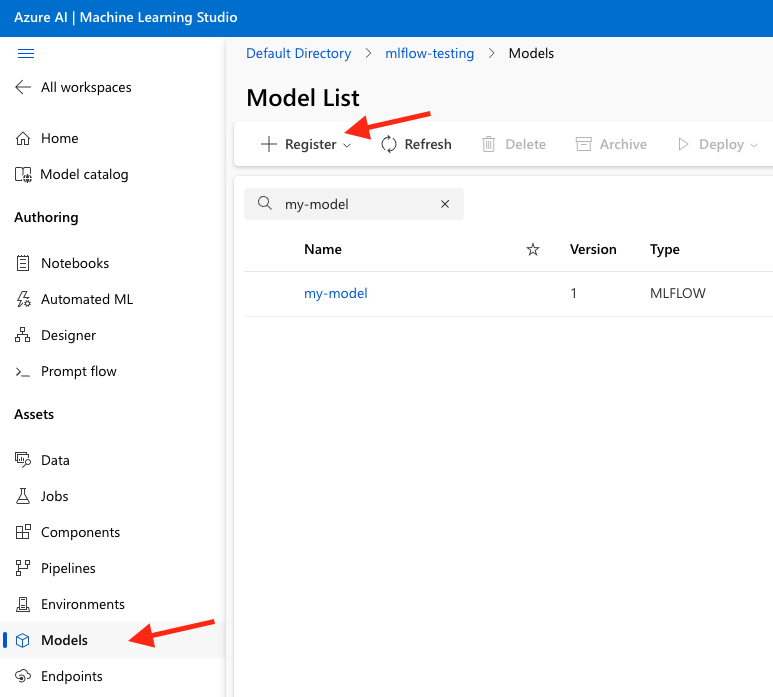
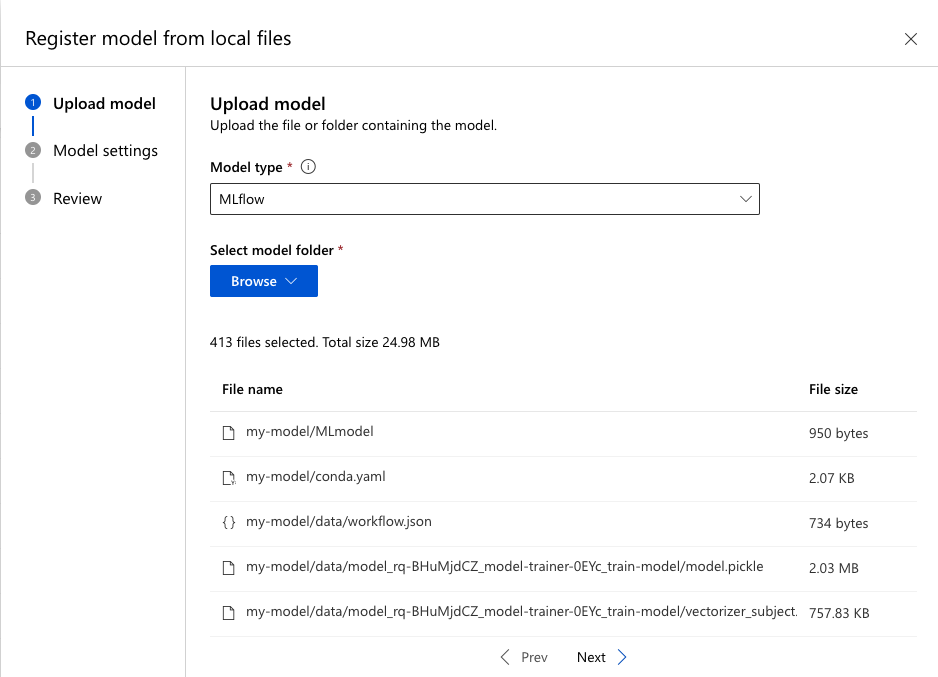
- Adjust the following settings, then register the model to Azure ML.
- Select MLflow as Model type.
- Select the my-model folder.
- Use the defaults for all other settings.
Create an endpoint and deploy the model
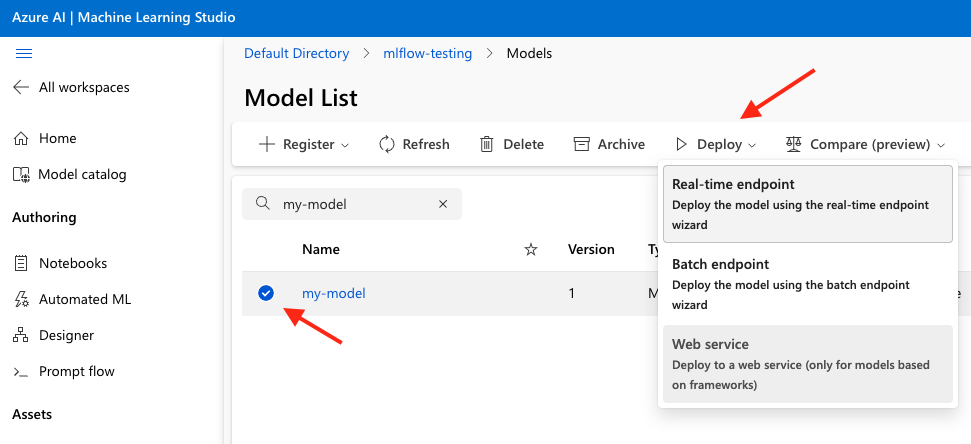
Once your model is registered to Azure ML, create an endpoint to deploy your model.
- Select the model name in the model list.
- Click Deploy.
- Click Real-time endpoint.
- Choose a virtual machine with enough memory, and then click Deploy.
**
NOTE
**If you are having issues at this stage, see troubleshooting online endpoint deployments for more information.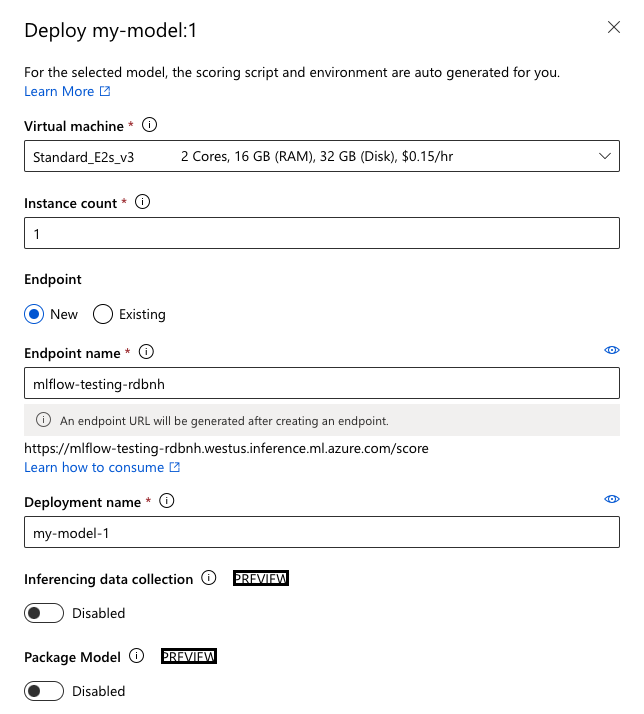
- Select Endpoints in the left-side menu to see the created endpoint.
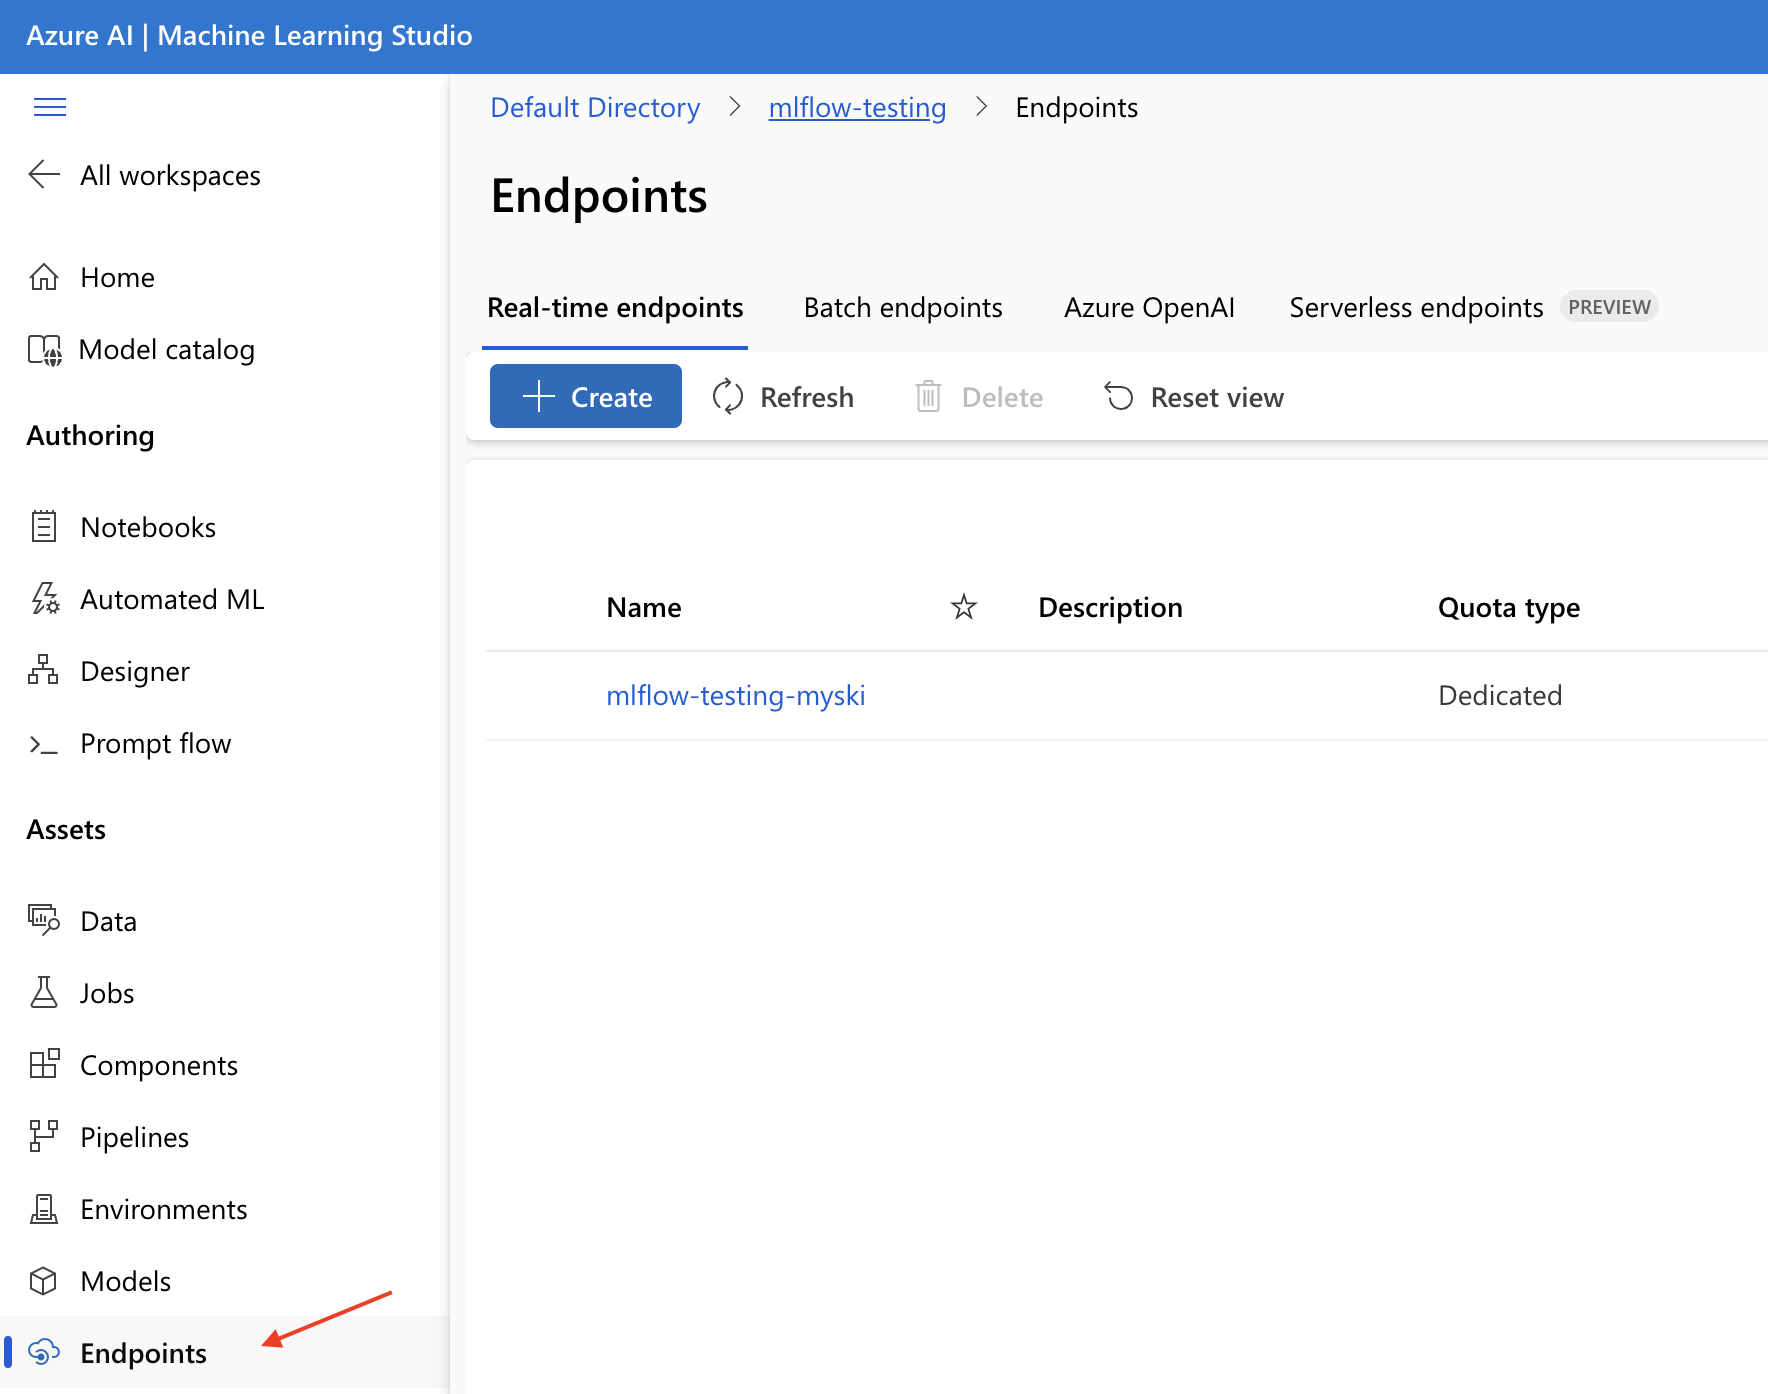
Testing deployed endpoints
Once the endpoint boots up, you can start testing and running the endpoint.
- From the Endpoint's home page, select Test.
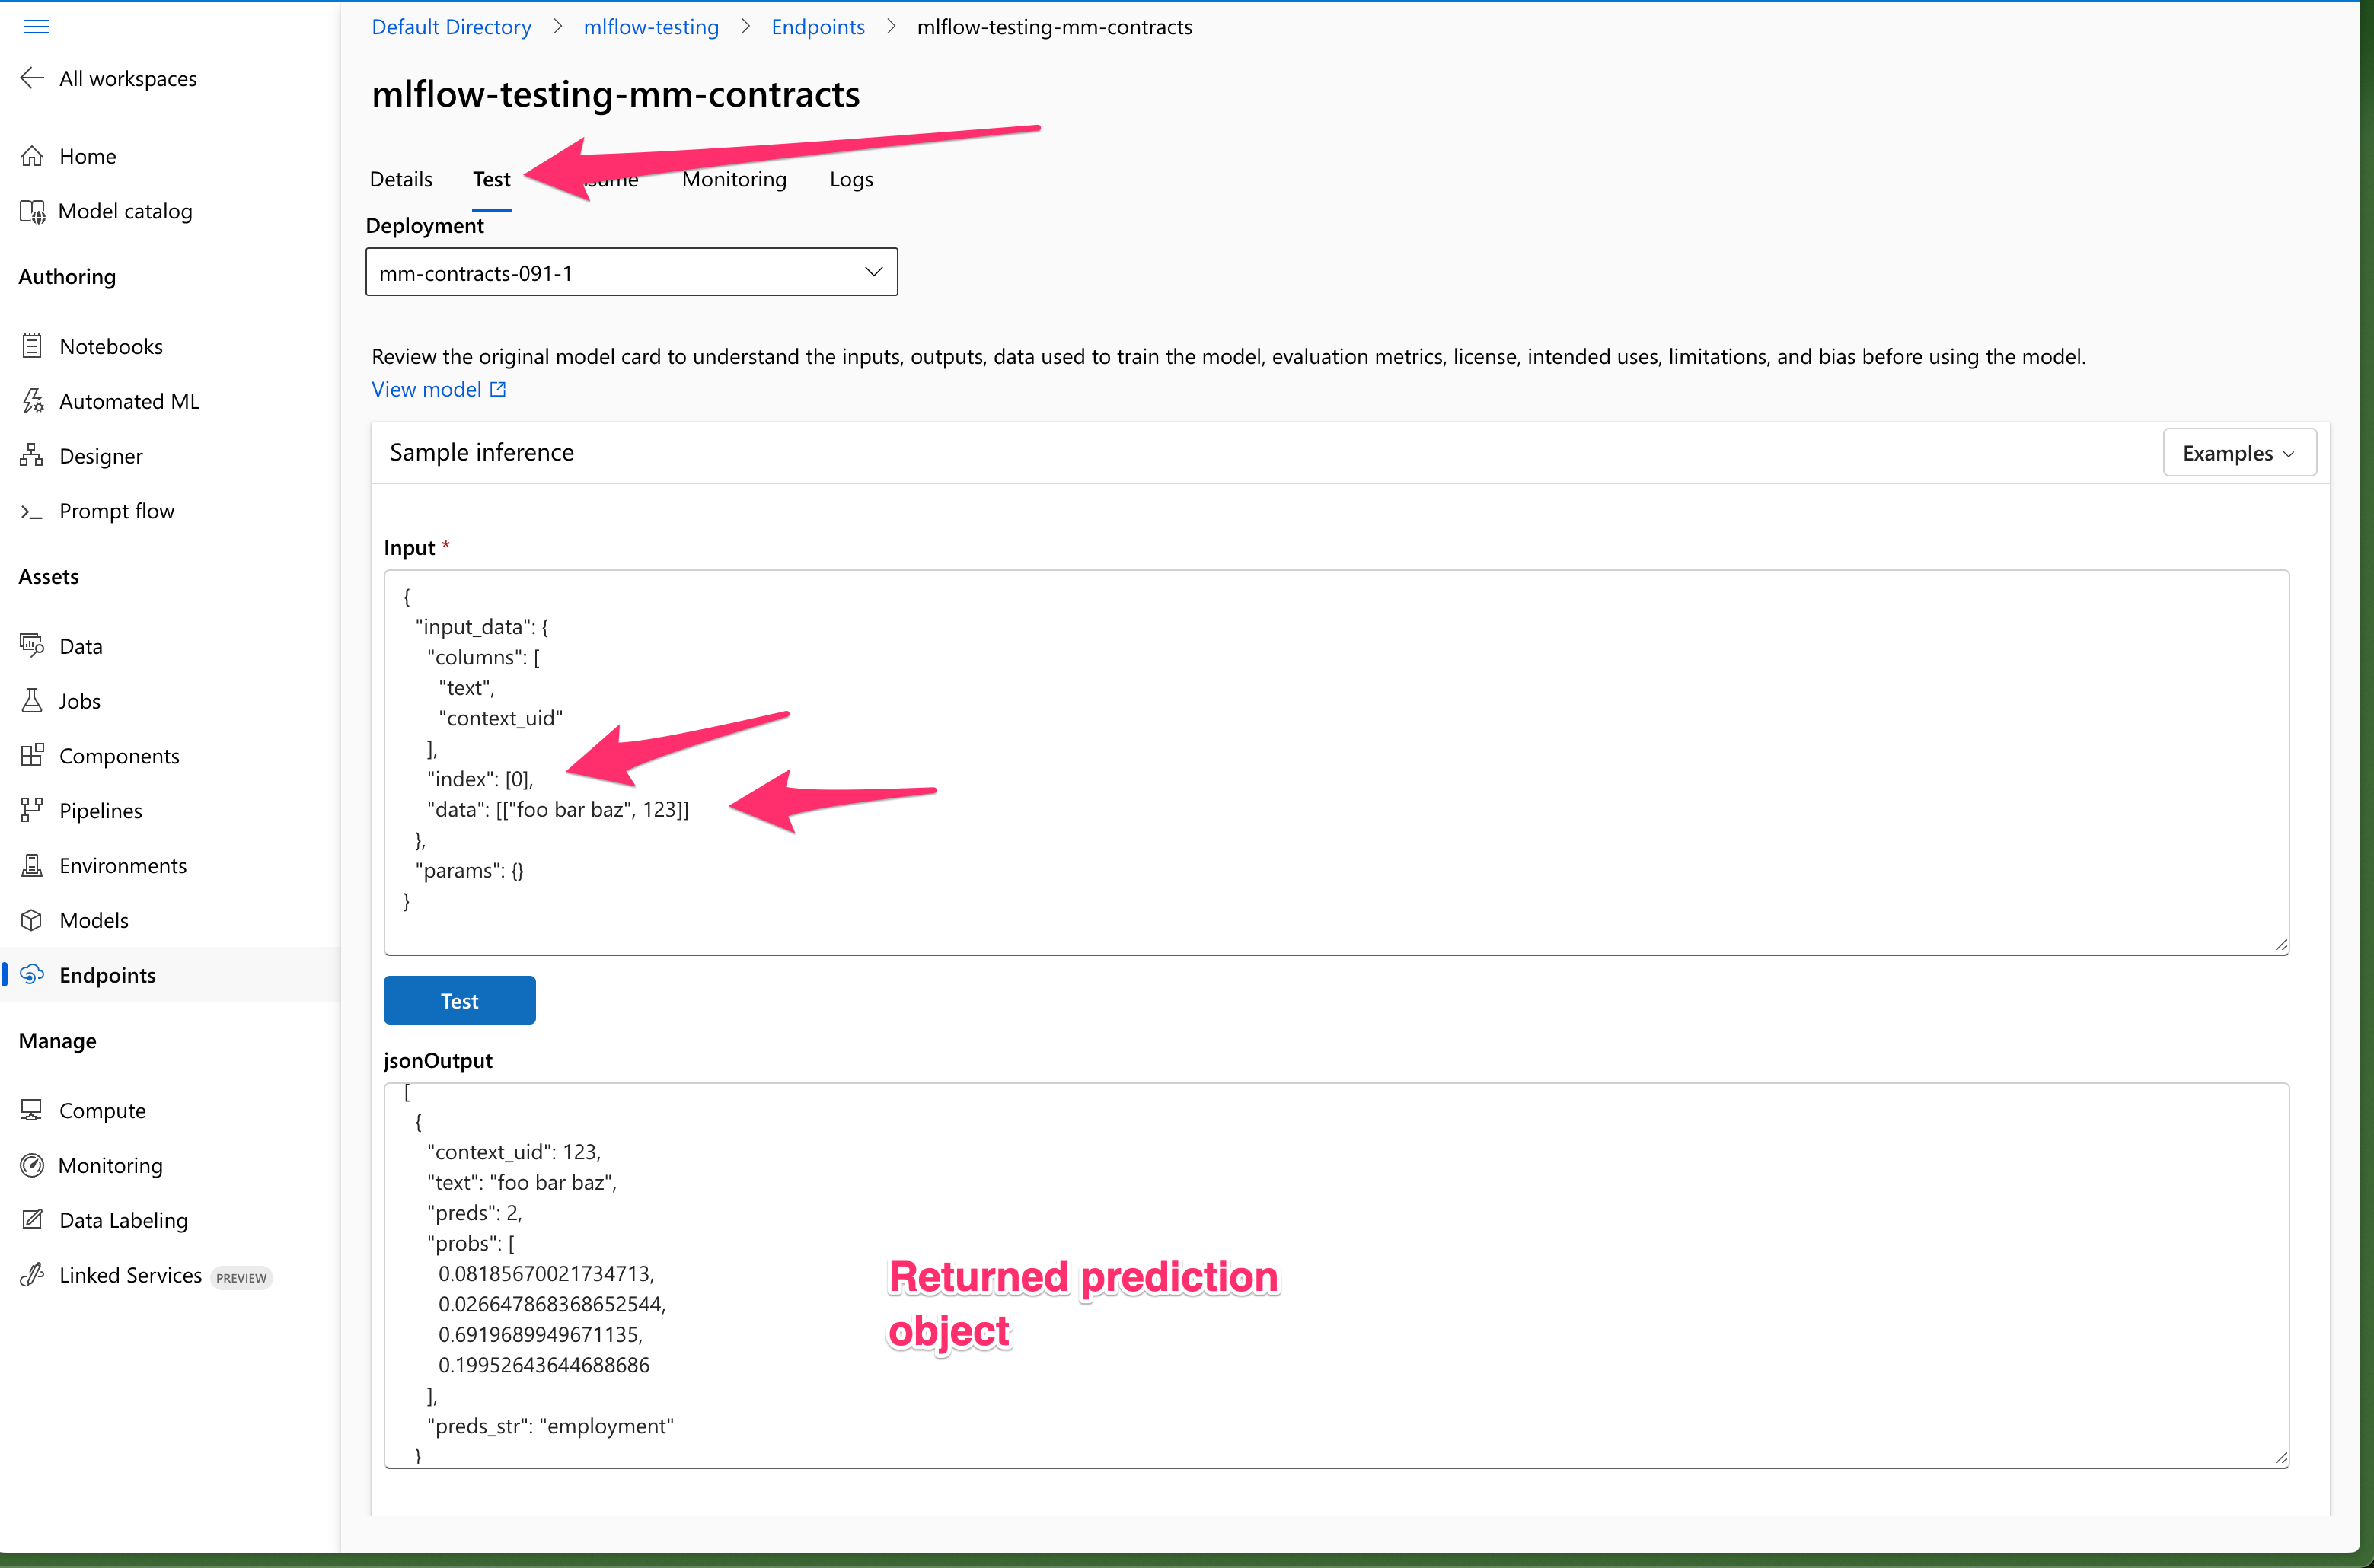
- Use an example record to ensure the returned prediction is expected.
- Use the Logs section to debug any errors during the test.
Conclusion
You exported a Snorkel-built model from Snorkel Flow, onboarded it to Azure ML, created a deployment endpoint, and validated the endpoint's results.
If you encounter issues during this process, please contact the Snorkel support team.