Deploying Snorkel-built models to AWS SageMaker
This tutorial walks through the four required steps to deploy a Snorkel-built application to AWS SageMaker:
- Deploy and export your model in Snorkel Flow.
- Build and push a containerized runtime environment to AWS ECR, if none exists.
- Push the exported model object to the AWS SageMaker.
- Score new data with the created endpoint.
Requirements
- Access to the AWS CLI.
- A SageMaker execution role configured and assigned through the AWS CLI.
- The ability to push containers to Amazon ECR from the AWS CLI.
- A Linux or MacOS development system running a python 3.8+ virtual environment with MLflow 2.0+ installed.
Deploying and exporting your model in Snorkel Flow
Follow the instructions in Deploying Snorkel-built models to deploy your model in Snorkel Flow. Next, download the deployment artifacts. To do so, click the Deployments option in the left-side menu, then click the Download deployment package button ( ). This will download the code and libraries that are required to run the exported deployment as a zip file to your local machine. Create a new directory on your development system and unzip the file into said directory.
Building a model runtime environment
Validate that you have AWS CLI access with the aws sts get-caller-identity command. If this command does not return an JSON IAM profile, see the AWS CLI documentation for more information about getting access configured.
The active account needs to be granted a SageMaker execution role, which includes full access to the SageMaker service. The role should be configured as followed to start, then refined for production use:
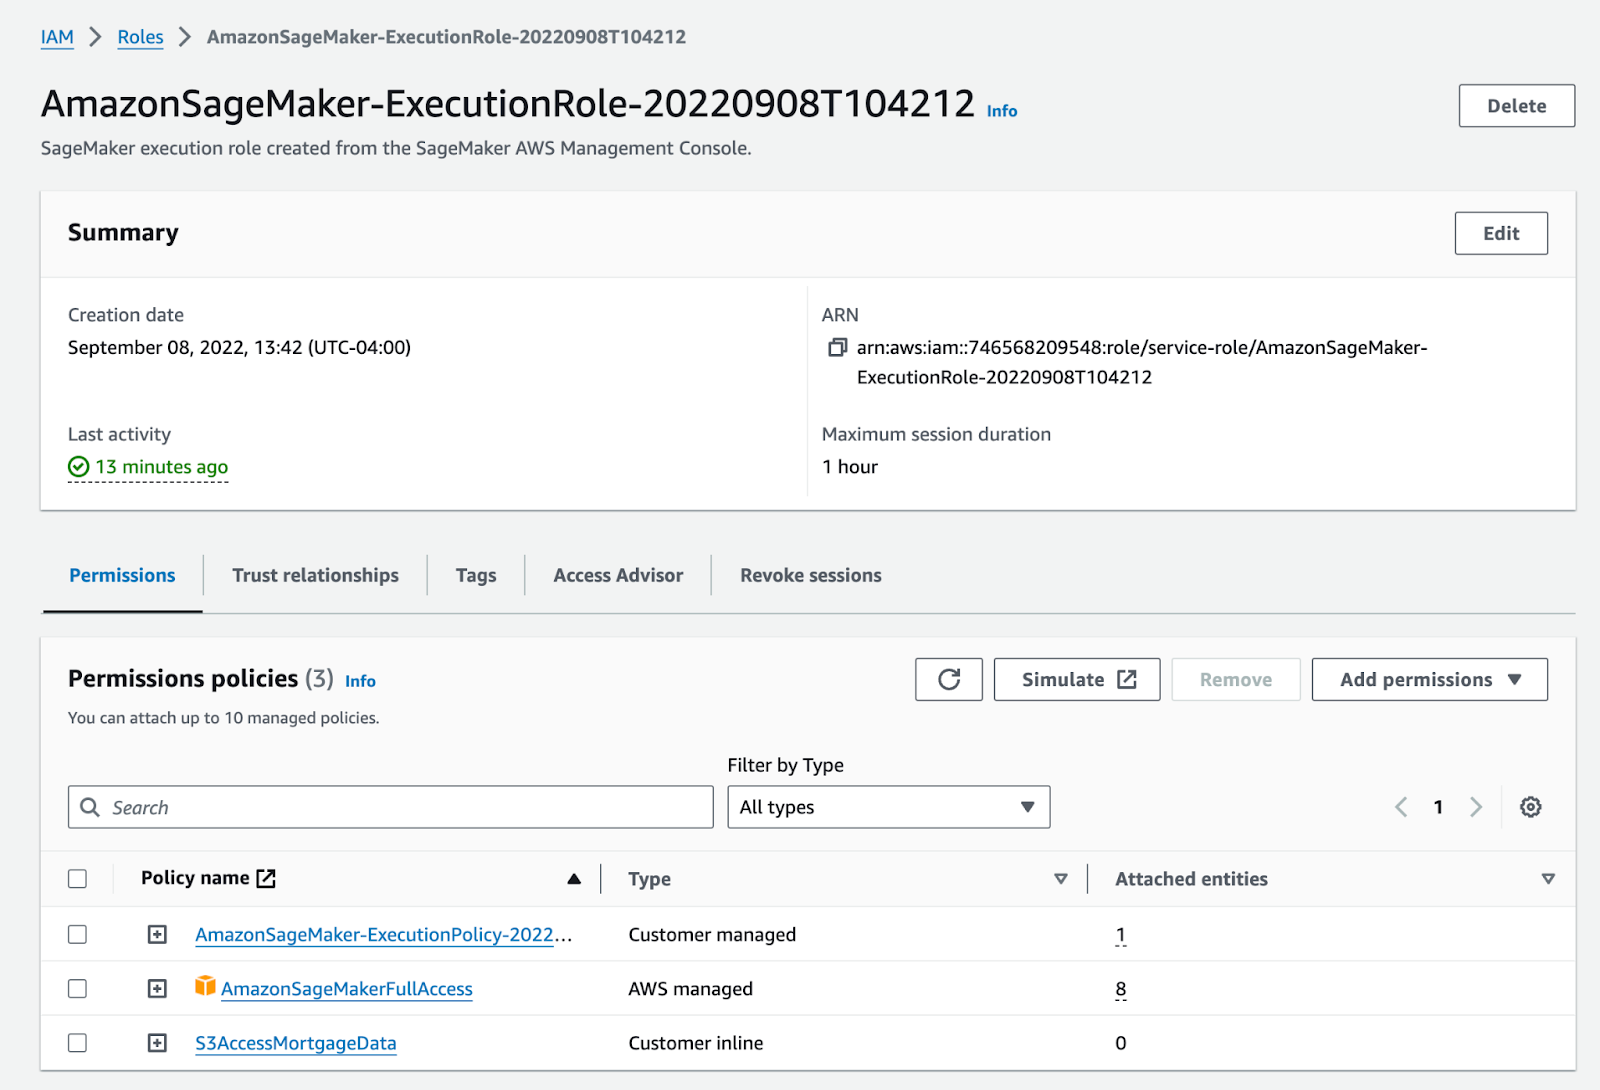
Copy the ARN of the role and save it as an environment variable in your terminal session (ARN=”{INSERT ARN}”). Next, navigate to the local model directory in the terminal and run the following command:
mlflow sagemaker build-and-push-container
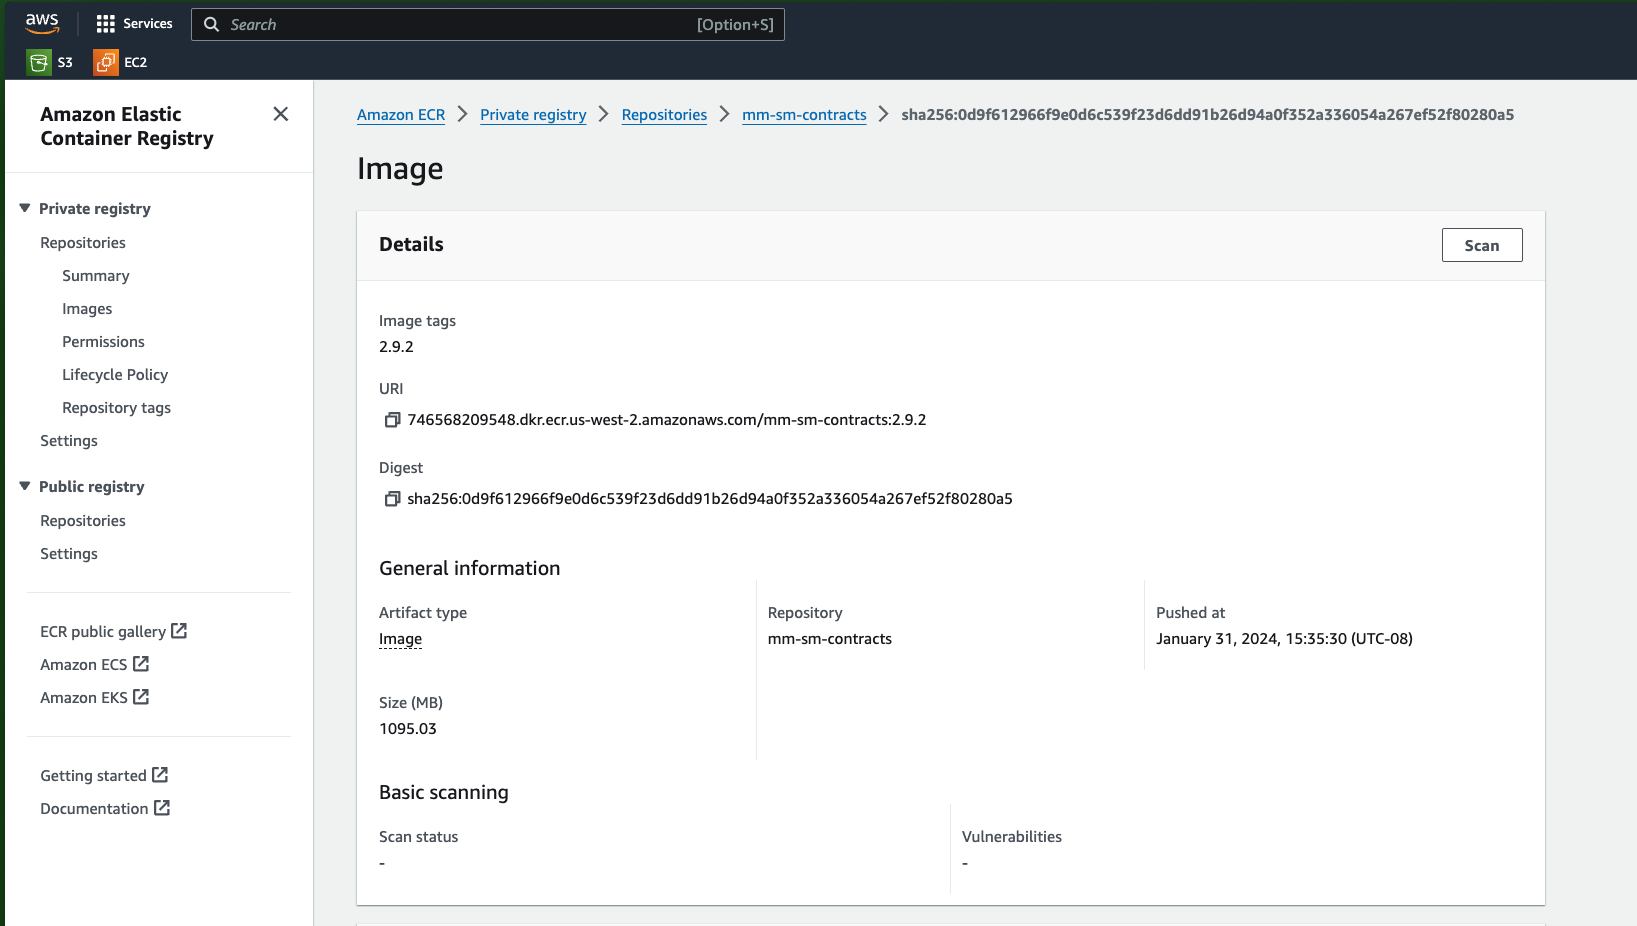
This will create a default containerized environment for the MLflow deployment and push this image to Amazon ECR. This should take about 10 minutes. After the command completes, log into the AWS console or use the AWS CLI to view the new container. You can find the image url in the beginning of the logs for the previous command:
2024/05/03 20:59:15 INFO mlflow.sagemaker: Pushing docker image mlflow-pyfunc to 746568209548.dkr.ecr.us-west-2.amazonaws.com/mlflow-pyfunc:2.12.1
This container will be used later when creating the Sagemaker deployment and endpoint.
Note: The build-and-push-container command will overwrite any existing container images for the same version of mlflow. Alternatively, users can create custom hosting images for each unique model deployment:
- Build the custom hosting image locally via docker build.
- Push the custom image to Amazon ECR
- When deploying a Sagemaker endpoint, add the -C image_url=$IMG_URL to the mlflow deployments create command below.
Deploying an AWS SageMaker endpoint
Now that a container runtime is created, it can be combined with the local model directory and pushed to Sagemaker as an endpoint. The SageMaker endpoint will use the default image created via the last command unless otherwise specified via the -C image_url argument. The endpoint will directly perform model scoring. To create an endpoint, run the following command:
mlflow deployments create -t sagemaker -m {local model directory path}
--name {deployment name}
-C region_name={region name}
-C instance_count={instance count}
-C execution_role_arn=$ARN
-C env='{"GUNICORN_CMD_ARGS": "--timeout 60 -k sync --workers 1"
}'
For example, specify region_name="us-west-2" and instance_count=1.
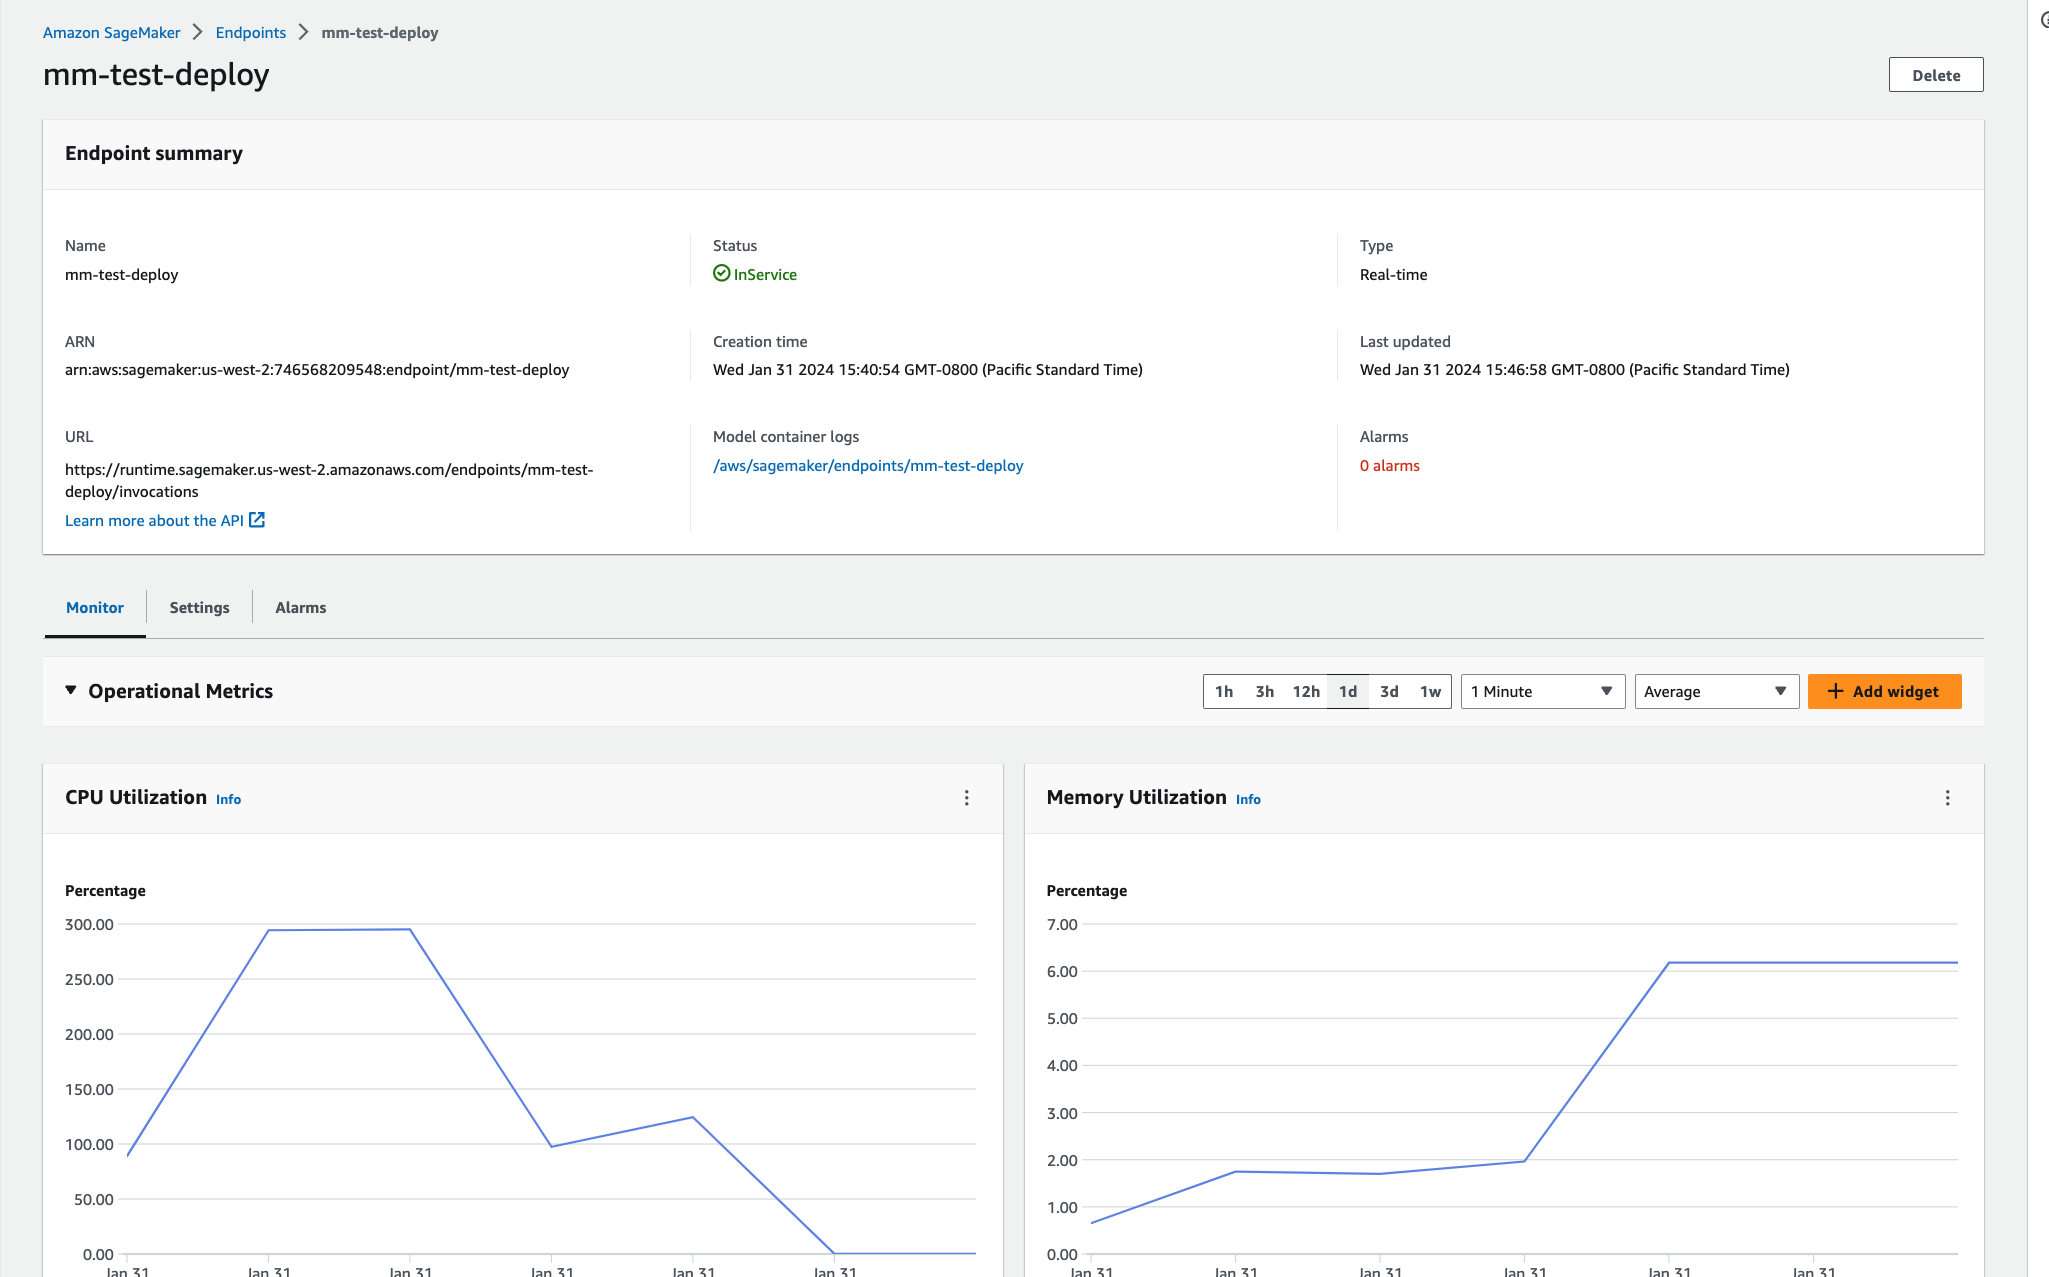
View the newly created endpoint in the AWS console or CLI.
Inference: scoring new data
For simplicity, this tutorial will focus on batch deployments for inService endpoints. To query the newly create endpoint, create a deployment client and pass the DataFrame that requires scoring to deployed endpoint.
ubuntu@ip-10-1-27-195:~/mlflow$ python
Python 3.8.10 (default, Nov 22 2023, 10:22:35)
[GCC 9.4.0] on linux
Type "help", "copyright", "credits" or "license" for more information.
>>> region = "us-west-2"
>>> import mlflow.deployments
>>> deployment_client = mlflow.deployments.get_deploy_client("sagemaker:/" + region)
>>> deployment_name = "mm-test-deploy"
>>> deployment_info = deployment_client.get_deployment(name=deployment_name)
>>> print(f"MLflow SageMaker Deployment status is: {deployment_info['EndpointStatus']}")
MLflow SageMaker Deployment status is: InService
>>>
>>> import pandas as pd
>>> d = {'context_uid': [1, 2], 'subject': ["test", "test"], 'body': ["test", "test"], 'num_images': [2, 3]}
>>> df = pd.DataFrame(data=d)
>>> df
   context_uid subject  body  num_images
0            1    test  test           2
1            2    test  test           3
>>> prediction1 = deployment_client.predict(deployment_name, df)
>>> prediction1
{'predictions': [{'body': 'test', 'context_uid': 1, 'num_images': 2.0, 'subject': 'test', 'preds': 0, 'probs': [0.379504032603055, 0.620495967396945], 'preds_str': 'SPAM'}, {'body': 'test', 'context_uid': 2, 'num_images': 3.0, 'subject': 'test', 'preds': 0, 'probs': [0.42396641921101064, 0.5760335807889894], 'preds_str': 'SPAM'}]}
Conclusion
This tutorial demonstrates how an exported Snorkel workflow can be configured in AWS SageMaker to score production data. If you have any questions about this technique, please reach out to support@snorkel.ai.