Developing and registering custom models
What you will learn:
- How to load a custom trained model into Snorkel Flow
In addition to built-in model templates, we can also train a custom model and use it as part of an application. To do so, we create a custom model class in a Notebook via the Python SDK.
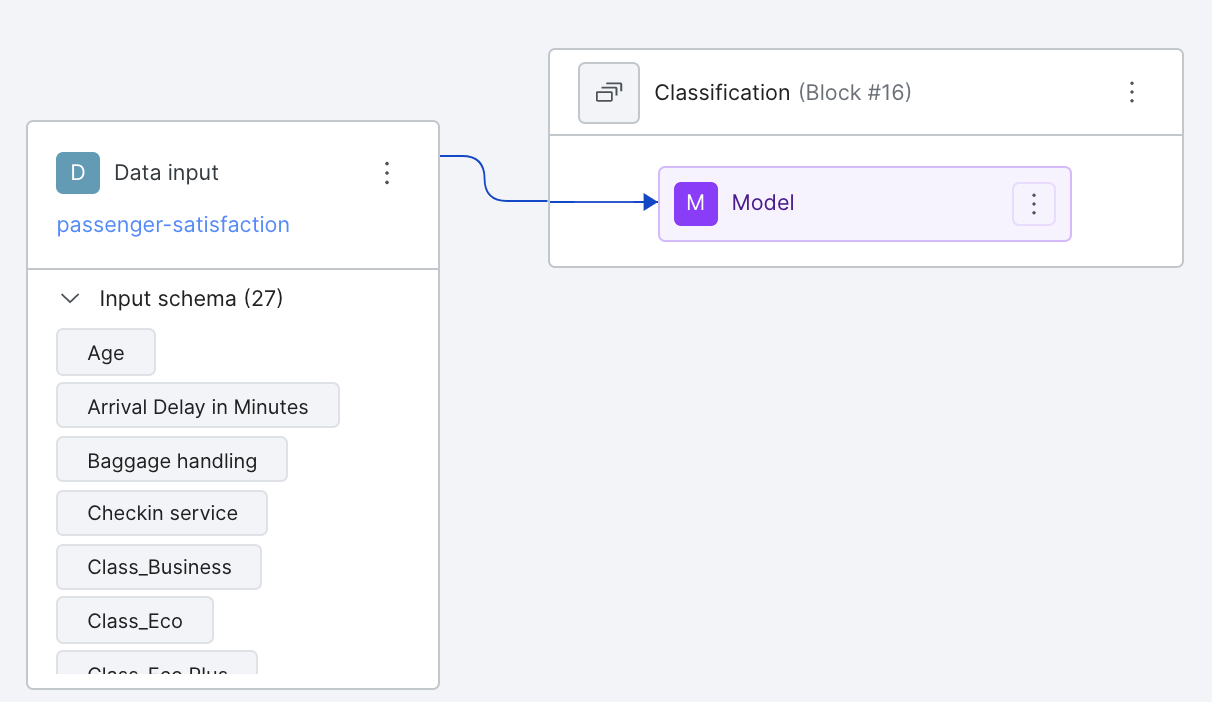
In this example, we will work with a passenger satisfaction dataset, classifying a passenger’s satisfaction (satisfied or unsatisfied) based on several features such as Age, Flight Distance, Seat Comfort, etc.
Develop a custom model
Workflows for developing custom models will typically include
- Retrieving the data from the application
- Training the model in Notebook
- Defining a model class
- Registering the class via SDK.
Retrieving data
In Notebook, we retrieve the programmtically labeled training data that precedes the model node using the SDK method get_node_data. We specify split="train" to receive the training data and pop the ground truth to target y_train.
import snorkelflow.client as sf
df_train = sf.get_node_data(
    node=node_uid,
    split="train",
    ground_truth=True,
    training_set_probs=False,
    training_set_filter_unlabeled=True, # filter out unlabeled data points
)
y_train = df_train.pop("ground_truth")
To clean up the data, we remove the ground truth label column satisfaction and the id column context_uid which is not needed for training.
relevant_columns = list(df_train.columns.values)
relevant_columns.remove('satisfaction')
relevant_columns.remove('context_uid')
df_train = df_train[relevant_columns]
Training a model
Now that we’ve prepared our data from the model node, we’re ready to train a model. A model of any choice is acceptable: e.g. Sklearn, PyTorch, Keras, etc. Feel free to experiment with a variety of custom models.
The chosen model must be able to extract the weights and save them to disk.
To illustrate a simple example, lets train a Logistic Regression model from Sklearn.
We first extract the values from our pandas dataframe, fit a LogisticRegression() model, and make the predictions on our training data.
from sklearn.linear_model import LogisticRegression
X_train = df_train.values # extract data points without ground truth
model = LogisticRegression()
model.fit(X_train, y_train) # train against the ground truth stored in y_train
preds_train = model.predict(X_train)
Defining a custom model class
After training the model, we need to write a custom model class in Notebook that inherits from the base class TrainedClassificationModelV2. Within the class, several necessary methods need to be defined: __init__, save, load, predict.
Let’s build up these methods individually.
__init__ takes in a model parameter where we will pass in our trained model instance from above. We instantiate a model instance variable with this parameter. In addition, we create a list of relevant columns (features) needed for the predict method.
Note
relevant_columns is a required list that dictates the input schema of the model. It must include all columns used by the predict method; otherwise, inference will fail.
def __init__(self, model):
    self.model = model
    self.relevant_columns = ['Age', 'Flight Distance', 'Inflight wifi service',
      'Departure/Arrival time convenient', 'Ease of Online booking', 'Gate location',
      'Food and drink', 'Online boarding', 'Seat comfort',
      'Inflight entertainment', 'On-board service', 'Leg room service',
      'Baggage handling', 'Checkin service', 'Inflight service',
      'Cleanliness', 'Departure Delay in Minutes', 'Arrival Delay in Minutes',
      'Gender_Female', 'Gender_Male', 'Customer Type_Loyal Customer',
      'Customer Type_disloyal Customer', 'Type of Travel_Business travel', 'Type of Travel_Personal Travel',
      'Class_Business', 'Class_Eco', 'Class_Eco Plus']
save determines how the weights of the model will be extracted and saved to a file on disk. It takes in a required argument dirpath, which is the directory where the model will be saved. In this case, we simply pickle the model and dump it to the path. In addition, a manifest needs to be written to disk and stores meta-information regarding the model. We instantiate a BaseManifest object, pass in the class type and relevant model_fields (the relevant columns we defined in __init__). Then, we simply write the manifest json to the same directory.
The only two required manifest fields are type and model_fields. However, the manifest can be additionally used to store other useful metadata for use in the other methods of the class definition.
def save(self, dirpath: Path):
    import pickle
    with open(dirpath / "model.pickle", "wb") as tf:
        pickle.dump(self.model, tf)

    # Need to also define operator input schema for manifest
    model_fields = self.relevant_columns
    from snorkelflow.models.cls_model import BaseManifest
    manifest = BaseManifest(type=self.__class__.__name__, model_fields=model_fields)
    with open(dirpath / "manifest.json", "w+") as mf:
        mf.write(manifest.json())
The class method load, on the other hand, defines how we read the weights from a directory path and load an instance of our defined class. The method takes in the directory path dirpath to read from, and a storage_options argument. In this case, we simply load the file from the path and unpickle our model. We then instantiate an instance of our class ExampleModelClass with the trained model.
@classmethod
def load(cls, dirpath: Path, storage_options: Optional[Dict[str, Any]] = None):
    import pickle

    from snorkelflow.utils import open_file
    model_path = os.path.join(dirpath, "model.pickle")
    with open_file(model_path, "rb") as tf:
        model = pickle.load(tf)

    return cls(model=model)
The last method predict dictates how we run inference on the data with our trained model. As such, it takes in one argument df, the dataframe we will run inference on. Here, we simply filter for the columns we need for prediction and call .predict and .predict_proba on our dataframe values.
predict must return a tuple of classification predictions and probabilities. However, probabilities are optional, in which case we could return ..., None instead.
def predict(self, df: pd.DataFrame):
    import pandas as pd
    processed_df = df[self.relevant_columns]
    return self.model.predict(processed_df.values), self.model.predict_proba(processed_df.values)
The full code can be seen below
from pathlib import Path
from typing import Any, Dict, Optional

from snorkelflow.models.cls_model import (
    TrainedClassificationModelV2,
    trained_models_dict,
)

class ExampleModelClass(TrainedClassificationModelV2):
    def __init__(self, model):
        self.model = model
        self.relevant_columns = ['Age', 'Flight Distance', 'Inflight wifi service',
          'Departure/Arrival time convenient', 'Ease of Online booking', 'Gate location',
          'Food and drink', 'Online boarding', 'Seat comfort',
          'Inflight entertainment', 'On-board service', 'Leg room service',
          'Baggage handling', 'Checkin service', 'Inflight service',
          'Cleanliness', 'Departure Delay in Minutes', 'Arrival Delay in Minutes',
          'Gender_Female', 'Gender_Male', 'Customer Type_Loyal Customer',
          'Customer Type_disloyal Customer', 'Type of Travel_Business travel', 'Type of Travel_Personal Travel',
          'Class_Business', 'Class_Eco', 'Class_Eco Plus']

    def save(self, dirpath: Path):
        import pickle
        with open(dirpath / "model.pickle", "wb") as tf:
            pickle.dump(self.model, tf)

        # Need to also define operator input schema for manifest
        model_fields = self.relevant_columns
        from snorkelflow.models.cls_model import BaseManifest
        manifest = BaseManifest(type=self.__class__.__name__, model_fields=model_fields)
        with open(dirpath / "manifest.json", "w+") as mf:
            mf.write(manifest.json())

    @classmethod
    def load(cls, dirpath: Path, storage_options: Optional[Dict[str, Any]] = None):
        import pickle

        from snorkelflow.utils import open_file
        model_path = os.path.join(dirpath, "model.pickle")
        with open_file(model_path, "rb") as tf:
            model = pickle.load(tf)

        return cls(model=model)

    def predict(self, df: pd.DataFrame):
        import pandas as pd
        print(f"Before: {df.columns.values}")
        df = df[self.relevant_columns]
        processed_df = pd.get_dummies(df)
        print(f"After: {processed_df.columns.values}")
        return self.model.predict(processed_df.values), self.model.predict_proba(processed_df.values)
Testing the custom model class
Now that we’ve written our custom model class definition, we can test our class before registering with Snorkel Flow.
# Initialize the model instance
model_instance = ExampleModelClass(model=model)
# Test the save method
model_instance.save(resolve_data_path('minio://custom_model_test'))
# Test the load method
model_instance2 = PS.load(resolve_data_path('minio://custom_model_test'))
# Test the predict method, check that results are the same before saving+loading and after
model_instance2.predict(df)
model_instance.predict(df)
Registering the custom model class
Now that we’ve tested our custom model class, it’s time to register our class with Snorkel Flow. Simply create an instance of our class and pass in our trained Sklearn model. Then, call the SDK method sf.register_trained_model and pass in this instance, the ID of the model node, and the description of the model.
model_instance = ExampleModelClass(model=model)
job_id = sf.register_trained_model(model=model_instance,
                                   node=node_uid,
                                   description="our newly created custom model")["job_id"]
Monitoring progress and completion
models.register_trained_model SDK method will output a Job ID for tracking. Using poll_job_status, we can track the status of the registration and prediction.
sf.poll_job_status(job_id)
Use a custom model
Now that registration has been completed, we can use the model in Snorkel Flow.
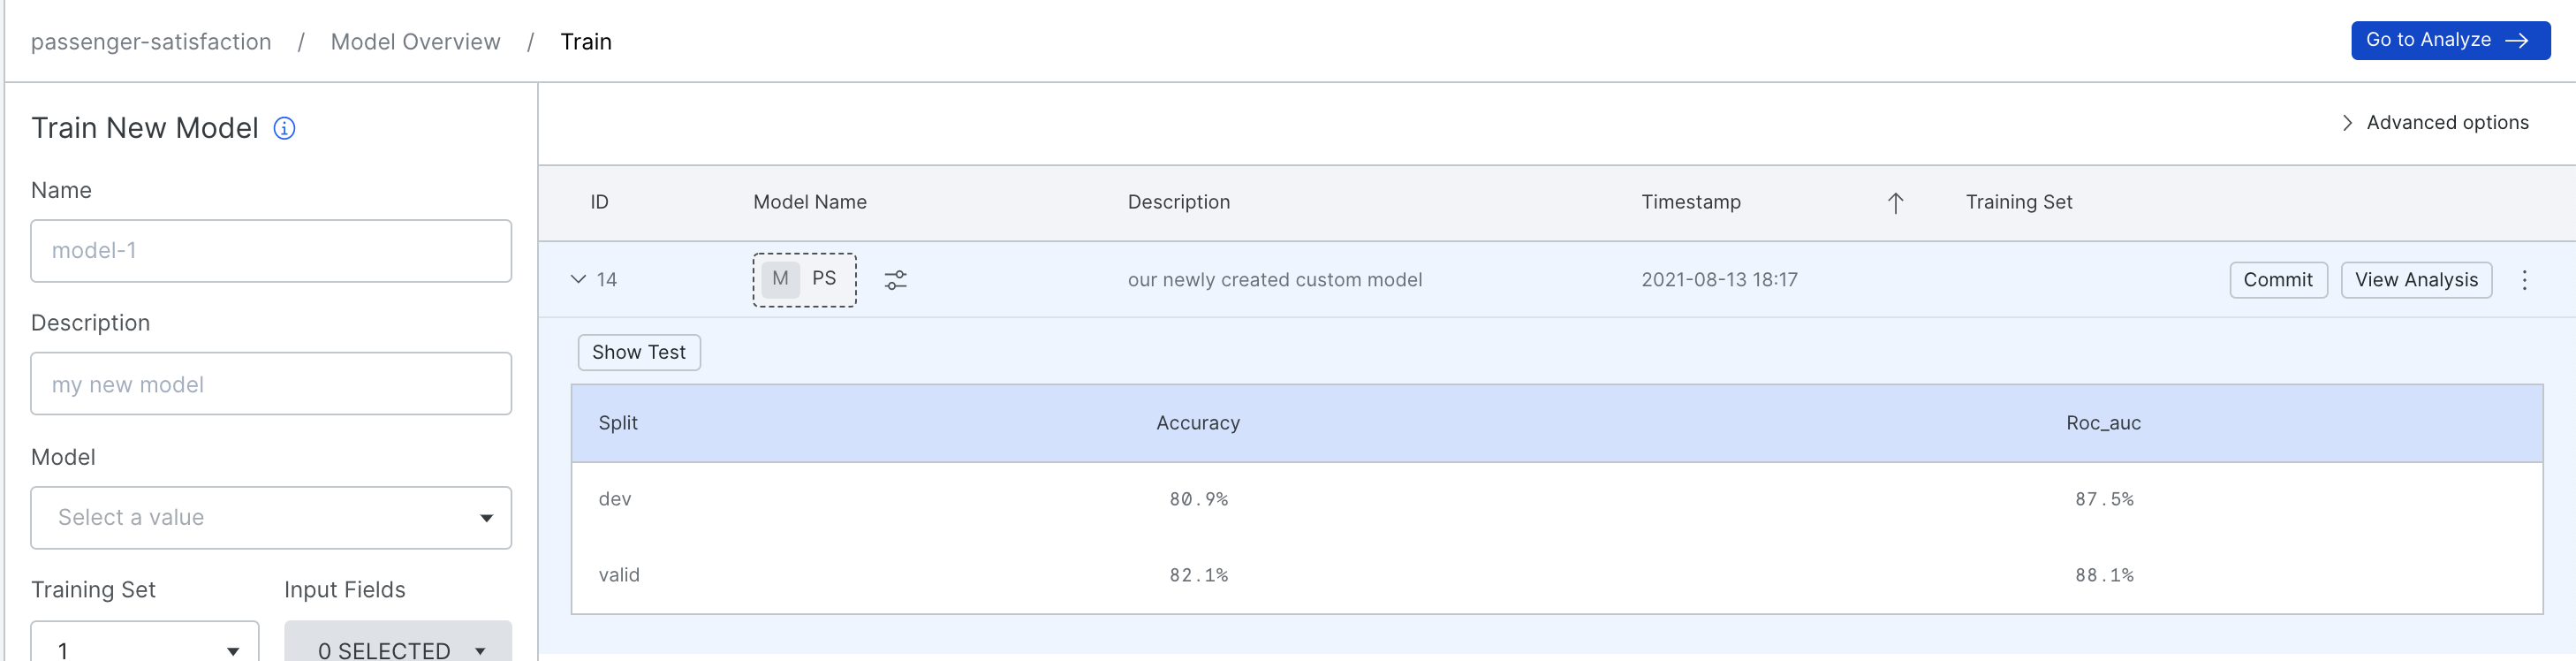
Once our registration has finished, our model will appear on the Train page in Snorkel Flow. It can then be committed just like any other trained built-in model and will appear in Application Studio.
Investigating issues
If you encounter any issues and want to understand the details, you could enable the debug mode of the Snorkel Flow SDK. For example, if you want to investigate issues when registering the custom-trained model, you can do the following:
ctx.set_debug(True)
sf.poll_job_status(job_id)
It will show the detailed error message and stacktrace which can help you fix the custom-trained model.