Configure SAML SSO
This document will guide you through the process of setting up SAML-based authentication for single sign-on (SSO) in Snorkel Flow. By the end of the step-by-step guide, you will be able to log in to Snorkel Flow using your identity provider (IDP) mediated by SAML 2.0.
Prerequisites
- An existing Snorkel Flow deployment
- Administrative access to the Snorkel Flow deployment
- A SAML 2.0-compatible IDP, such as Okta, Google, or PingIdentity
Configuring your identity provider
We recommend having three windows open: one for Snorkel Flow, another for your IDP, and a third with these instructions. You will be asked to copy and paste metadata between the two systems.
Initial configuration
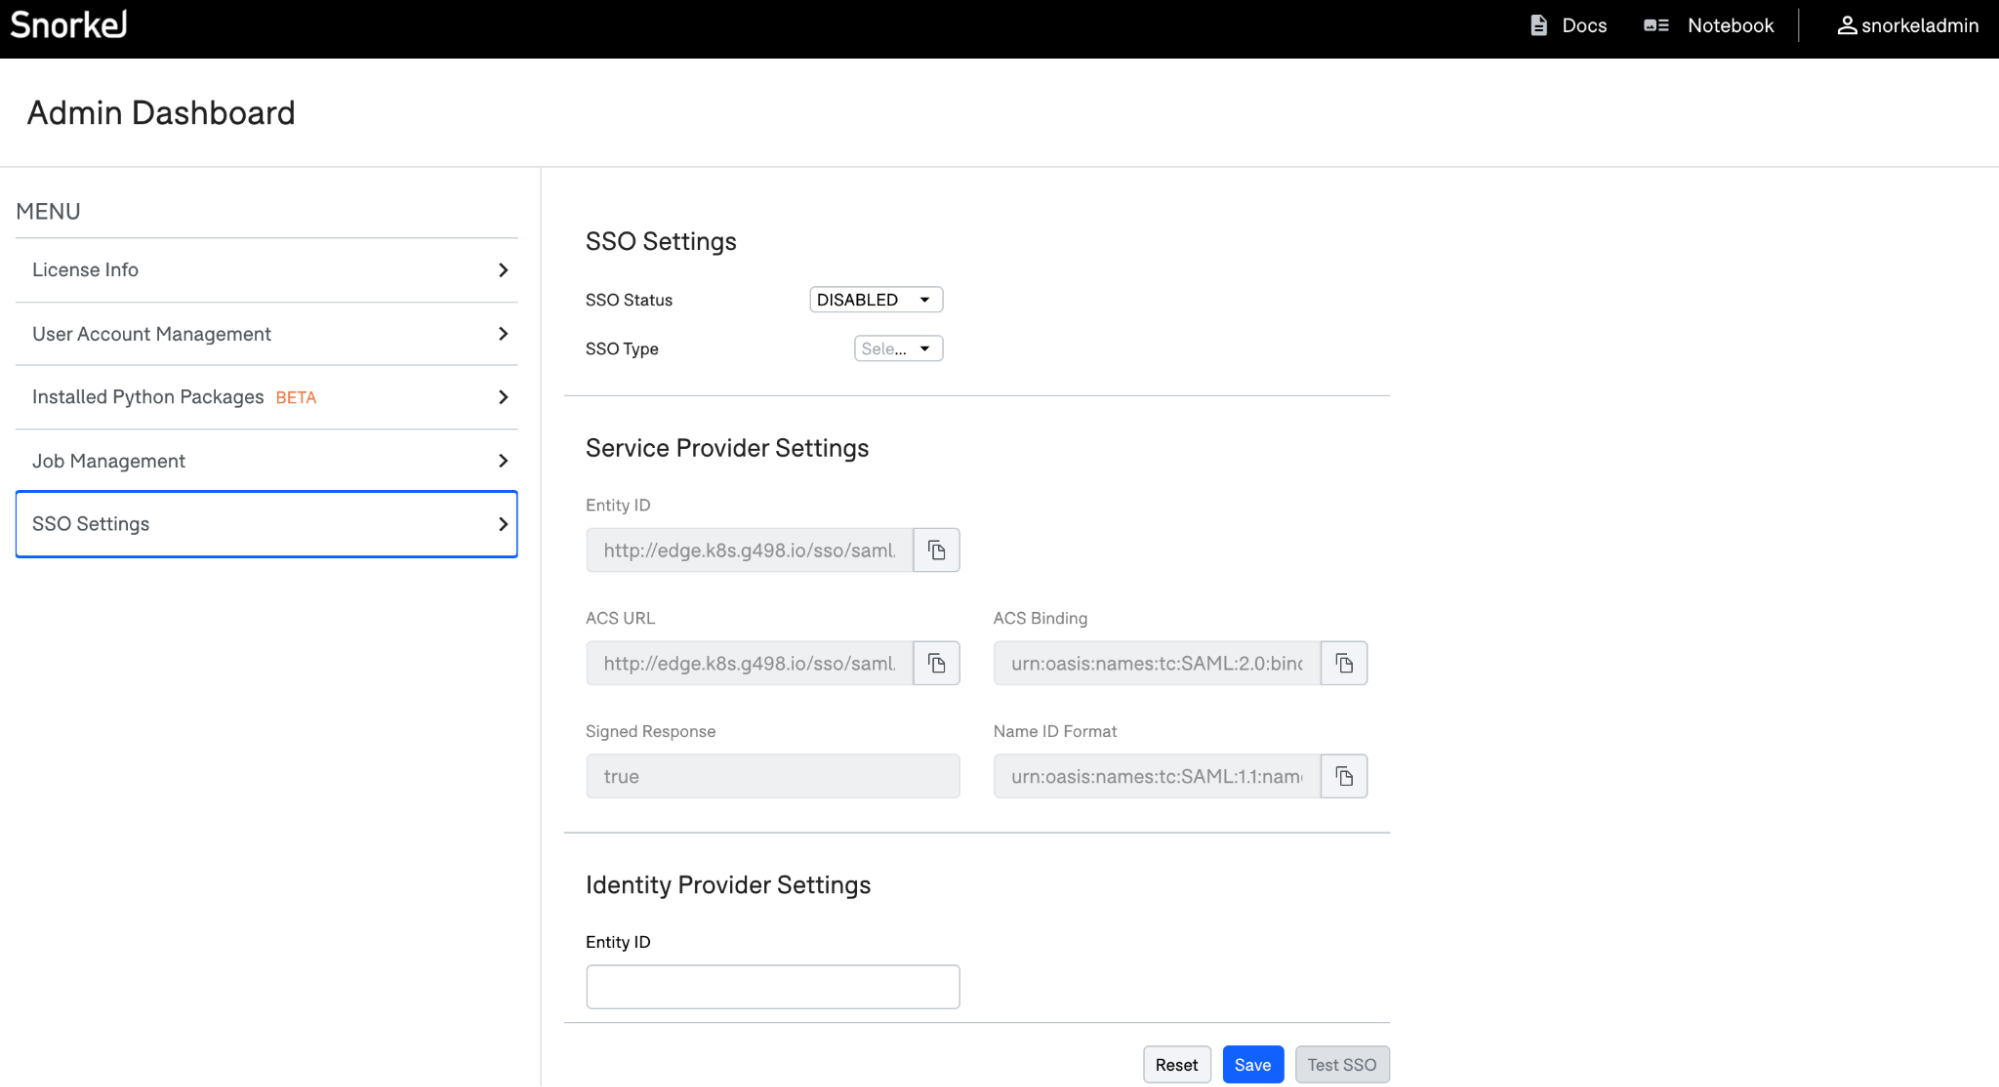
Open the Admin Settings page in Snorkel Flow, and navigate to the SSO Settings tab. Change SSO Status to Enabled and SSO Type to SAML.
Registering Snorkel Flow with your identity provider
In order for your IDP to provide authentication for Snorkel Flow, you will need to provide information about your Snorkel Flow instance to your IDP. First, in your IDP management console, you will need to add a new service provider (we recommend naming it after your Snorkel Flow instance). Each IDP has their own name for service providers, such as “Applications” or “Connections”. Note that if you have multiple Snorkel Flow instances, you will need to repeat this for each instance.
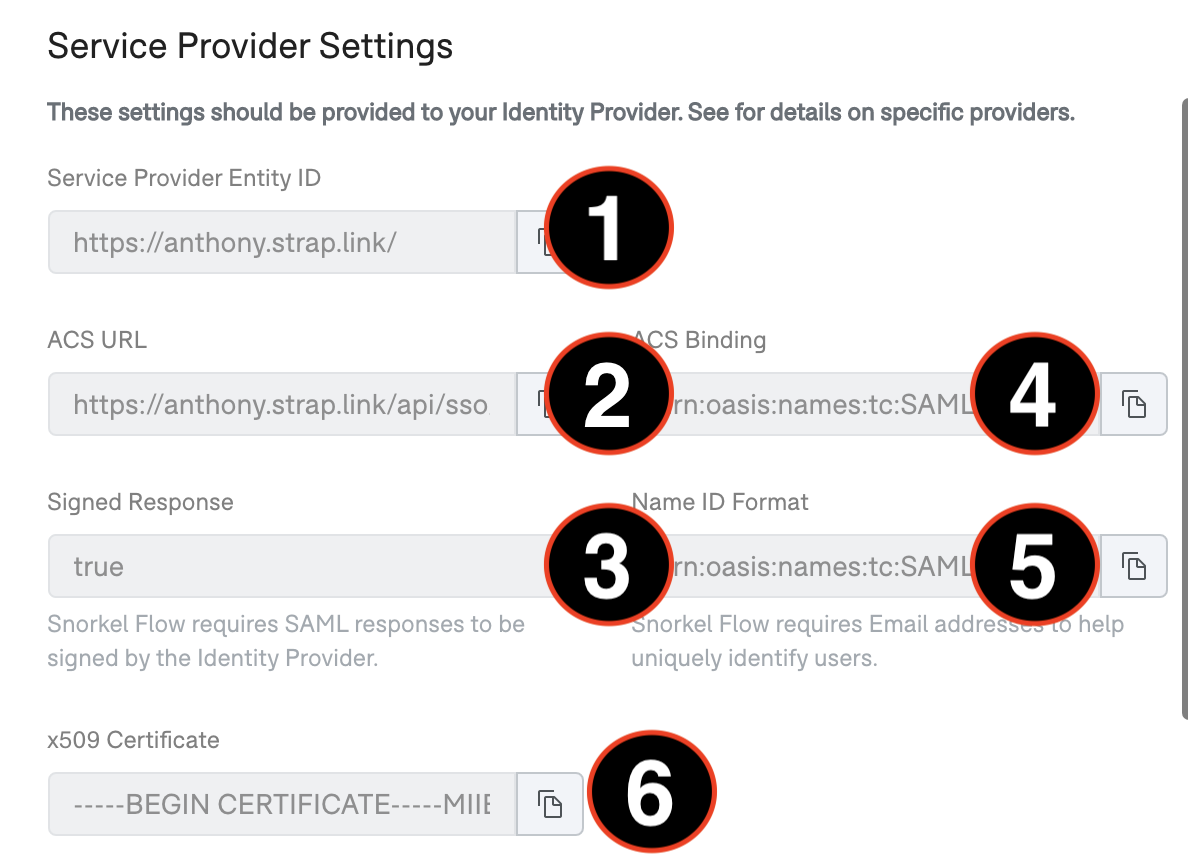
Your IDP will then ask you to enter standard metadata about the newly created service provider. These can be retrieved from the Service Provider Settings section in Snorkel Flow.
- Service Provider Entity ID: Unique identifier that names your Snorkel Flow instance.
- ACS URL: URL where requests are sent after successful authentication with your IDP.
- Signed Response: Look for a checkbox that says “Sign Assertion & Response” or “Sign Response” and check it.
- ACS Binding: In many cases, this value is optional. Paste the value as given in the Snorkel Flow settings or look for an option called Binding and select Redirect.
- Name ID Format: Snorkel Flow uses each user’s email address for SSO login. Paste the value as given in Snorkel Flow settings or look for an option called Name ID Format and select “Email” or “Email Address”.
- X509 Certificate: Certificate provided by Snorkel Flow, often referred to as the Verification Certificate by IDPs. Paste the value for this certificate directly into this field in your IDP or upload file containing this content.
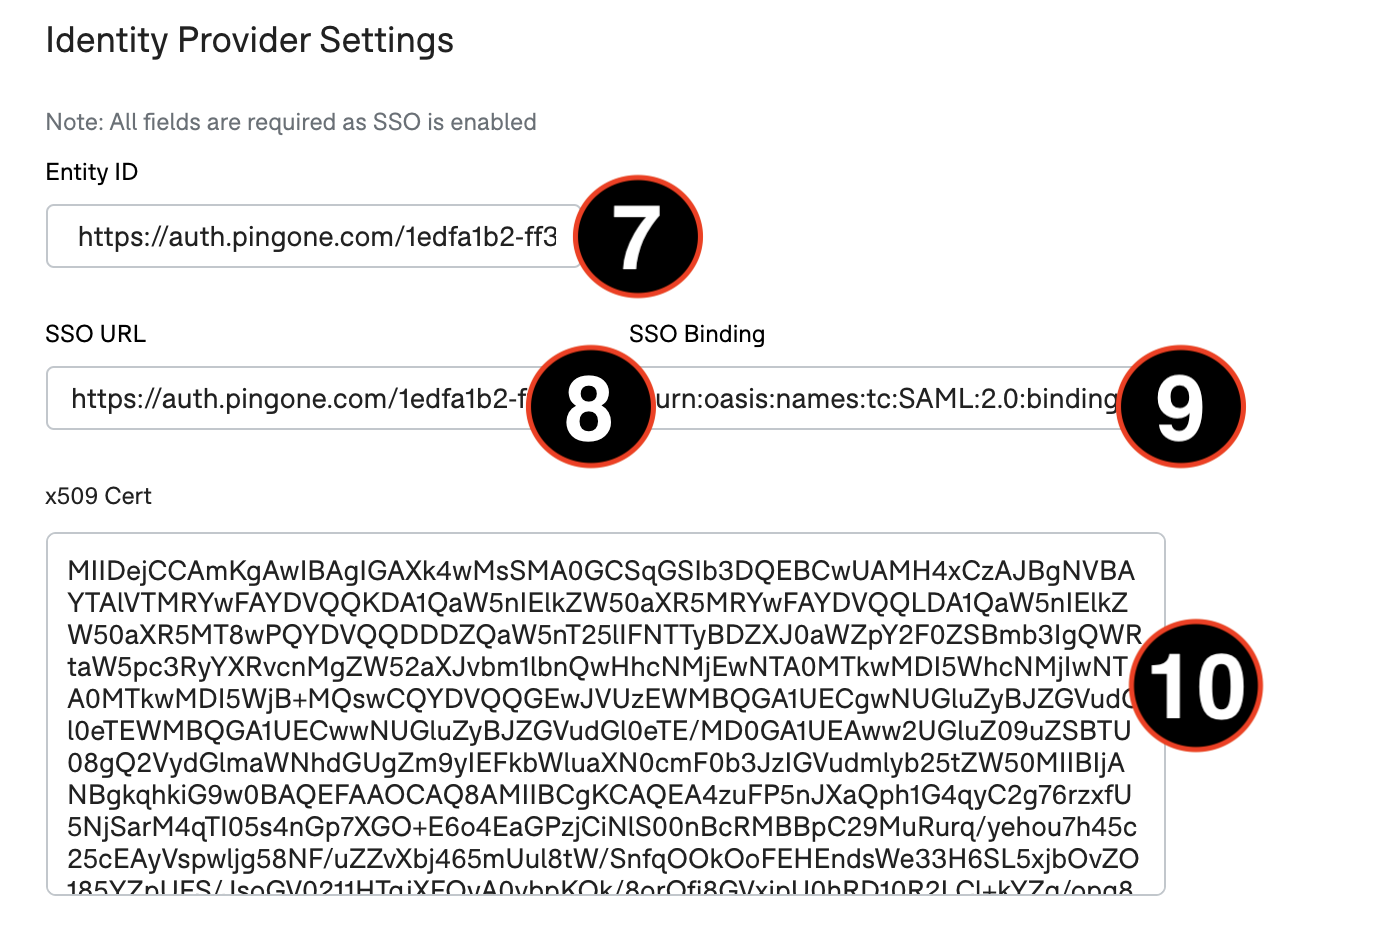
Registering your identity provider with Snorkel Flow
- Identity Provider Entity ID: This may also be called the Issuer ID, and also tends to be a URL. Paste the value from your IDP here.
- SSO URL: This may also be called the SSO Service URL, and frequently will end with a code like start or startsso. Paste the value from your IDP here.
- SSO Binding: This is commonly the string urn:oasis:names:tc:SAML:2.0:bindings:HTTP-POST, but if your IDP specifies a different value, paste it here.
- X509 Certificate: This is frequently a file downloaded from your IDP called the Signing Certificate. You may also see a body of text to copy and paste. Download this file, copy the contents and paste them into this field.
Once you’ve finished the configuration above, click the Save button.
Testing the connection
You can test the connection to your IDP by using the Test SSO button on the Admin Settings page. This will attempt to perform an authentication handshake between your IDP and your Snorkel Flow instance. If the connection is successful you will be redirected back to the Admin Settings page with a success message. If not, you will be presented an error message.
If you run into an error, review your steps through the guide above to ensure everything was configured correctly. If you need additional assistance, contact Snorkel AI support.
Requiring SSO login
As an administrator, you can require that all Snorkel Flow authentication use your SSO provider. This is enabled by changing the SSO Status from Enabled to Required.
As a prerequisite, all users must have email addresses assigned to their profile in Snorkel Flow. Emails can be provided by Snorkel Flow administrators on the User Management tab on the Admin Settings page.
Provider-specific guides
PingIdentity
Initial configuration
- Add a Connection in the PingOne console.
- Select “Web App” as the application type.
- Select “Manually Enter” under app metadata.
Registering Snorkel Flow with your identity provider
- Copy ACS URL from Snorkel Flow into the information pane.
- Download the signing certificate and open the file in a text editor. Copy and paste the content into the “x509 Cert” field under Identity Provider Settings on Snorkel Flow.
- Select “Sign Assertion and Response”.
- Leave the default Signing Algorithm in place.
- Do not enable encryption.
- Under the field Entity ID, copy the field called “Entity ID” under Service Provider Settings in Snorkel Flow. Paste this value into this field.
- Leave SLO Endpoint and SLO Response Endpoint blank.
- Set the field “Assertion Validity Duration (In Seconds)” to 300.
- Set the field “Target Application URL” to the URL of your Snorkel Flow instance. This is generally the same as the URL you pasted for the Entity ID.
- Select “Enforce Signed Auth Request”.
- Under the “Verification Certificate”, first copy the contents of the x509 Cert under the Service Provider Settings and paste it into a file. Save this file, then choose to import this file as the verification certificate on PingIdentity.
- Click Save and Continue.
Registering your identity provider with Snorkel Flow
- From the list of Connections on PingIdentity, select the Snorkel Flow connection you just created.
- Click the menu button on the right side of the application.
- Click the “Configuration” tab in the Snorkel Flow application details.
- Copy the Issuer ID beginning with https://auth.pingone.com and paste it as the Entity ID under Identity Provider Settings in Snorkel Flow.
- Copy the Single Sign-on Service URL beginning with https://auth.pingone.com and paste it as the SSO URL under Identity Provider Settings in Snorkel Flow.
- Enter urn:oasis:names:tc:SAML:2.0:bindings:HTTP-Redirect as the SSO Binding under Identity Provider Settings in Snorkel Flow.
- Click Save in Snorkel Flow.