Configure OIDC SSO
This document will guide you through the process of setting up OIDC-based authentication for single sign-on (SSO) in Snorkel Flow. By the end of the step-by-step guide, you'll be able to log in to Snorkel Flow using your identity provider mediated by OpenID Connect.
Prerequisites
- An existing Snorkel Flow deployment
- Administrative access to the Snorkel Flow deployment
- An OpenID Connect identity provider, such as Okta, Google, or PingIdentity
Configuring your identity provider
We recommend having three windows open: one for Snorkel Flow, another for your identity provider, and a third with these instructions. You'll be asked to copy and paste metadata between the two systems.
Initial configuration
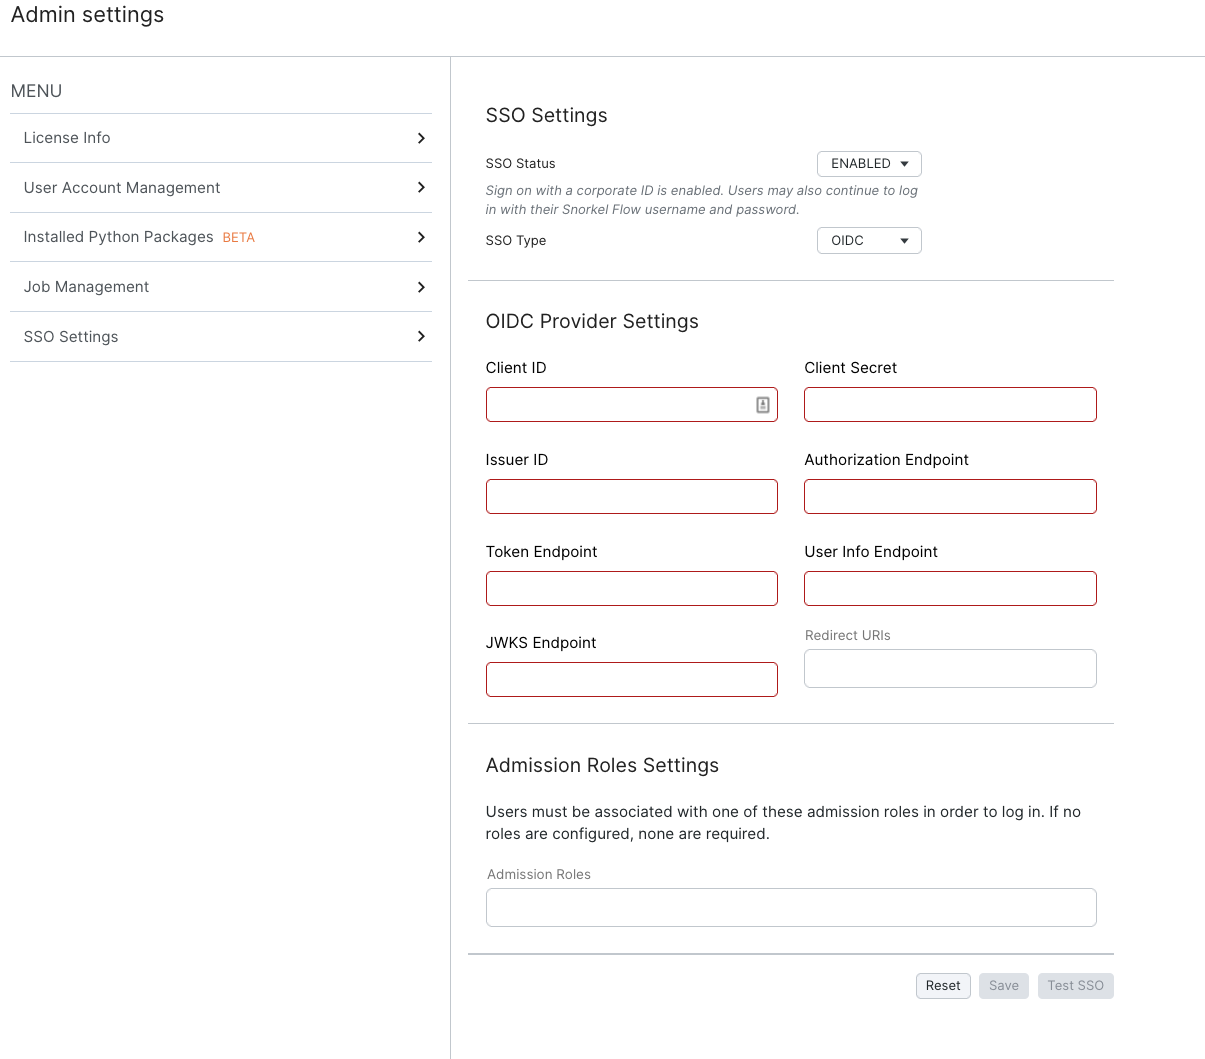
Open the Admin Settings page in Snorkel Flow, and navigate to the SSO Settings tab. Change SSO Status to Enabled and SSO Type to OIDC.
Registering your identity provider with Snorkel Flow
-
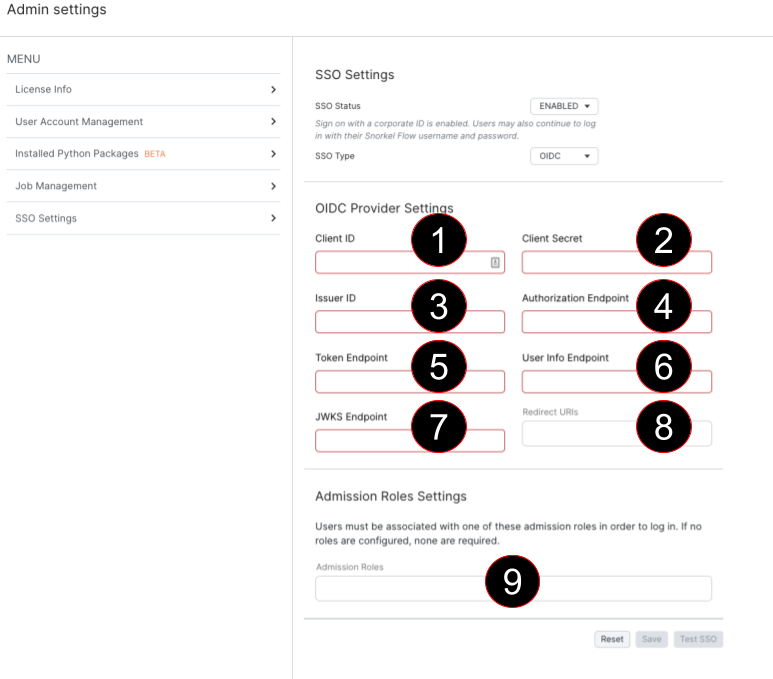
Client ID: The client ID created by your identity provider.
-
Client Secret: The client secret created in pair with the client ID by your identity provider.
-
Issuer ID: An ID used by the Identity provider, this may be a URL.
-
Authorization Endpoint: A URL provided from your identity provider for Authorization.
-
Token Endpoint: A URL provided from your identity provider for generation of tokens.
-
User Info Endpoint: A URL provided from your identity provider for user info.
-
JWKS Endpoint: A URL provided from your identity provider for JWKS info. This may also be referred to as a cert endpoint.
-
Redirect URIs: The URIs that are allowed for redirection for this OIDC token. These much match
what is set in the identity provider settings. The default path used by Snorkel Flow is /api/sso/oidc/callback
-
User Info Handler: Leave field blank
-
Resource ID: Leave field blank
-
Admission Roles: An Optional field, that limits login to only users with the defined roles. See Admission Roles below for instructions on usage.
Once you’ve finished the configuration above, click the Save button.
Testing the connection
You can test the connection to your IDP by using the Test SSO button on the Admin Settings page. This will attempt to perform an authentication handshake between your IDP and your Snorkel Flow instance. If the connection is successful you'll be redirected back to the Admin Settings page with a success message. If not, you'll be presented an error message.
If you run into an error, review your steps through the guide above to ensure everything was configured correctly. If you need additional assistance, contact Snorkel AI support.
Requiring SSO login
As an administrator, you can require that all Snorkel Flow authentication use your SSO provider. This is enabled by changing the SSO Status from Enabled to Required.
As a prerequisite, all users must have email addresses assigned to their profile in Snorkel Flow. Emails can be provided by Snorkel Flow administrators on the User Management tab on the Admin Settings page.
Admission Roles
You can allow only specific users from your OIDC provider to connect to Snorkel Flow by using the Admission Roles field. The field lets you set a list of roles and a user must have at least one of the roles on the list to be allowed to login via OIDC.
By default, a users roles are found by requesting the role scope when making the initial request, then checking the role claim on the id_token provided by the OIDC provider. However, if the admission roles user info field is specified, a user specified scope can be requested from the /userinfo endpoint, and a user specified claim will be checked to get the list of roles from the user info response. The format of this should be scope:claim, where scope is the scope to request, and claim is the name of the claim in the user info response containing the list of roles.